Covering a speaker enclosure with carpet isn't difficult but will require some (read: lots of) patience the first time you do it. I will cover (no pun intended) the basics here. I'm sure there are many ways to do it. This is how I've done it in the past. Try all of the following on scrap pieces of wood and carpet the first time.
Carpet Selection:
Carpet will have a wide range of backings. For covering speaker enclosures, the worst has a solid rubber backing. It is very difficult to work with. It doesn't bend sharply and is much more difficult to cut. It should be avoided at all costs. Another type of backing is the type used for household carpet. it's much more flexible than the solid rubber type and is easier to cut but is still hard to work with. The best is the most commonly used type (big surprise) for covering enclosures. At first glance, you might think it has the poorest quality but it's actually very good. It has a thin flexible, stretchable backing. You can actually see through it if you hold it up to a bright light. It allows you to make nice clean corners that lay down nicely and stay down. It's also cuts very easily. It can be purchased from virtually any car audio dealer that builds enclosures. If there are no dealers in your immediate area, Select Products has several different types of carpet that will work well.
Selecting an Adhesive:
Many installers use spray adhesive for enclosures. It works fairly well when covering the enclosure with vinyl or cloth or even the very light carpet but I've been, generally, dissatisfied with it's long term holding abilities. For heavier carpet, it won't work well at all. One advantage that it has is... it's less time consuming to use (very important if you're making a living doing installs). My adhesive of choice is contact cement. It will hold (virtually) forever and isn't affected by heat. If you've never used contact cement, it must be applied to BOTH of the pieces that are to be joined. The glue is then allowed to dry until it is no longer sticky to the touch. If it strings when you touch it, it's not dry enough. After it's dry (about 5-15 minutes depending on conditions), the parts are put together. You must keep in mind that the parts will permanently bond to each other on 'contact' (hence the name). If one tiny point touches, you 'might' be able to pull it off but if a large piece makes contact, solvent (acetone or mineral spirits) will have to be used to break the bond. You can use a roller or a brush to apply the cement. Read the High Pressure Laminate page for more options on applying the cement to the wood. I've used Weldwood Contact Cement in the past and never had any trouble with it. If it's available in your area, it would be a good choice.
Note on Contact Cement:
All contact cement uses solvents which have to evaporate for the adhesive to become 'dry'. When the solvent evaporates, it causes the surface to cool. If the humidity is sufficiently high (like it is here in Louisiana), there will be condensation on the surfaces. This moisture causes the bond to be weak. If the humidity is high in your area because it's been raining, it will be better if you wait for a better (less humid) day. If the humidity is high because you live in a humid region or it's a cold, damp day, you may have to use a heat gun to keep the surfaces warm and moisture free. If you do use a heat gun, make sure that there is a LOT of ventilation. Even if the contact cement is 'non-flammable', you still need a lot of ventilation.
Cutting Tools:
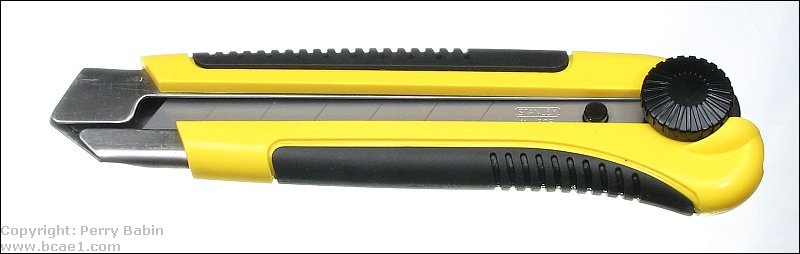
There are several tools that will make the job easier. The first is a good sharp knife. Most people use a razor knife which works fairly well. The biggest problem is that the blades dull very quickly. I use a 1" wide putty knife sharpened on one edge with a very rough sandpaper on a belt sander. It allows a quick resharpening of the knife throughout the job and holds the edge much better than a razor knife. There are also knives that have snap-off blades that will give you a new edge when the end of the blade is snapped off. The following is such a knife and is available from Stanley tools.
IMPORTANT!
When working with any knives but especially this type of knife, get into the habit of retracting the blade the instant that you end the cut. It's not natural at first and may seem to be a bit of a pain but if you get into the habit, you won't even realize that you're doing it. These knives can do a lot of damage very quickly but if you remember to immediately retract the blade, there's very little risk of causing damage or injury.
----- Critically Important -----
Flash graphics viewing/use alternatives:
Flash support by most modern browsers has been dropped but that's not the end of the line for Flash.
There is no practical alternative to Flash for the interactive demos/applets/graphics on this site.. Especially when there are alternatives, some simple, some good, some...
Ruffle is chosen by most because they can't imagine using anything but their preferred browser. It works. It's OK but not great. The Flash graphics won't look as they're supposed to but it, generally, works.
The #1 preferred (by me) way to view the site and the Flash graphics is with the Chromium Portable browser and the installation of the older (no time-out) Flash Player files. This was incredibly simple when people knew computers but not today when people only know how to work with their phones.
The Flash Browser is a good option but it's so stripped down that it makes it somewhat difficult to use.
The Maxthon browsers are an option. The v4.95 is the easiest (install and use). V5.3.8 and 6.1.0 require (very) slightly more effort (very).
The Chromium and Maxthon browsers on the page above are 'portable' browsers. They are not installed into your system. They are simply made available for use on your computer. They can be carried around on a Flash drive and used on any computer.
----- Critically Important -----
Another cutting tool that you'll need is a good pair of heavy duty scissors. They will be needed to make some of the longer cuts and for cutting excess material out of your way. If you can't find a pair that will cut your carpet, you can get by with a good knife alone. As a side note... If you're living with your parents, don't use your mom's good scissors. If you do, you will NEVER hear the end of it. :-)
The Easy Part:
The easiest part of covering the enclosure is, generally, covering the top, front, bottom and back. First, you simply cut a piece long enough to wrap around the enclosure (plus a few inches). Then you apply contact cement to both pieces (carpet and wood) and wrap the carpet around the box stretching it tight as you go. The seam should be on the bottom. Where the 2 ends meet on the bottom of the enclosure, let them overlap. Then, with a SHARP knife, cut through both of the overlapped pieces (all of the way to the wood). Cutting both pieces at one time makes them fit together perfectly. After cutting, there will be a piece of scrap on the top and a piece of scrap underneath the flap of carpet that's going to remain. You'll lift the flap and remove the scrap piece. Then you'll glue the flap down. If the box has been completely covered with contact cement, you can use wax paper to prevent the scrap piece from being bonded to the enclosure. Well, it should look something like what's shown in the demo below (clicking the buttons will go through the different steps).
IMPORTANT!
When working with any knives but especially this type of knife, get into the habit of retracting the blade the instant that you end the cut. It's not natural at first and may seem to be a bit of a pain but if you get into the habit, you won't even realize that you're doing it. These knives can do a lot of damage very quickly but if you remember to immediately retract the blade, there's very little risk of causing damage or injury.
Different Methods of Covering the Ends of the Enclosure
Simplest Method:
The simplest method of getting the ends of the enclosure to look good is to screw a board covered with carpet onto the end of the enclosure. When using this method, you'll simply have to leave a couple of inches of extra carpet sticking off of the end of the enclosure. The extra is folded over to the end of the enclosure. When the covered board is screwed to the enclosure (from the inside of the enclosure), the pieces that you folded over will be covered and and the ragged ends will no longer be visible. If you want, you can just pull the carpet tight and staple the ragged ends to the inside of the cover board (no gluing). I strongly recommend predrilling the ends of the enclosure so the screws will be able to pull the cover board tightly to the enclosure. The hole has to be large enough to to let the screw's threads to pass cleanly but not so large that the head will pull through. Do not predrill the covered board.
Inset board:
This method takes a little more foresight but isn't really any harder. In the following diagram, you can see that end of the enclosure is set in slightly (the thickness of the cover board plus the thickness of 2 layers of carpet. You again screw the panels to the enclosure with screws from the inside. The finished enclosure looks a little better because there isn't the small gap between the cover board and the enclosure.
Another View
Cut Overlap:
This type of finish is the most difficult. It requires a great deal of forethought when folding the carpet over and cutting the excess. The cuts are the same as the straight cut in the demo above (with overlapped layers) but are done diagonally from the corner of the side of the enclosure to the center of the side of the enclosure. If done properly, the entire end of the enclosure will appear to have no cuts. After you're finished, running your hand back and forth over the cuts will fluff up the fibers and make the cuts disappear. The cuts could follow virtually any pattern but, many times, it comes out something like the dark dashed line on the following diagram. If you want to try this method and it doesn't come out well, you can always use the 'simplest method' to cover your mistakes.
This site was started for pages/information that didn't fit well on my other sites. It includes topics from backing up computer files to small engine repair to 3D graphics software to basic information on diabetes.
This site introduces you to macro photography. Macro photography is nothing more than the photography of small objects. It can take quite a while to understand the limitations associated with this type of photography. Without help, people will struggle to get good images. Understanding what's possible and what's not possible makes the task much easier. If you need to photograph relatively small objects (6" in height/width down to a few thousandths of an inch), this site will help.
If you're interested in air rifles, this site will introduce you to the types of rifles available and many of the things you'll need to know to shoot accurately. It also touches on field target competition. There are links to some of the better sites and forums as well as a collection of interactive demos.
This site helps anyone new to computers and anyone with a basic understanding of computers with a desire to learn more about the internal components of a computer. If you have a computer that you'd like to upgrade but don't know where to start, this is a good site for you.
This site is for those who want to begin racing karts but don't fully understand how the various parts work. It's mostly interactive demos that show how the various parts of the kart work.
Click HERE to visit a friend's new car audio tech site.