
|
| Email Home Page |
|
|
|
|
| Email Home Page |
|
|
|
Foreword:
Again... It's helpful to know how the amplifier behaves when working properly. If your amp is working properly, pay attention the way the indicators light up when powering the amp up. If you don't know how they're supposed to behave, ask around.
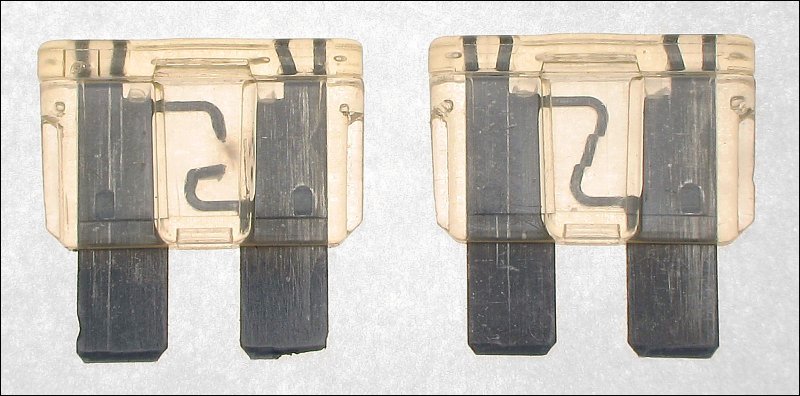
On-board Fuses: For those who don't know what a blown fuse looks like, the one on the left below is blown. The one on the right is OK.
B+ and Remote Voltage: With your multimeter set to DC volts, the black meter probe on the ground terminal of the amp (not on the point where the ground wire connected to the vehicle) and the head unit on (so the amp will have remote voltage applied), touch the red probe alternately to the B+ (battery +) and remote terminals of the amp. If the voltage is below ~11 volts, you need to check the wiring feeding whichever line is too low. Normally, both will be above 12v. It's important that you leave your head unit on during testing so that the remote line will have voltage on it, the amplifier will be on, and the amplifier will be drawing current. Sometimes the voltage will only drop when current is being drawn from the power source. If the amp only shuts down when the amplifier tries to produce high power (when it hits a strong note), you need to measure the voltage at the time when the amp shuts down. The voltage drop should be minimal when the amp is producing/trying to produce significant output. If it's dropping below ~11v, you need to determine why. If you have confirmed that you have sufficient voltage on the amplifier's B+ and remote terminals and have a good ground, procede to step 3.
Important!
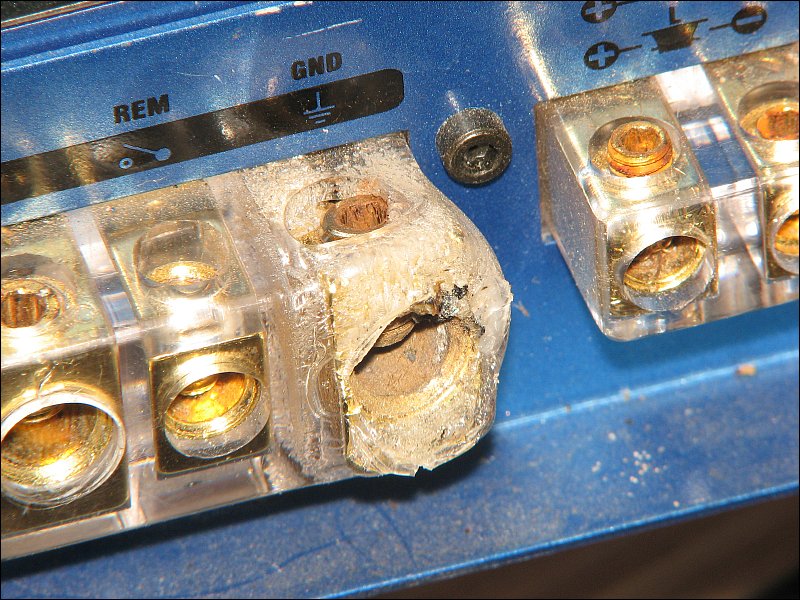
Bad Ground? If you find that the B+ or remote voltage is low at the amplifier, you need to trace the voltage back to the source to determine where the voltage is dropping. At each connection, fuse or other point where the wire is not continuous, check the voltage. You need to check the voltage on BOTH sides of each connector and fuse holder. Since the meter leads are not long enough to reach the grounds at the battery or trunk over the long run of the power wire, you need to scratch the paint/primer/undercoat to bare metal at each point where you need to check the voltage. If you find that the voltage is good on one side of a connector or fuse but not on the other side of the connector/fuse, you need to replace the connector or fuse. In some cases, the connections between the wire and the fuse holder will be a problem. You will also see defective fuse holders.
Clues to a Bad Connection:

Fuses - Open But Not 'Blown':
----- Critically Important -----
Adobe has deemed that the Flash content on web pages is too risky to be used by the general internet user. For virtually all modern browsers, support for Flash was eliminated on 1-1-2021. This means that those browsers will not display any of the interactive Flash demos/calculators/graphics on this (or any other) site.
The simplest (not the best) fix, for now, is to download the Ruffle extension for your browser. It will render the Flash files where they were previously blocked. In some browsers, you will have to click on the big 'play' button to make the Flash applets/graphics visible. An alternative to Ruffle for viewing Flash content is to use an alternative browser like the older, portable version of Chrome (chromium), an older version of Safari for Windows or one of several other browsers. More information on Flash capable browsers can be found HERE. It's not quite as simple as Ruffle but anyone even moderately familiar with the Windows Control Panel and installation of software can use Flash as it was intended. The following demo is from the Installation Primer page of my Basic Car Audio Electronics site. At every point where there is a green indicator, you should check the voltage. Using the demo should help you to better understand where you'd lose voltage when there is a break in the circuit.
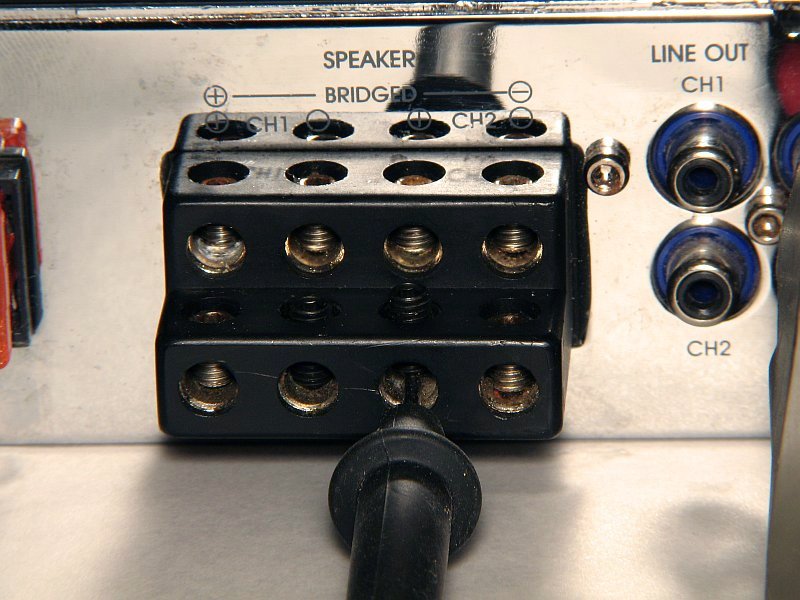
If the voltage remains near or above 12v but the amp still goes into protect mode, disconnect all speaker wires from the speaker terminals of the amp and disconnect signal cables from the amp. It's important that you disconnect the speaker wires from the speaker terminals of the amplifier and disconnect all RCA cables from the RCA jacks of the amplifier. If the amp powers up after disconnecting the speaker and signal cables from it, try reconnecting the RCA cables. If the amp goes into protect with the RCA cables plugged in, go to step 4. If it doesn't go into protect, reconnect one pair of speaker wires at a time. If you're using a mono amp and have only one pair of speaker wires, you'll need to disconnect all but one speaker from the other end of the speaker wires. If you find that one pair of speaker wires or one speaker causes the amp to go into protect, disconnect all speakers from the other end of the wires and separate the wires so they can't touch. If the amp still goes into protect, you have a bad speaker wire or the wire is shorted to chassis ground. If the amp only goes into protect when one particular speaker is connected to the amp, you have a defective speaker. .
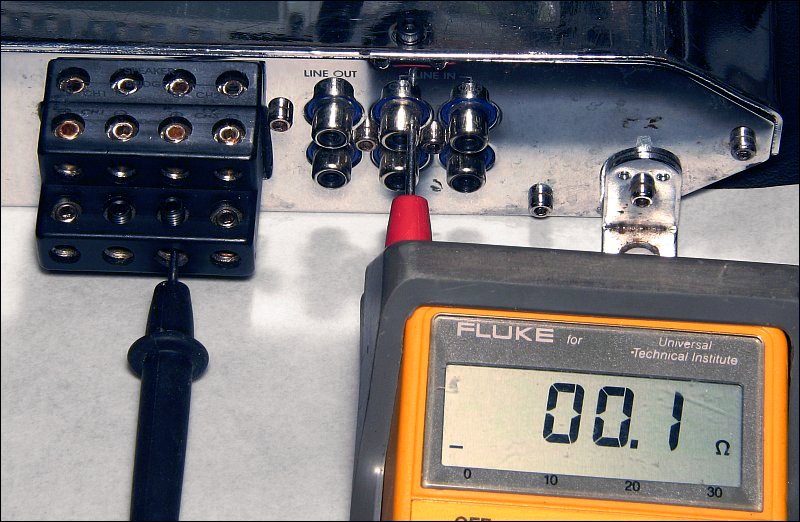
If the amplifier goes into protect with the RCAs plugged in (but all speaker wires disconnected), there could be several problems. You first need to check the RCA shields of the head unit. THIS link takes you to a page where it's explained in detail. If the shield ground of the head unit is OK, the amplifier could have one of several problems. You need to power up the amplifier and measure the voltage on the shields (shiny outer metal ring) of the RCA jacks. Touch the black meter probe to the ground terminal of the amp and the red meter probe to each of the RCA shields. If you read 10v or more, the amplifier may have a shorted transformer. If you read something less than 1v, the transformer is likely OK. Some amplifiers have a problem with broken connections between the RCA shield and the circuit board. This is sometimes difficult to check unless you know how the input circuitry of the amplifier is designed. In most of the budget amplifiers, the shield will be directly connected to the NON-bridging speaker terminals. If you have that connection, the shield ground connection is intact. Sometimes, the connection is intermittent so you need to move the RCAs while you're checking to insure that the connection is solid.
If the amp goes into protect with no RCA or speaker cables connected to it or if the amplifier blows the fuse AFTER remote voltage is applied, the amplifier likely has shorted output transistors. If that's the case, the amplifier will need to be repaired. If you'd like to repair it yourself, read the Amplifier Repair Primer page. It will help you troubleshoot many amps down to the component level.

Updated October, 2022.
|
|
This is a link to this site's home page. |