
|
| Email Home Page |
|
|
|
|
| Email Home Page |
|
|
|
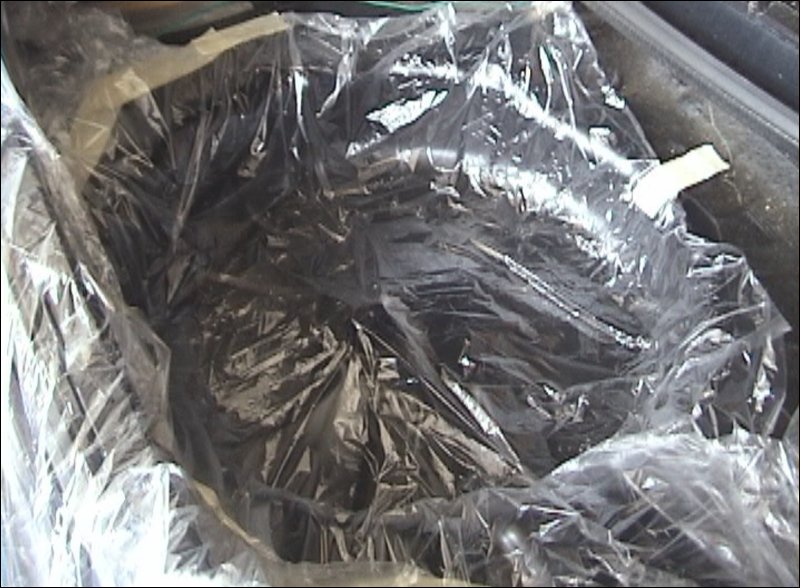
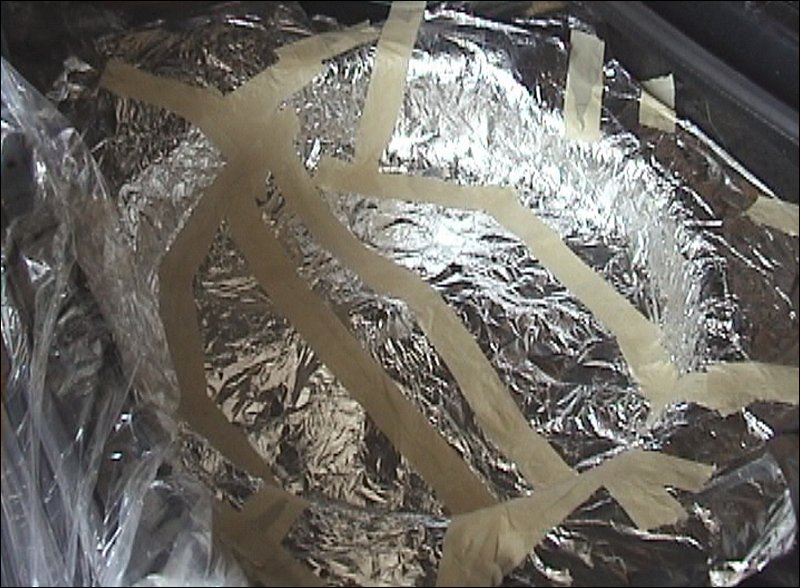
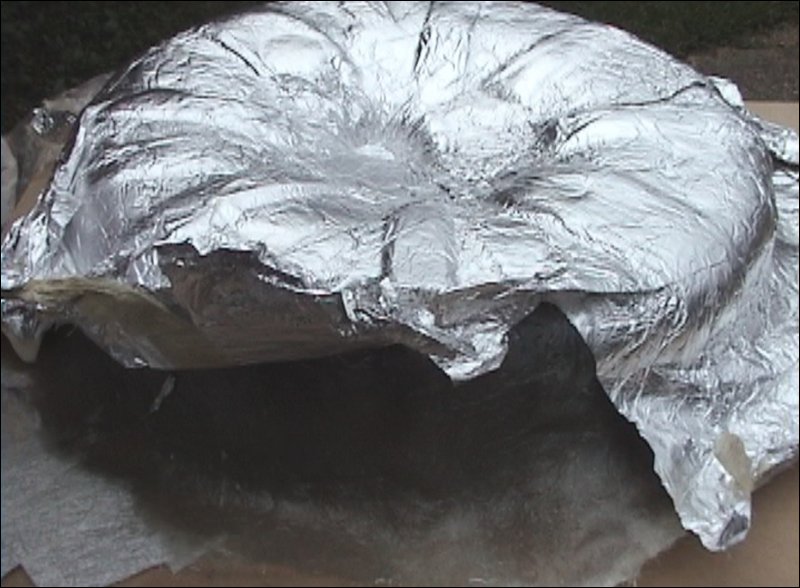
The fiberglass spare tire well enclosure is a very popular car audio project when trunk space needs to be maximized or the owner wants an ultra-stealth installation. Here the subwoofer will use the space normally occupied by the spare tire. The biggest drawback to this method is that the spare tire needs to be removed and won't be available in an emergency. The first step in this installation is the removal of the trunk carpet, wheel well baffle and spare tire. Some spare tire wells will have a large threaded bolt sticking up from the bottom that will probably need to be removed before beginning the installation. For smaller protrusions you can build over it. Just make sure there is enough depth to mount the subwoofer if a flush installation is desired. After the extra items have been removed and the wheel well has been vacuumed out it's time to start laying down the protective surface. This is to prevent excess fiberglass resin from getting on the trunk surfaces and to keep the resin from sticking to the spare tire well. A large drop cloth as a secondary level of protection is also recommended. The primary level of protection will be a layer of aluminum foil that is form fit into the well. Be sure to tape the seams between sheets to prevent resin leak through. When all taping is complete add some mold release to the foil. A simple kitchen cooking spray (like Pam) works very well and is easy to apply.
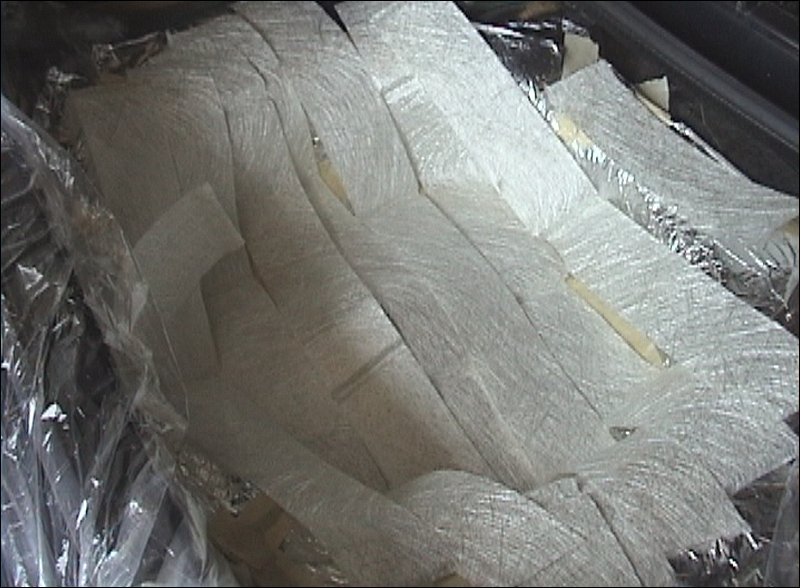
 Now prepare the fiberglass mat. For a spare tire well enclosure I like to use a three ounce chop mat that comes in a four inch wide roll. Cut several lengths that will cover the width of the well. Cut one set for each layer you plan to add and also cut some square patches to fill in the spaces.
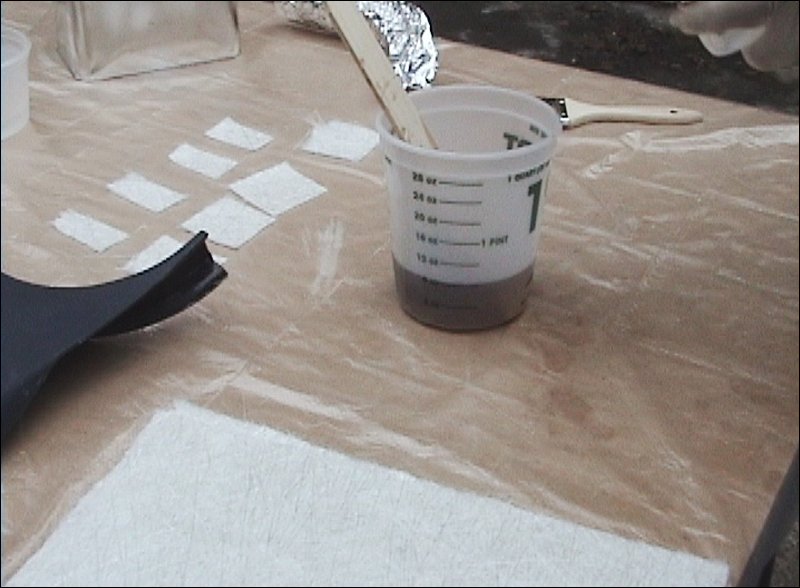
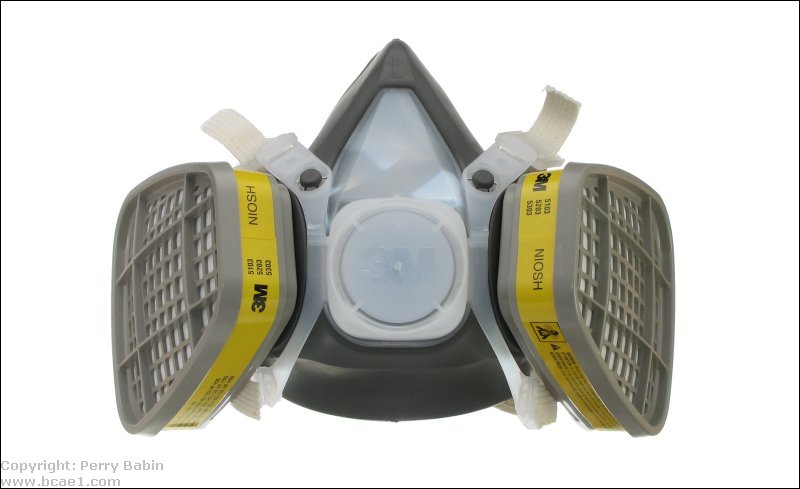
 Once the mat is ready you can mix up the resin. This is definitely a job you'll need to wear a fume mask (NOT a dust mask) for since the vapors will be concentrated in a very small area. Be sure to open the doors or windows of the vehicle to let the resin fumes escape the interior. If opening the doors it's recommended to disconnect the battery to prevent drain. Now put on disposable latex gloves and mix up one liter of resin at a 1% resin to hardener ratio in a disposable plastic cup. This is the standard ratio for mixing and is done by volume. So for every liter of resin you will need to add 10mL of MEKP hardener.
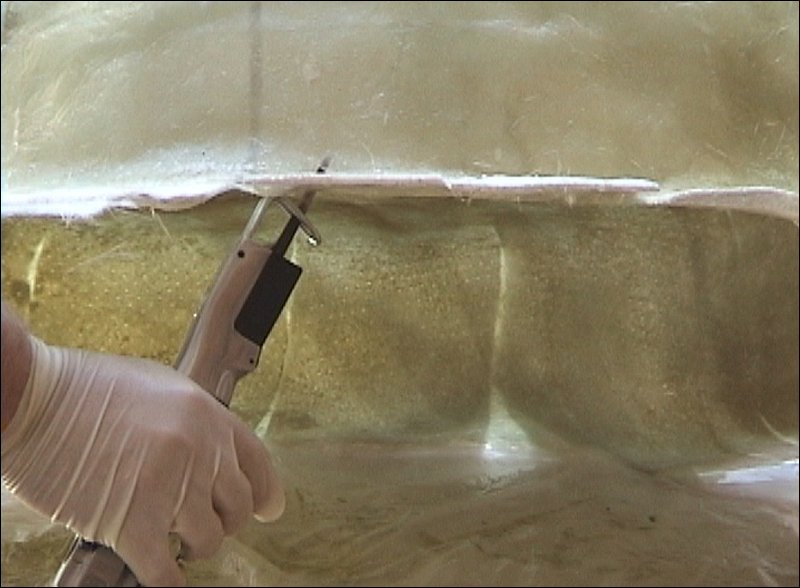
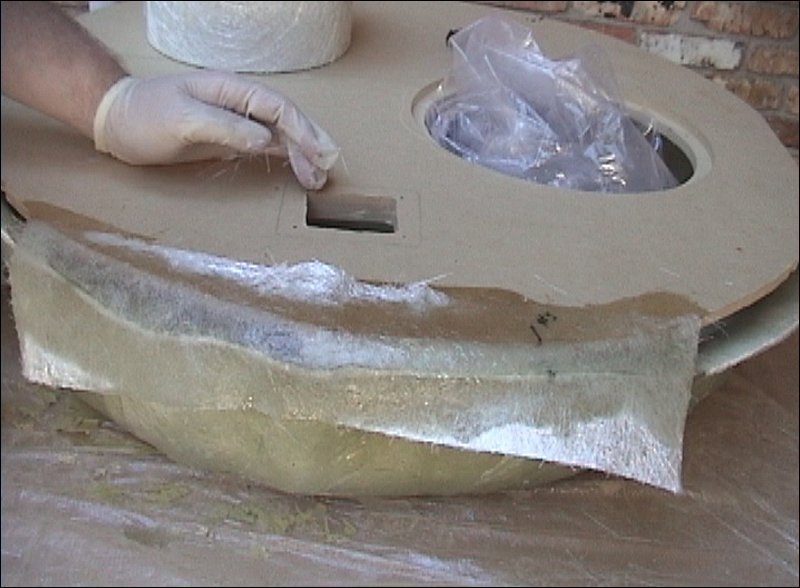
 Once thoroughly mixed, begin saturating the chop mat one layer at a time. Saturate the mat until it becomes transparent. Be sure and saturate the mat at least two inches past the top edge of the spare tire well. You'll need this lip to mount the baffle board to. When the first layer is complete you can add a second layer of mat directly over the uncured first layer. I wouldn't recommend adding more than three layers of mat at one time or the excess heat from curing can warp the fiberglass. Now let the fiberglass cure in the well with the trunk lid open.
 For the final layers you can work outside of the vehicle. It's easier and eliminates the chance of spilling resin on the vehicle or in the trunk. It also lets the owner take the vehicle home for the night if they need it. Remove the tape where it attaches to the vehicle and simply pull the fiberglass tub out of the well. It should come out easily because of the plastic and foil layers laid down for protection. Now invert the tub onto your work surface and remove the plastic and foil. The cooking spray will allow the foil to peel off easily for the most part. You may get a few places that stick but that's OK. They should come off with a little prying.
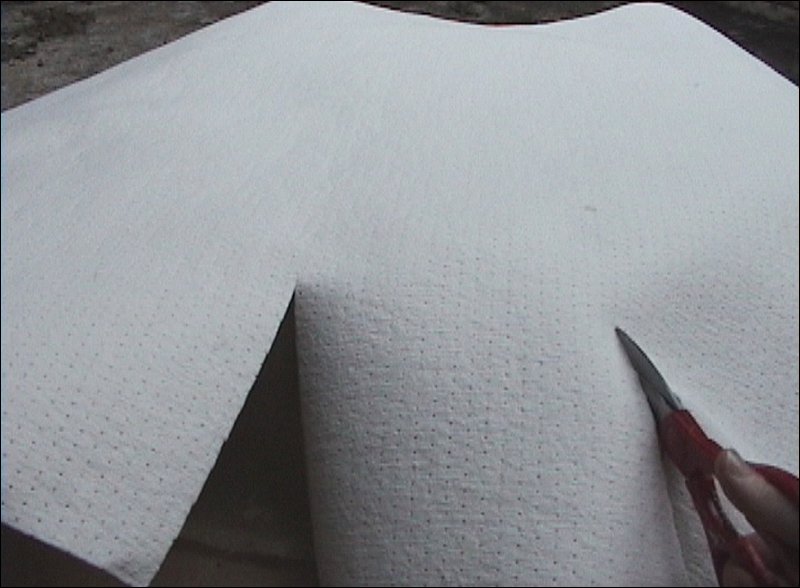
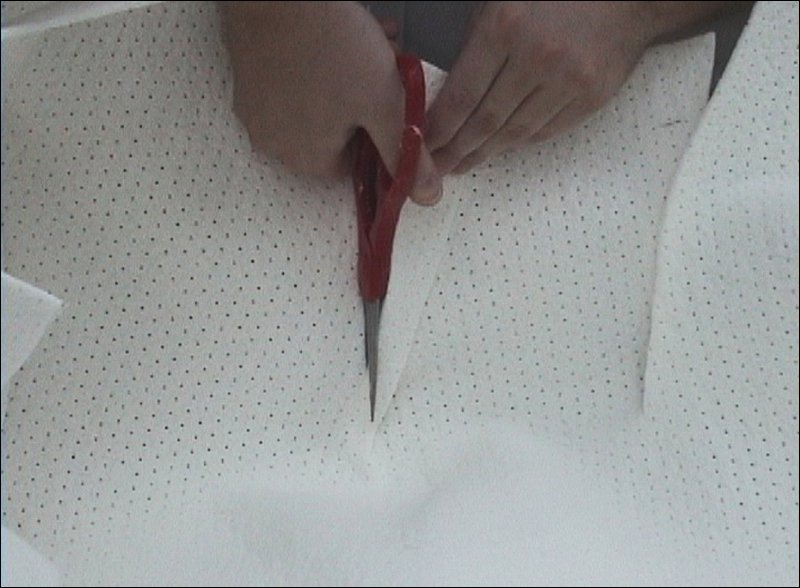
 Now you're ready to add our final layers. You could keep adding fiberglass mat and resin but this is more expensive and time consuming. Instead you can add a layer of thick Coremat followed by another layer of fiberglass mat to keep it in place. Coremat is a chopped fiber polyester fabric that is you can use to thicken and strengthen an enclosure. It will save time, weight and fiberglass mat and resin when creating the enclosure. It also doesn't warp like an equivalent amount of curing fiberglass would and the 4mm version is the equivalent of about 4 layers of fiberglass mat. Because Coremat is so thick we will need to precut it to the curves of our enclosure. Keep the enclosure inverted and wipe off the cooking spray residue with a damp, soapy rag. Dry it with a towel and add a light coat of spray adhesive to the top to make the surface semi-tacky. Now take a piece of Coremat large enough to cover the enclosure and take into account the curved areas and place it on the inverted enclosure. Cut in from one outside edge of the Coremat until you reach the edge of the enclosure bottom. Move over about six inches and repeat the process.
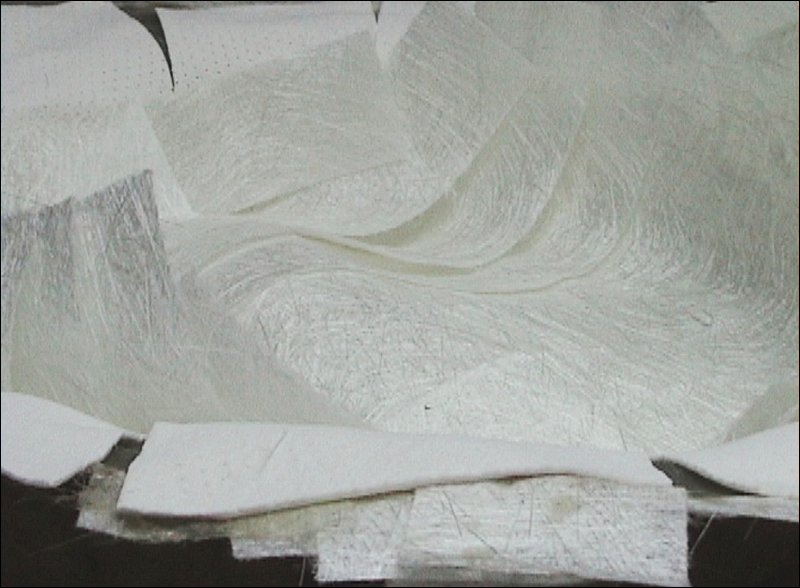
 When all cuts are complete you can flip the enclosure over and add another coat of spray adhesive to the bottom of the fiberglass interior. This one should be heavy enough to make the Coremat stick to the enclosure. Then press the Coremat to the bottom. Finally, overlap the seams of the cuts and make a flush cut from the top lip to the bottom edge. Remove the two pieces of Coremat that were cut out and press the seam in place. Repeat this for all other overlaps and you will have a perfectly fitting layer of Coremat.
 Now precut strips of fiberglass to lay over the top of the Coremat. This is the same process used for the first layers of fiberglass. When everything is laid out and ready you can put on your gloves and fume mask and mix up the needed resin. Coremat soaks up a lot of resin because of its thickness so plan on using at least a half gallon of resin for this step. You can mix the resin in two consecutive batches instead of all at once. This will increase your working time before curing.
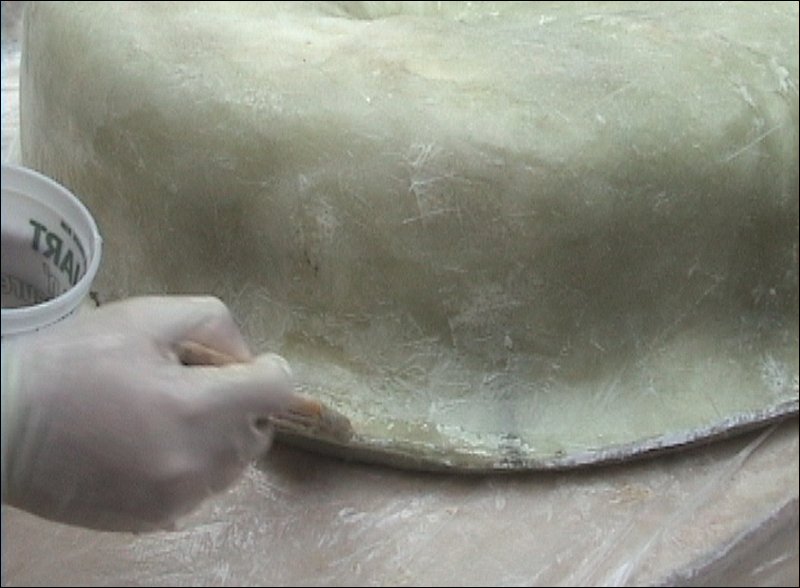
 Begin by pouring a generous amount of the resin over the bottom and spread it around the enclosure. Use your brush to push the resin into the mat and to eliminate air bubbles using the stipling technique (pressing the brush tips into the wet mat). I recommend adding two layers on top of the Coremat for extra strength. Once both layers are complete use a fiberglass roller to remove any remaining air bubbles. Place your brush and roller in acetone and let the resin cure. Set the enclosure in the sun if possible to speed the curing time. After the enclosure has cured, cut the excess material away from the enclosure lip. The remaining piece will be what you mount the MDF baffle to. Place the trimmed piece in the spare tire well and double check for fit.
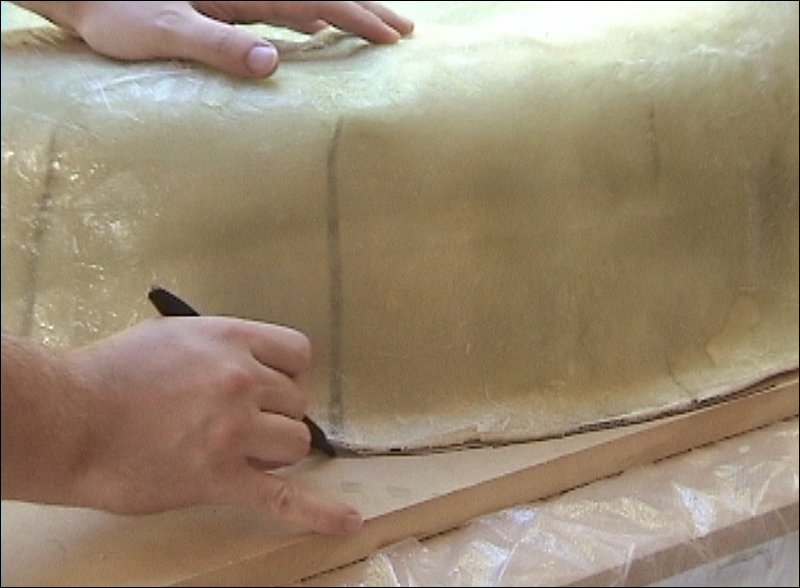
 Now place the inverted enclosure onto a piece of MDF large enough to cover the opening. Trace along the edge with a permanent marker. With the size of this enclosure's lip it is necessary to trim another inch from this line. We'll also use a rabbeting bit on the router to help the MDF baffle seat properly on the enclosure lip.
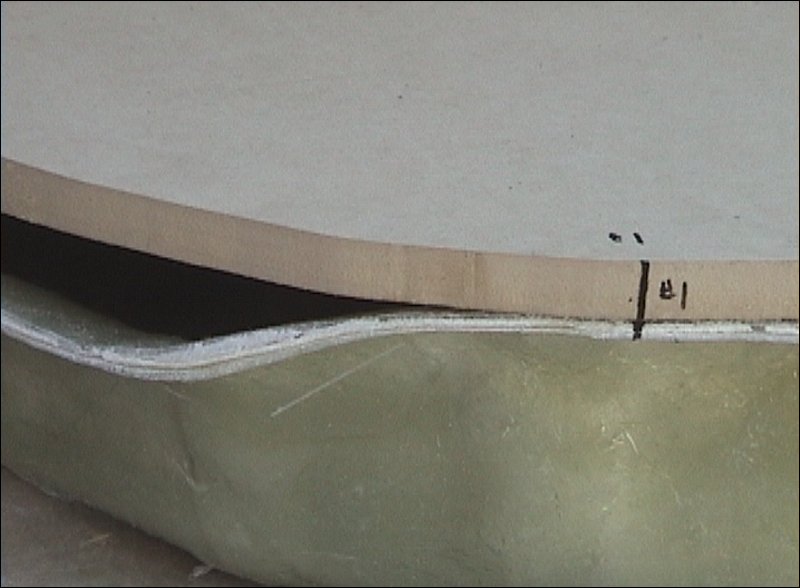
 Here you can see the gaps that exist between the fiberglass enclosure and the flat MDF baffle. You will cover these with more fiberglass later in the process. Also note the alignment marks that were made to match the enclosure to the baffle. A total of three marks were made for matching. If you were using an MDF ring for the subwoofer and wrapping in fleece you would not need to bridge the gap with fiberglass or make an MDF baffle to fit. However if you want a strong, flat surface you will need to make the baffle from MDF.
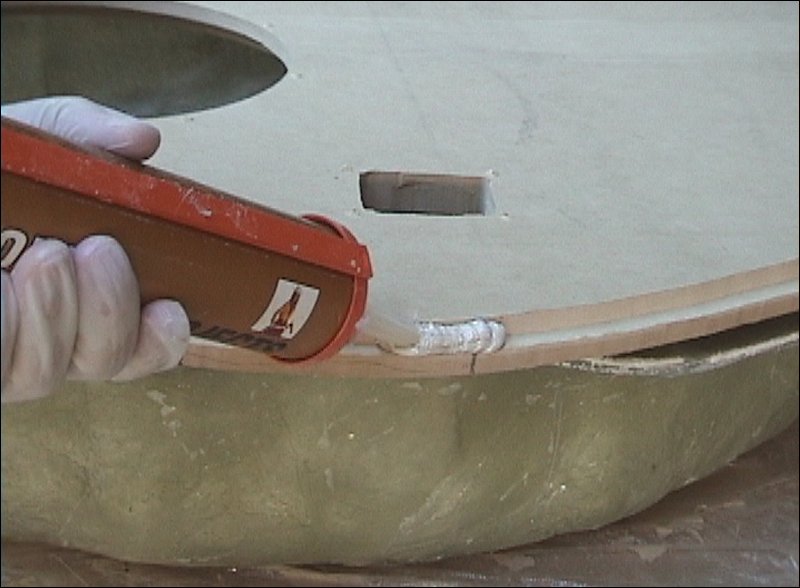
 Before attaching the baffle to the enclosure cut out the subwoofer and terminal cup mounting holes and pre-drill the screw holes. The speaker hole will need to be rabbeted if you wish to flush mount the subwoofer. To attach the MDF baffle to the fiberglass tub use construction adhesive (Liquid Nails). Since the two pieces will likely not meet in all places mark out on the baffle where they do meet. This is where you'll add a generous line of adhesive. A rabbeted edge gives more surface area for bonding. Be sure to wear disposable gloves as construction adhesive is not something you want on your skin. After the baffle is in place add another line of adhesive to the outer edge. You're now ready for the fiberglass.
 Pre-cut fiberglass strips that are 12-18 inches long and mix up about a 1/2 liter of resin. Begin by painting a wet layer of resin to the MDF baffle edge and then place a strip of mat over it. Soak the mat with more resin to bond it to the baffle and the fiberglass lip. Push out any air pockets with the brush. Make sure that the mat is attached securely to the baffle and the lip. Add a second layer of mat directly on top of the first layer. Once both layers are in place move to the next section of the enclosure. When the entire enclosure edge is covered with two layers of mat add a third layer of mat on top of this. Because this edge is curved it will be very strong and three layers is all you will need.
 After the resin has cured you can go back and cut off the excess fiberglass along the lip edge. There may still be small holes along this edge so for extra assurance mix up some more resin and apply it to the enclosure edge as a sealant. Be sure to push the resin into the edge to make sure any small holes are filled.
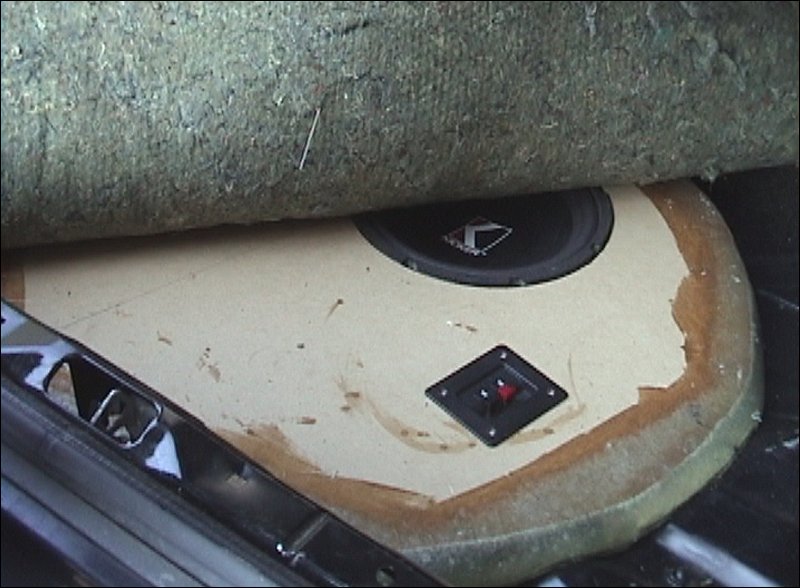
 After the final resin application has cured you can mount the hardware and check the final product. The enclosure can be finished with carpet for a professional look or left "in the white" since it's going to be under the factory trunk mat.
Previous tutorial and images from the DVD
Above, it was stated that you need to wear a respirator when working with the uncured resin. The dust masks that use nothing more than a white paper filter aren't sufficient. Those are designed to protect from airborne particle matter (saw dust, etc...), not vapors. The respirator below is the type you need. It uses carbon filtration. Carbon reacts with the vapors and traps them. Bear in mind that these will not work properly if you are not clean shaven. If you are wearing a mask like this and you can smell the resin, it's not working properly. It's likely that it's not properly adjusted. It needs to fit snugly. If it's properly adjusted and you still smell the resin, the carbon filter packs may have been used up.
 The MEK peroxide that's used as a catalyst with polyester resin is extremely dangerous. If it gets in your eyes, it can cause instant, irreversible blindness. When working with it, wear real safety glasses or goggles (it's not going to hurt to look like a geek for a while). Being a geek for a couple of hours is better than being blind for the rest of your life. Before using it, read the MSDS (Material Safety Data Sheet - click HERE to open), especially the instructions for first aid if it gets into your eyes. The following is an exercpt from the MSDS.
----- Critically Important -----
----- Critically Important -----
The following calculator will help you estimate the internal volume of the wheel well enclosure. This drawing should help you understand how the volume is determined. Please keep in mind that the actual volume of the fiberglass part of the enclosure will be slightly different because the fiberglass material will take up some air space. This is only a rough estimate of the total volume.
|

|

|
|

|