|
Compressing and Decompressing Files
|
|
Overview:
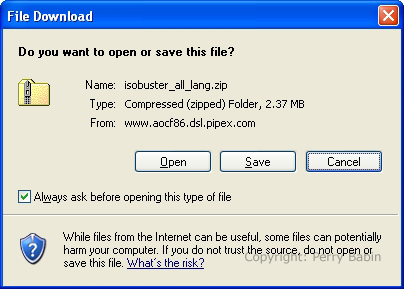
For this demo, I picked a nice data recovery application. I have no affiliation with the them but if you need to recover files from a corrupted/defective CD or DVD, this program can likely do the job. On the following web page, I clicked the link to start the download.
 This dialog box is asking whether you want to open or save the file. For zipped files, I prefer to save them to the hard drive.
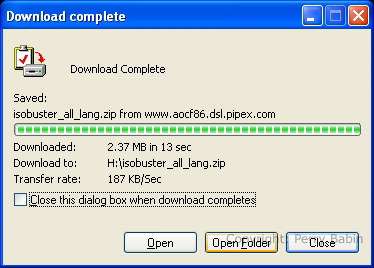
 After the file downloads, You will have the choice to open the folder or to open the file. In some instances, it's OK to simply open a zipped file. In other cases (as when you're installing software), you need to properly unzip the file into a folder. I clicked OPEN FOLDER.
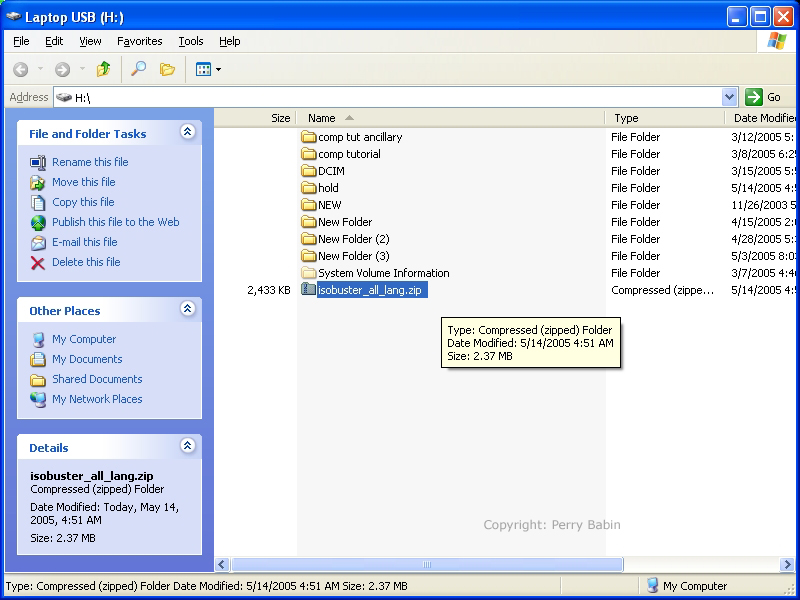
 This is the folder to which the compressed file was dropped when we downloaded it.
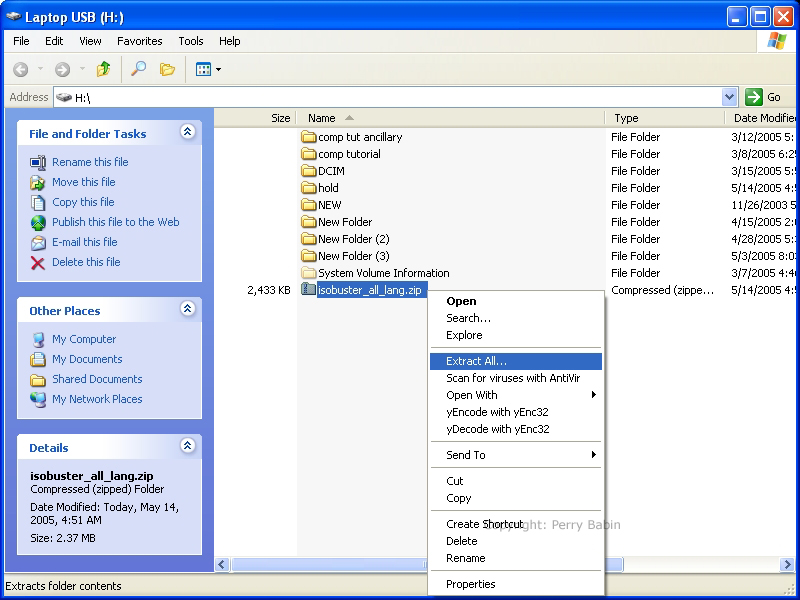
 When you open the folder, the downloaded file is highlighted (or it should be highlighted). Right-click it and select 'extract all'.
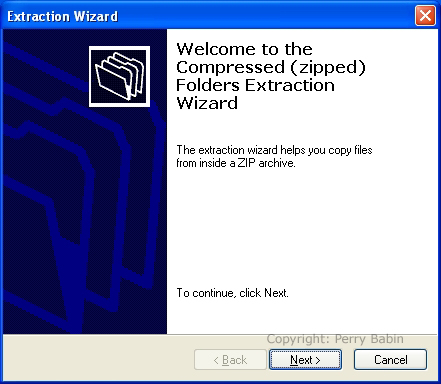
 Clicking 'extract all' launches the Extraction Wizard. Click NEXT.
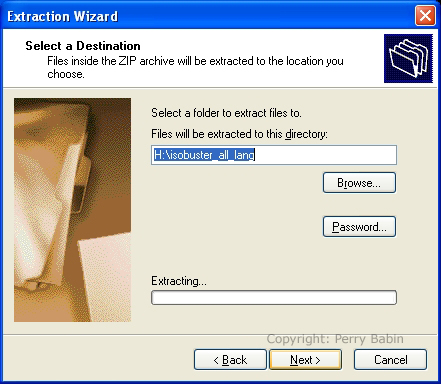
 This shows you the default folder to which the file(s) will be unzipped (decompressed). Click NEXT.
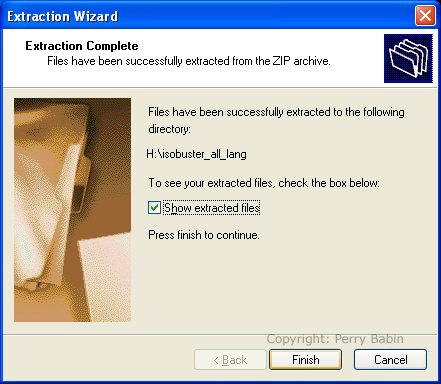
 This shows that the files have been decompressed and asks if you'd like to open the new folder when you click FINISH below.
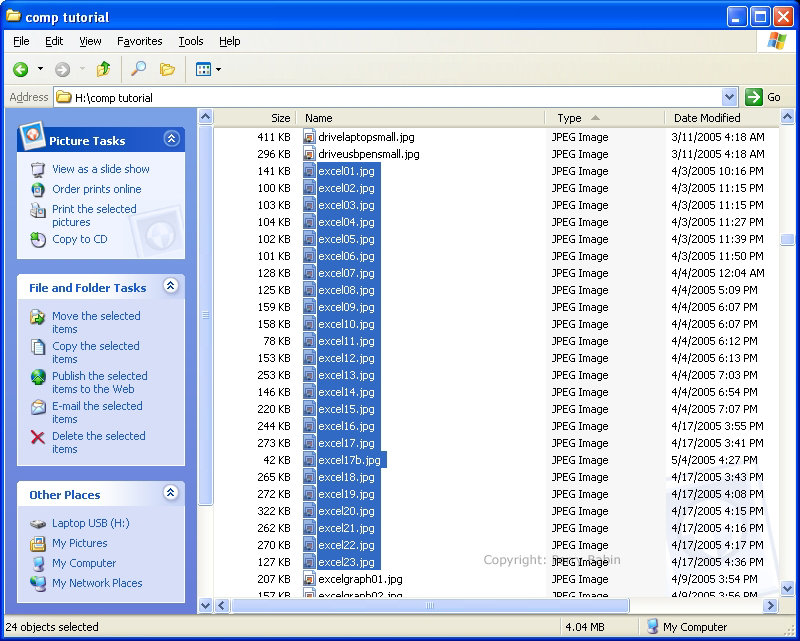
 This is the new folder and the file that we downloaded. Many times there are quite a few files and... sometimes there is only one file. To run this program (and install ISO Buster), you would simply double-click the .exe file.

There are times when you need to email multiple files. To do so can be time-consuming. If you want to make it easier, you can add all of the files you need to send to one compressed folder. To zip a series of files, select all of the files you want to send. Here, all of the files are in order. If they were not in order, you could select them one at a time with ctrl-left-click. If they were in multiple folders, you would need to create an empty folder and copy (not cut or move) the files to the new folder. Then you could easily select them.
 When the files are selected, right-click on the highlighted area and select SEND TO >> COMPRESSED (ZIPPED) FOLDER.
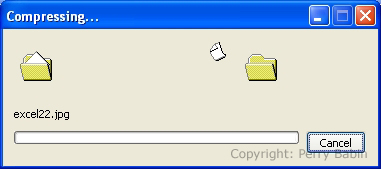
 You will see the following progress bar as the files begin to compress. The time it takes to compress the files depends on the speed of your computer, the size of the files, the number of files and the type of files. It generally takes less than a minute but sometimes it takes longer.
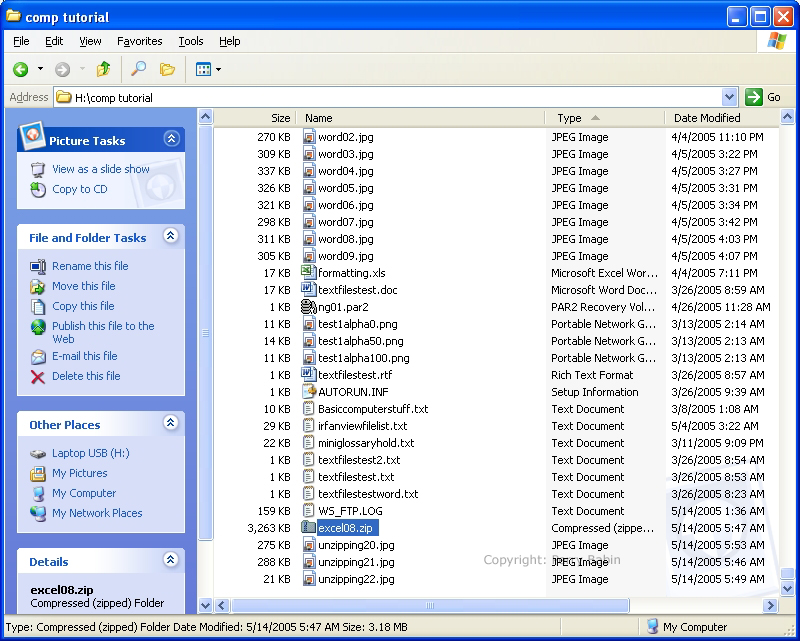
 Below is what the newly compressed file looks like. The compression software generally picks one of the files and uses it for the file name.
 If you double-click the file, it will open and you can see its contents. The original files are still in their original location. These are copies. If you look at the headers of the columns, you can see values that are not generally seen. The most interesting one is the packed ratio. This tells you how much smaller the zipped/compressed file is compared to the original. Keep in mind that the size of the file will be restored when the folder is decompressed.
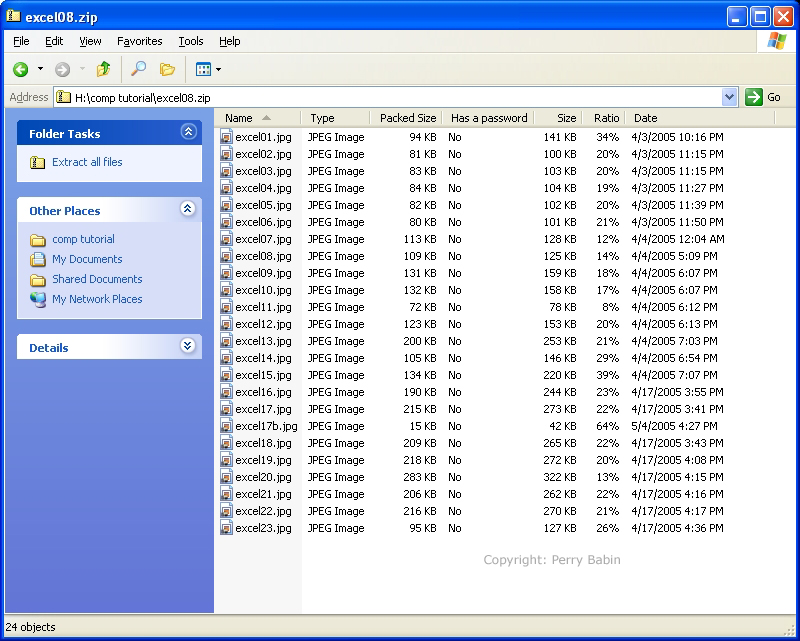 Note: The compression of image files is typically in the sub-10% range. These are highly compressed. In this simple utility, you can not set the compression level. In other programs like '7-zip', you can tell it whether you want minimal compression (faster) or high compression (slower but the file occupies less space when done). Whether the files are compressed or not, putting them in a single folder will make emailing them easier.
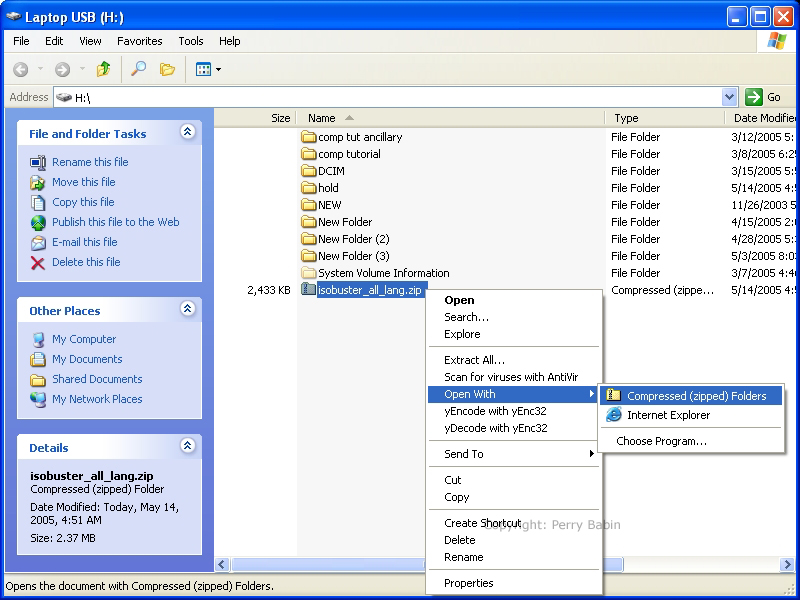
To view the contents of a zipped folder, you right click the file and select OPEN WITH >> COMPRESSED (ZIPPED) FOLDERS.
|
|
| Contact Me: babin_perry@yahoo.com | |
|
Perry Babin 2005 - Present All Rights Reserved
|