|
Sound Card Audio Formats
|
|
Overview:
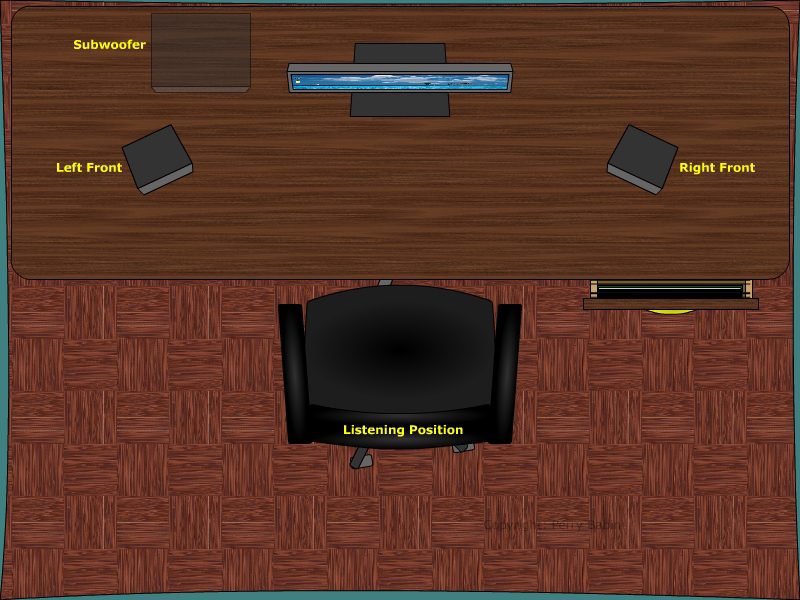
Two Channel Stereo Audio:
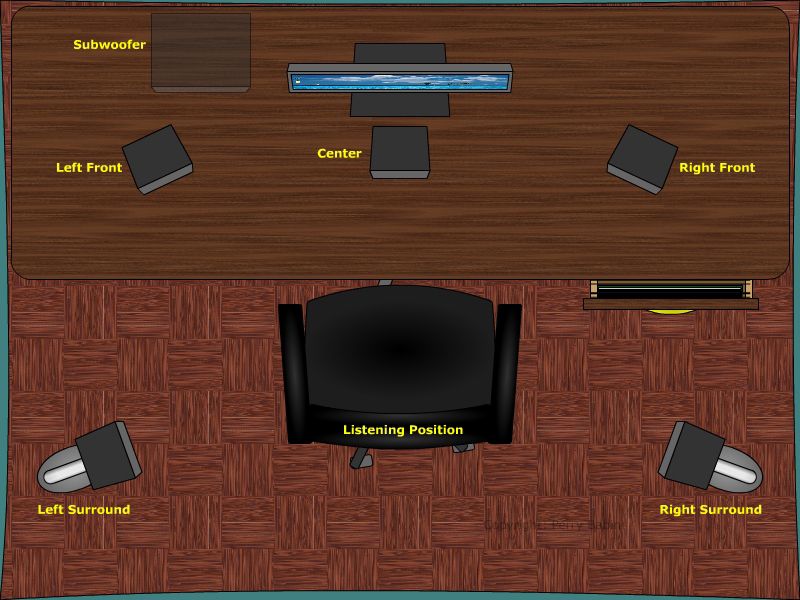
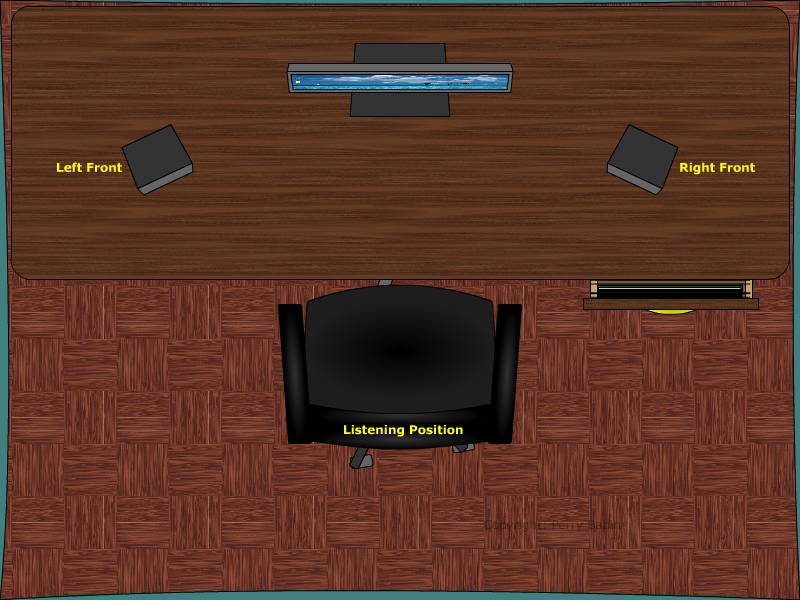 Notes: This image shows the two channel system with a subwoofer (under the desk).
 Multi-Channel Audio:
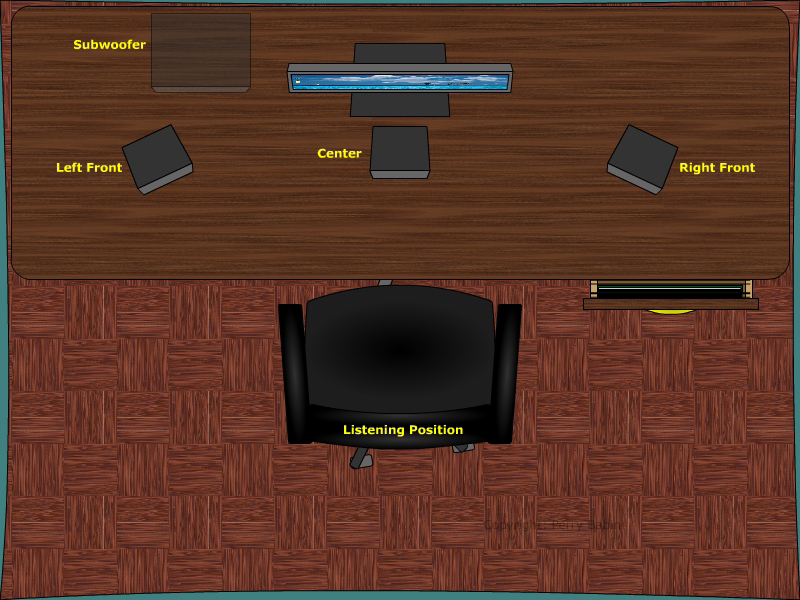 The next level of complexity is the 4.1 channel setup. This, like the 3.1 system, can be produced from a 2 channel signal. The surround channel is a mono signal. If the signal is derived from a signal source that has the information to produce two independent surround channels, the signals will be mixed down to the single channel.
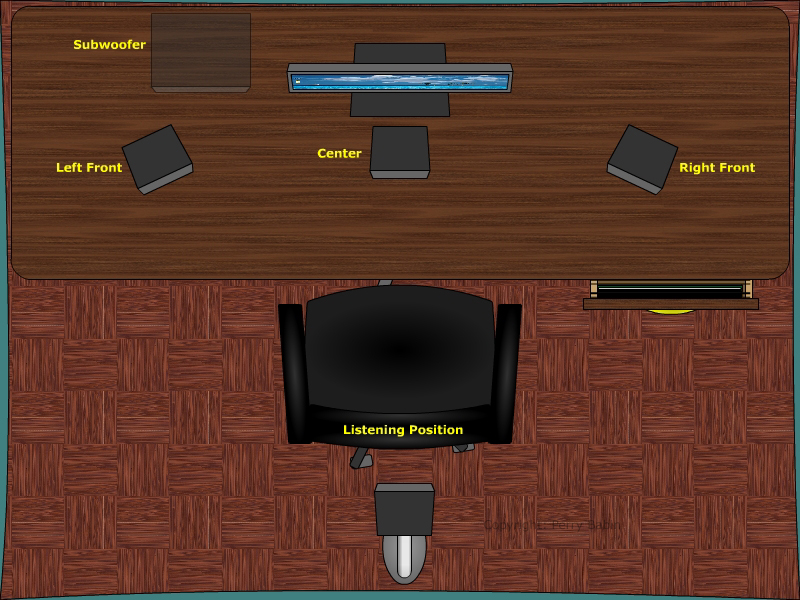 This is a true 5.1 channel system. Most DVDs can be encoded with the data to drive each of the 6 speakers with 6 discrete channels of audio.
 Note: a 'discrete' channel is a channel that can reproduce a signal that is in no way dependent on the content of any other channel. Digital Surround: Home Audio vs Encoded DVD Signals: Additions to the LFE Signal:
If you only use one media player (Windows Media Player, for example), you have likely never had the following issues but you should read this because you will most likely be installing more/different media players in the future. The problem arrises when the other media players access different level controls to set the volume. Some adjust the 'wave' level. Others adjust the 'master' volume. Multiple Volume Controls:
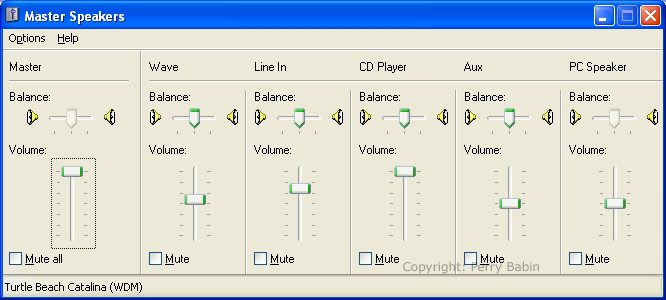 This image shows the volume control icon. It's the third from the left in the following image. Also notice the icon on the far left. We'll discuss it shortly.
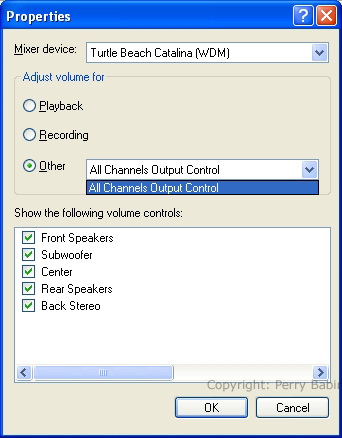
 There are two things you need to take note of in this next image. The first is the 'Mixer Device' drop-down menu. When you click the 'down-arrow', it expands. If you have more than one set of sound card drivers installed, you need to make sure that the proper one is selected. Here, I have a choice of the Turtle-Beach card (that I recently installed) or the on-board card (the Via AC97 audio device). If you have the wrong device selected, the mixer's controls may not work properly or there could be some missing/unusable options/features shown. The next thing you need to notice is the check boxes in the lower pane. This is where you select the controls that you want access to on the mixer. There are generally a few that you don't use and therefore don't need on the mixer. You can likely leave it as is.
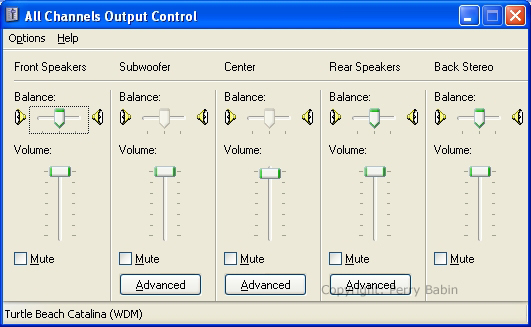
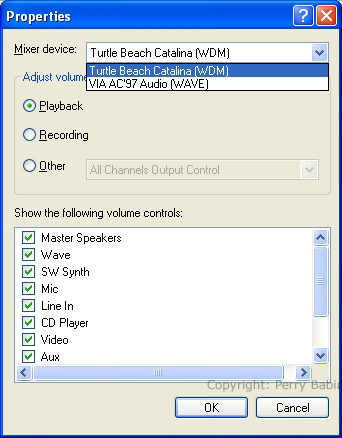 Below (just for this example), I selected most (maybe all) of the possible choices. As you can see, I had to shrink it considerably to get it to fit in this 800 pixel wide column of text. On the screen, it spanned just about across the desktop.
 Below is a second picture of the mixer properties dialog box. As you can see, I've expanded the 'Other' menu. There is only one choice here (there could be other preset choices) but you would select the choice shown (for the 'all channels' display).
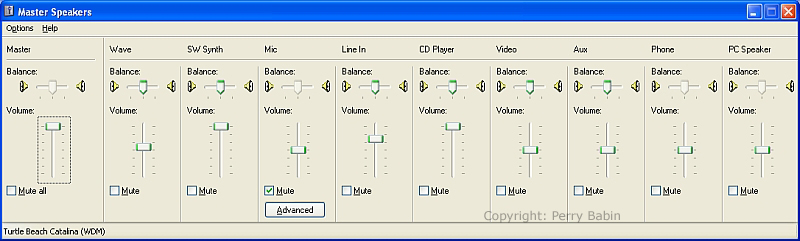
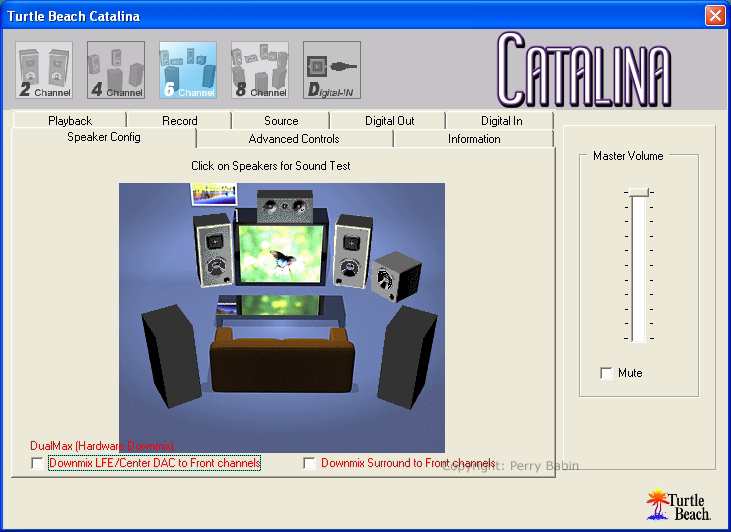
 This is a screen cap of the 'all controls' mixer. Notice that I've clicked the 'other' radio button. These controls can be accessed in several ways on this computer (with the mixer shown, in the Catalina control panel or in the AC3 filter control panel). These controls determine the output level of the individual output channels on the sound card.
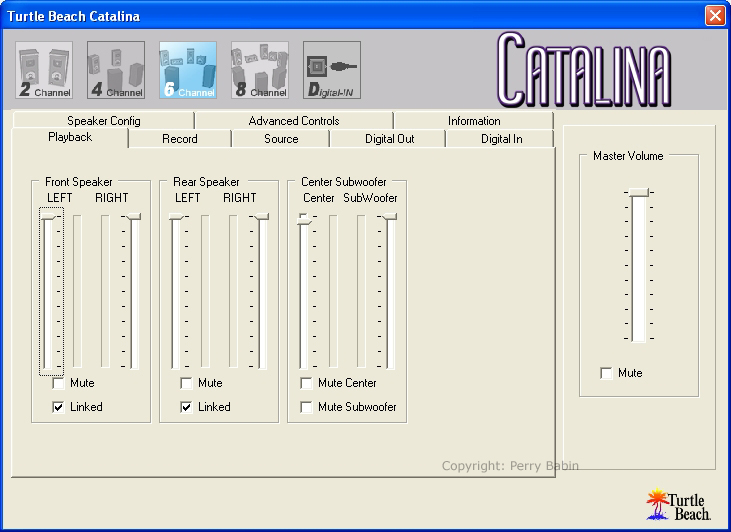
 As I mentioned, you can access the controls through the Catalina control panel. Remember that icon I showed you earlier (the one that's 'supposed' to look like the icon on the bottom-right of the following dialog box)? Clicking it will launch the following control panel. This control panel and the mixer I showed you immediately above are different interfaces for the same controls. If you have them both on the screen at the same time, you can move one set of controls and the slider on the other interface will move in unison.
 I'm showing you all of these level controls because it will be necessary to be able to find them if you have problems with no audio or insufficient output from one or more outputs on the sound card. You shouldn't forget about one more level control. It will be the resident volume control on the media player you're using. Some are linked directly to one of the sliders shown here and other are independent. Notes:
When using only the front channel outputs on the sound card (that's what you would use for a two channel stereo speaker setup -- with or without a subwoofer), the setup is generally done by default. When you move to a system with a '.1' channel, the setup becomes a little more difficult and somewhat unpredictable. If you have a 5.1 channel speaker system (very common), and you're playing a CD or DVD that was produced with only two channels of audio (left and right), you need to know about the check boxes in the next two images. In a true 5.1 system, you have 6 discrete channels. If you have only 2 channels of audio, you will get audio out of only 2 channels (left/right front). Since the front speakers are likely satellites (small speakers), they will not produce any appreciable bass. To force audio out of the other speakers (including the subwoofer), there is generally some sort of feature to distribute the audio. In the following dialog boxes, the 'Stereo Expand' and the 'Magic 5.1 enable' cause the audio to be played through all of the speakers. The name of that feature on your system may be different. Look in the owner's manual if you can not find it. The owner's manual will likely be on the installation CD in PDF format.
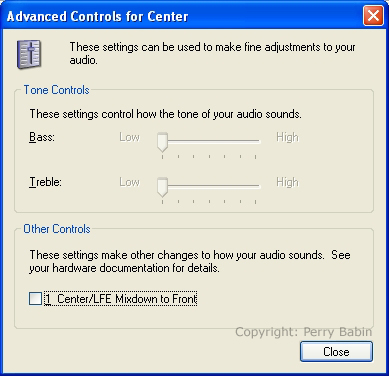
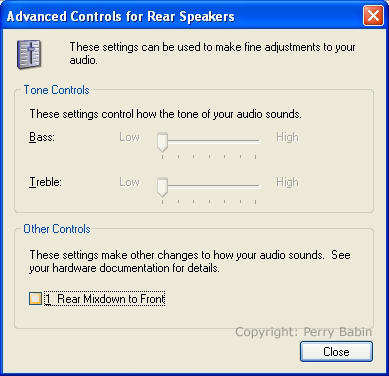
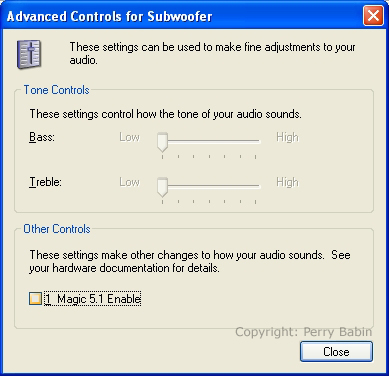 Note, to access the box above, click 'advanced' under the subwoofer slider. To access the box below, click the advanced tab on the sound card's control panel (it may be in a different location on your sound card's control panel).

In a 5.1 channel system that's properly set up, you will have strong, almost continuous output from the center channel. You will have little content in the left/right front channels unless there is something (action/dialog) happening on the far sides of the screen. The rear channels will generally have even less output. While it's possible for the left/right front/surround speakers to have high level output, it's not common. The subwoofer will be driven hard at times and at times it will be completely silent. Mixdown:
  Note: When making changes to the various audio modes, if there isn't an immediate difference when you make a change (and particularly if there is no change when you close the dialog box where you made the change), you may have to close and restart the media player for the changes to take effect. If you are playing a CD and switch to a DVD (or vice-versa), and the audio is not as it should be, you may have to close and reopen the media player. On my system, if I'm listening to a music CD and switch to a DVD with a digital multi-channel audio soundtrack, sometimes the audio isn't right on the DVD. This can be cured by closing the media player and reopening it.
Virtually all sound cards include some application to allow you to send a signal to each of the output channels. The following image shows the test window for a 5.1 channel system. Generally, you can click on each speaker and a signal will be sent to that speaker (or to that particular output channel on the sound card).
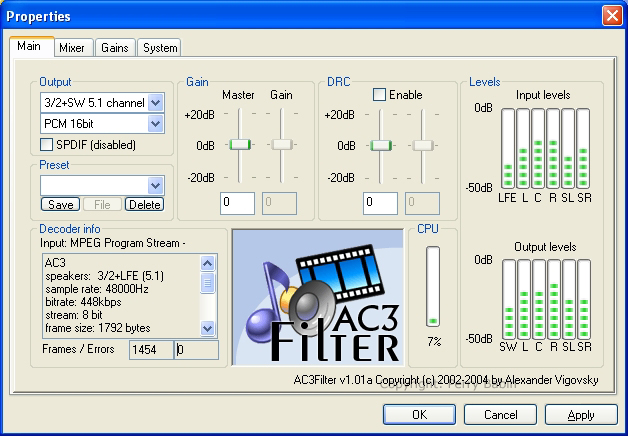
To decode the digital audio data stream ,you need a decoder/filter. In this section, I'll cover many of the features of the AC-3 filter that I'm using (there may be others but, if they exist, I'm not familiar with them). This filter can be located/downloaded via Google. The Basics:
 Here, I expanded the menu to let you see a few of the other choices.
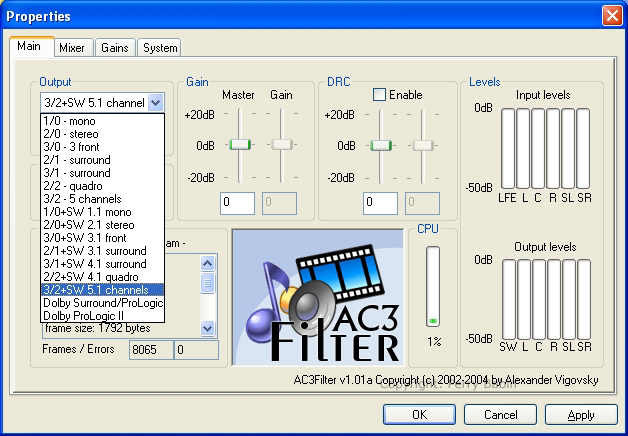 Note: The filter option dialog box can be accessed in Windows Media Player by going to TOOLS >> OPTIONS >> DVD >> ADVANCED. These are most all of the possible choices for speaker configurations and the characteristics of each one. The number to the left of the slash is the number of front speakers. The number to the right of the slash is the number of surround channels and 'SW' indicates that it has a dedicated subwoofer output channel. In each of the different modes, the content of each channel can be set (in the matrix). I'll cover some of those options a little later.
|
||||||||||||||||||||||||||||
|
|
||||||||||||||||||||||||||||
|
Master Gain: Other Input Gains: Auto Gain: One-Pass Normalization:
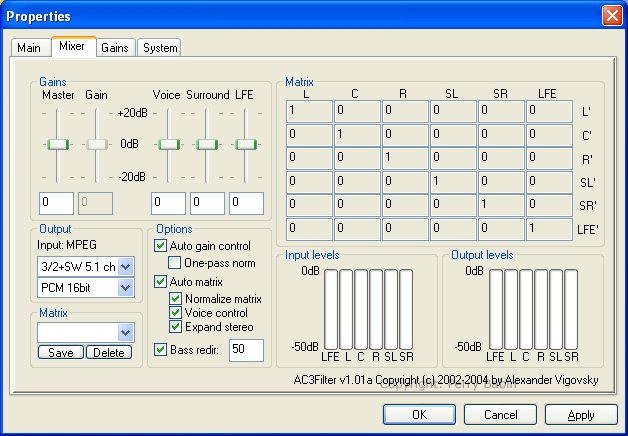 Auto Matrix: When this is selected, the total maximum signal level through the matrix will be '1'. This is activated when you want to generate a center channel from an audio program that has only two stereo channels. The output is sent to the center channel. This has no effect when the signal source is a 5.1 channel Dolby Digital signal. This is used to derive one or two surround channels from the left and right channels of a two channel stereo signal source. This has no effect when the signal source is a 5.1 channel Dolby Digital signal. Creation of surround signals outside of digital audio only works when the source a stereo signal (mono doesn't work). Bass Redirect:
On DVDs, you'll find several different audio programs. I'll try to cover the basics. If you are interested in more detailed information, Google can probably help. LPCM Audio:
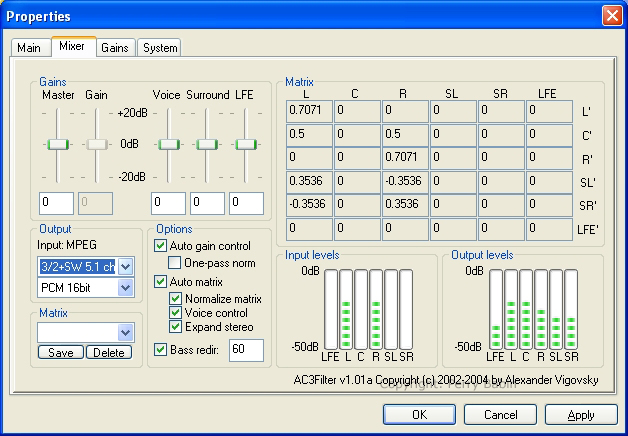
 If you look at the matrix, you can see how the original left and right signals are redistributed. The left and right front outputs are 3dB down from the input level but nothing else is added to the L/R front channels. The signals to the center channel include 1/2 of each of the left and right input channels (notice that this adds up to 'one' -- it will have the highest output because all others will have an output less than 1). The surround channels are probably the most interesting (you know you're a geek when this is interesting :). As you can see both surround channels have output from each of the left and right input channels. The level is 9dB down from the input level. You should also notice that one of the values is 'negative'. What they're doing is subtracting one channel from the other. This in effect plays the difference in the two signals. For the left surround channel, the right signal is the negative channel. For the right channel, the left signal is negative. The result is relatively good and it helps to open up the soundstage, this is not substitute for a digital surround system.
 Digitally Encoded Two Channel Audio:
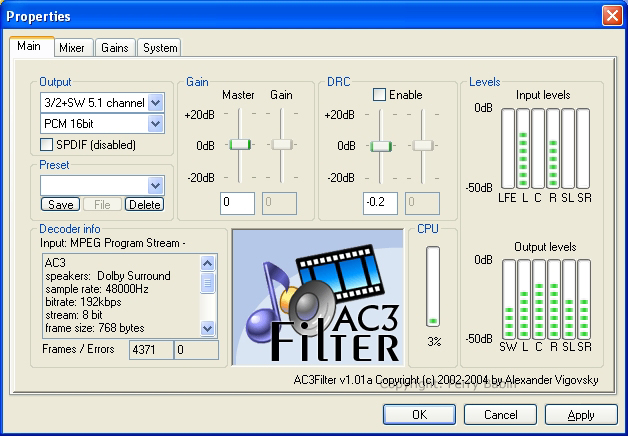 Dolby Digital -- AC3:
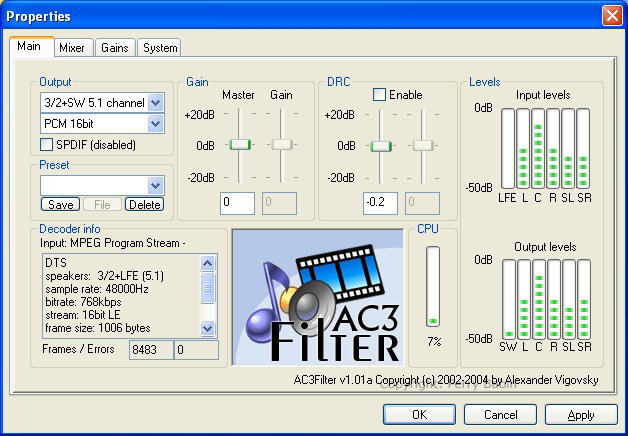
 DTS:
|
||||||||||||||||||||||||||||
| Contact Me: babin_perry@yahoo.com | ||||||||||||||||||||||||||||
|
Perry Babin 2005 - Present All Rights Reserved
|