If you have multiple computers and you want all of them to have simultaneous access to the internet, you will need a network. More and more people are moving towards broadband internet connections (cable, DSL...). If you have a broadband connection and you want more than one computer to access the internet, this page will help you understand what's required to get your network up and running. The following image shows a generic network setup with a router.
Broadband Modems:
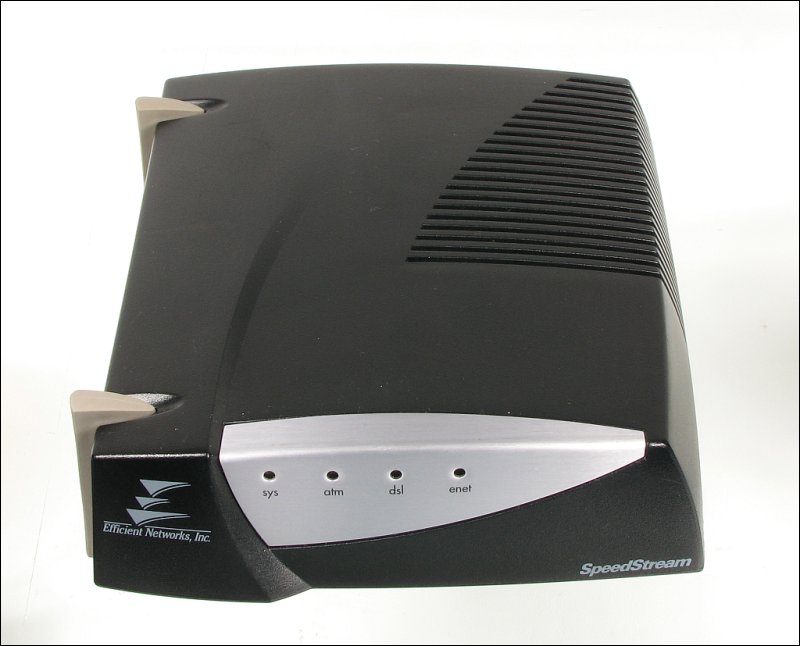
This first device is a DSL modem. It's only one of many different styles but they are all similar in function. The modem is the interface between the ethernet line that goes to your computer's network card and the telephone/DSL/cable TV line. All will have some sort of indicator lights on the front of the unit. This one has lights to tell you if the modem has passes a self-test, has a good connection to the DSL equipment at the service provider, has a good connection to your ethernet card and a light to indicate that the is traffic passing to/from the WAN (Wide Area Network).
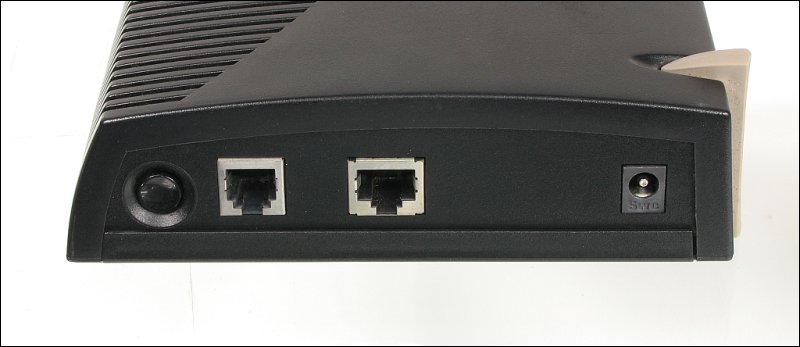
On the rear of the modem, you can see two telephone type connectors. One is a standard RJ11 connector and connects with a standard telephone cable. The larger connector is an RJ45 connector and is relatively standard for LAN (Local Area Networks). The RJ45 connector has 8 conductors. For most 100Mb/s LAN connections, only 4 of the conductors are used (even though there may be 8 wires in the cable/connector). For 1Gb/s (1000Mb/s) networks, you have to use all 8 conductors.
Network Cables:
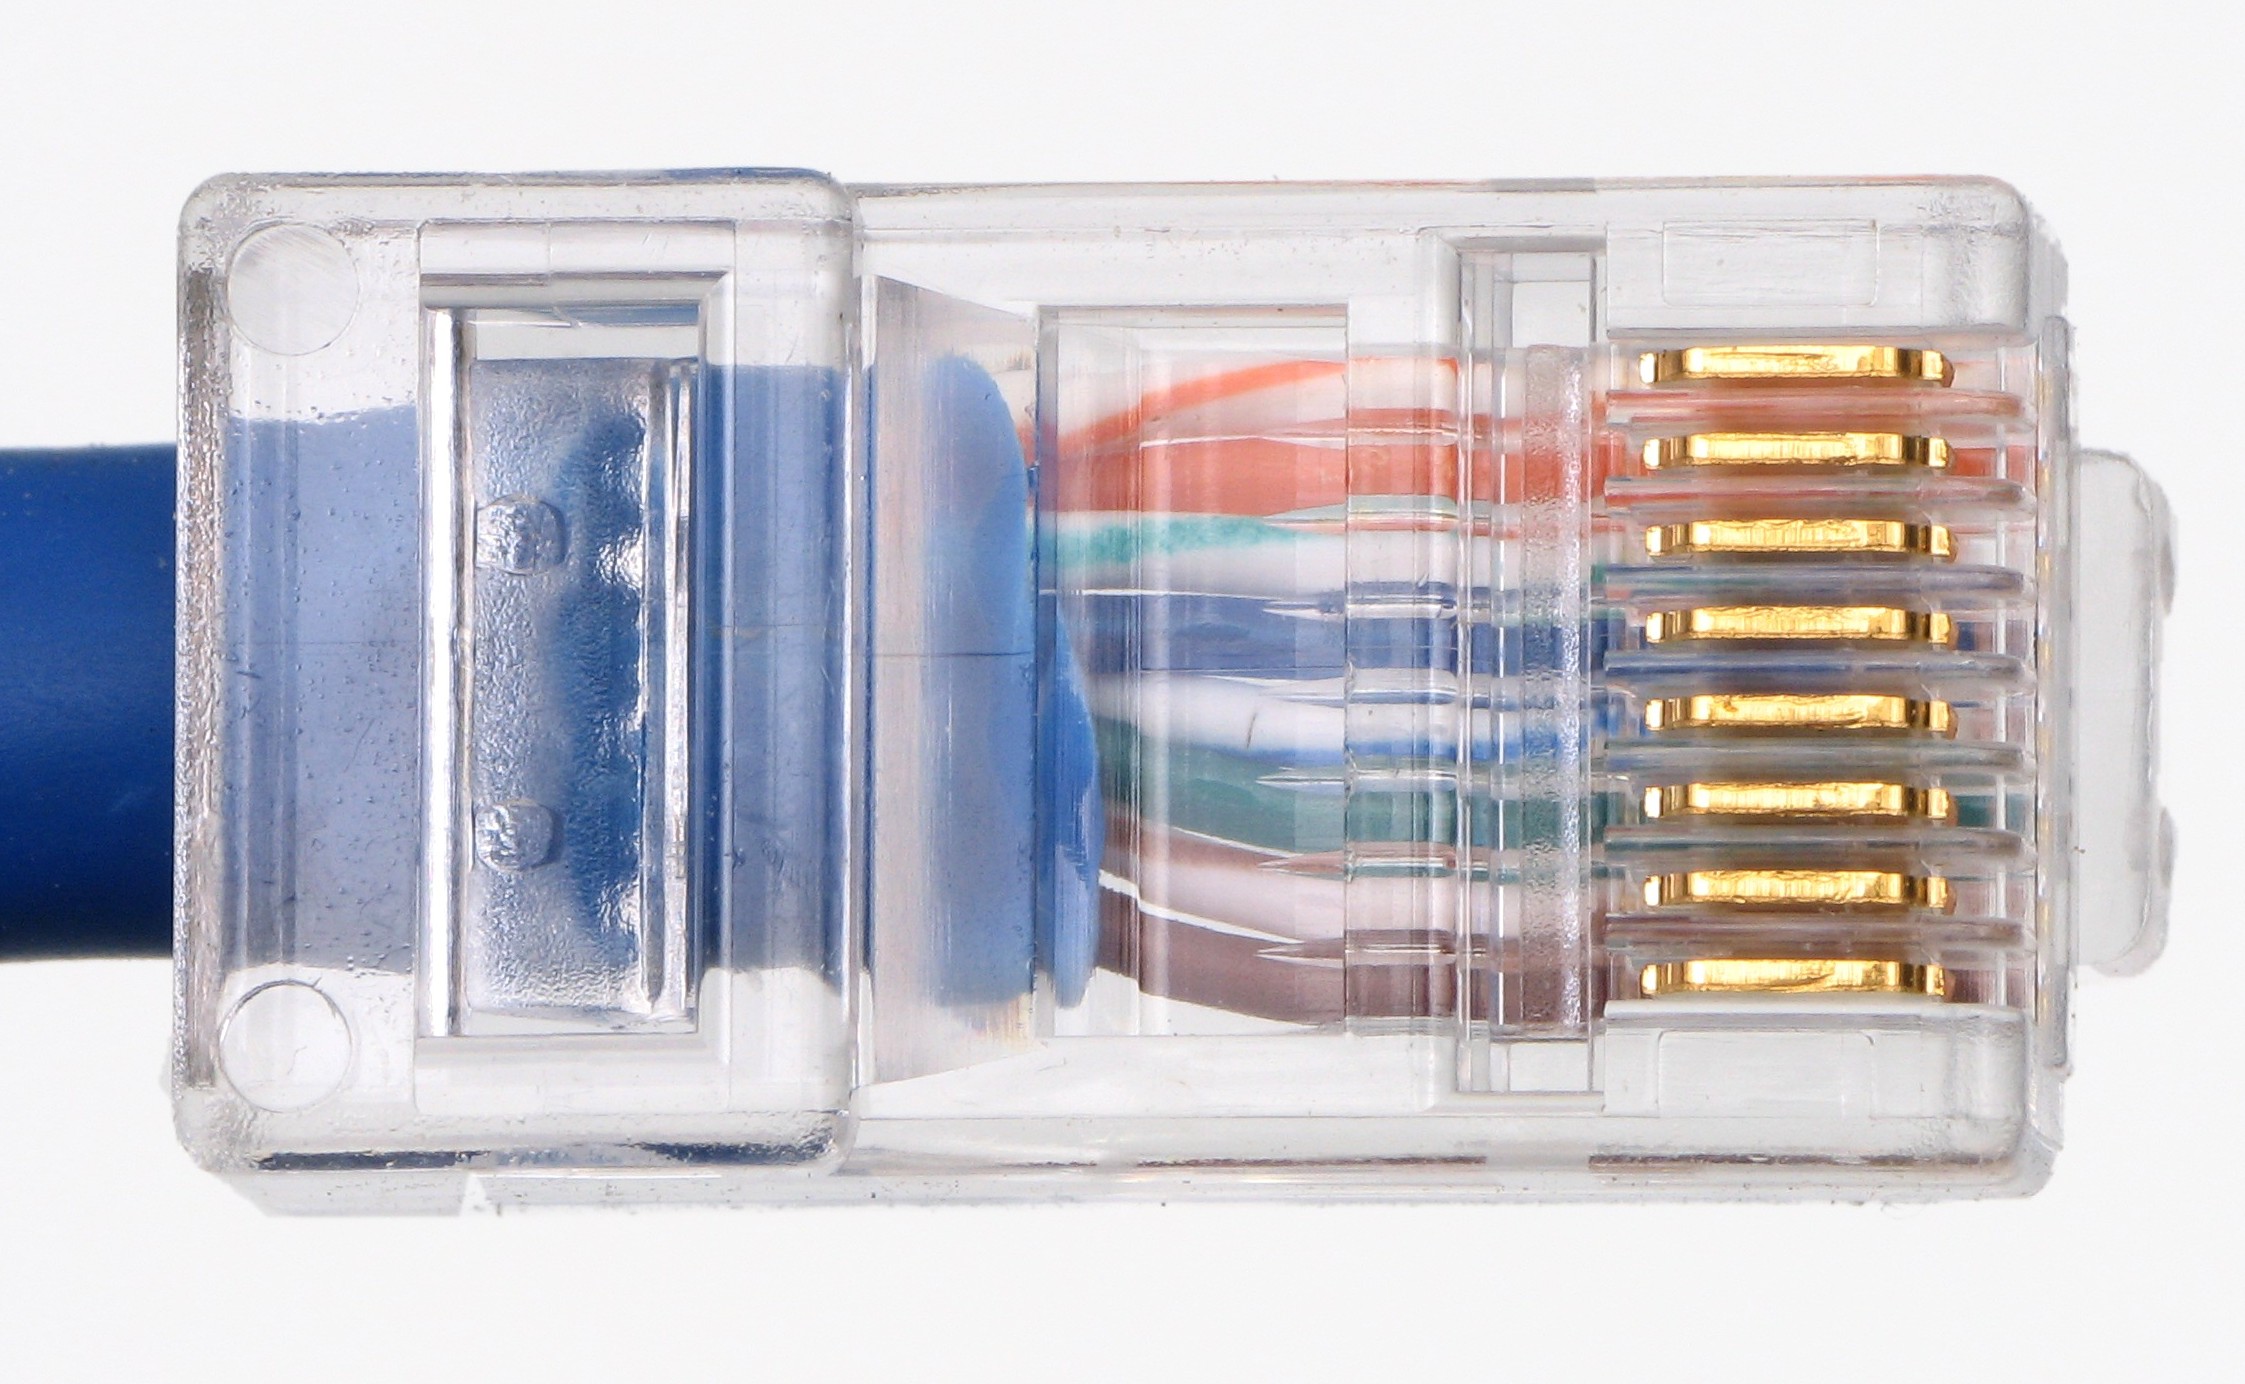
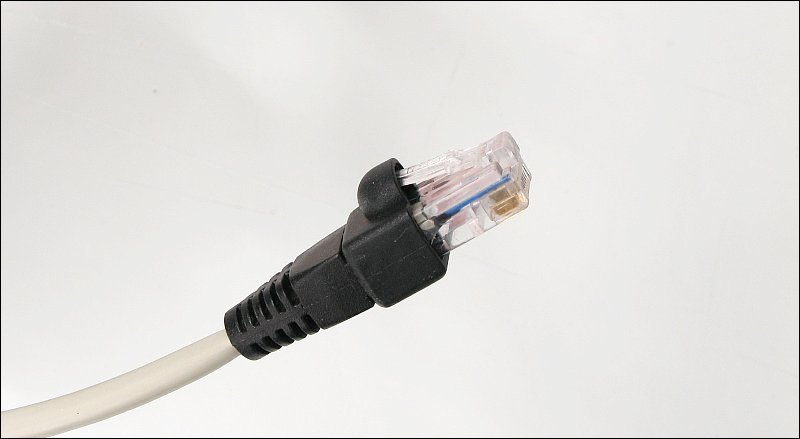
The following 2 images are of the connector of a typical network interconnect cable. This cable uses an RJ45 connector. Notice the locking tab on the connector. When pulling the cable through a bundle of other cables or from behind your computer, you have to be careful not to allow the tab to catch on anything. They are relatively fragile and are easily broken. Some cables have protective boots over the tab. This makes them much less likely to get broken but sometimes makes them harder to depress and release (especially in tight spots where there is little room to work). When the tab is broken, the connector won't remain seated in the jack and the internet connection will be lost or intermittent. If the tab is in place but has fatigued and is not locking the connector into the jack securely, you can sometimes pull it up (away from the body of the connector) a bit farther than it's normal position and when released, it will remain high enough to lock into place.
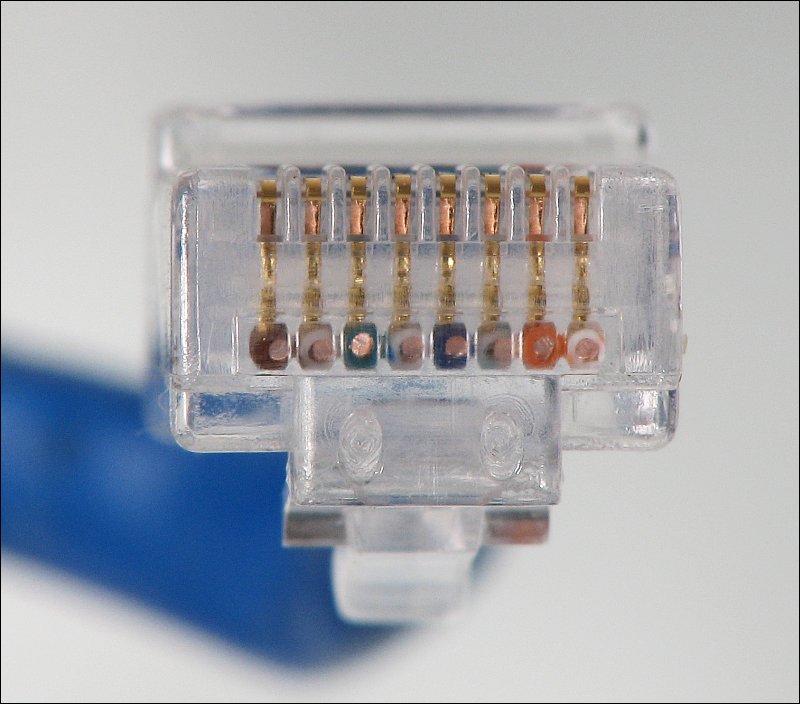
This is a close-up of the colored conductors inside the connector. They are arranged in a specific order. The conductors are coded in pairs. The colors are orange, green, blue and brown. This is a 'straight-through' cable. There is another type of cable. It's called a 'crossover' cable. The crossover cable has it's green and orange pairs swapped. If you look at the two end connectors side by side and the positions of the green and orange are not the same, it's likely a crossover cable and may not work for all ethernet connections.
The image below shows the standard wiring for a 'straight-through' cable. Both ends are wired exactly the same. In a 'crossover' cable, the orange pair goes in place of the green and vice-versa but only on one end of the cable. When networking with a hub/switch/router, the cables are typically the straight-through type.
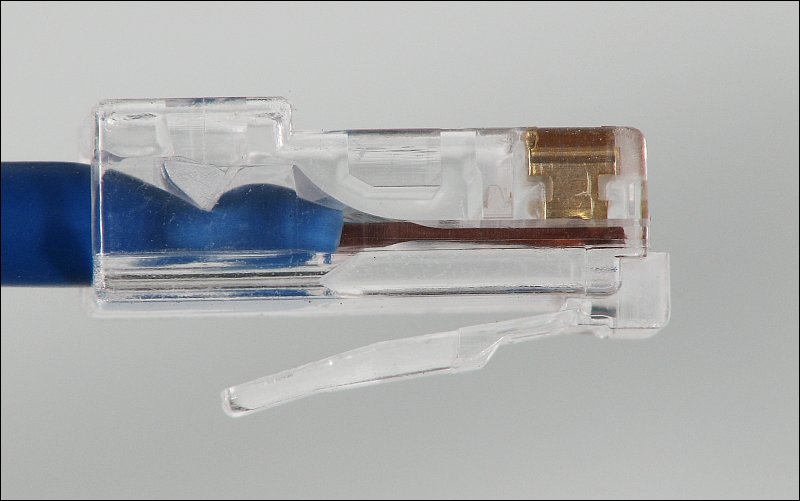
If you have to replace an end on one of the ethernet cables (it's not rocket science), you will need to make sure that all of the individual conductors go to the end of the connector before you crimp the connector (image below). There are only 2 tiny points on the terminals and you need both of them to bite into copper for the cable to be reliable. You also need to make sure that the outer insulation is well inside of the connector so that it will be captured by the wedge in the connector when crimped (this can also be seen in the image below). This will make the cable much more reliable.
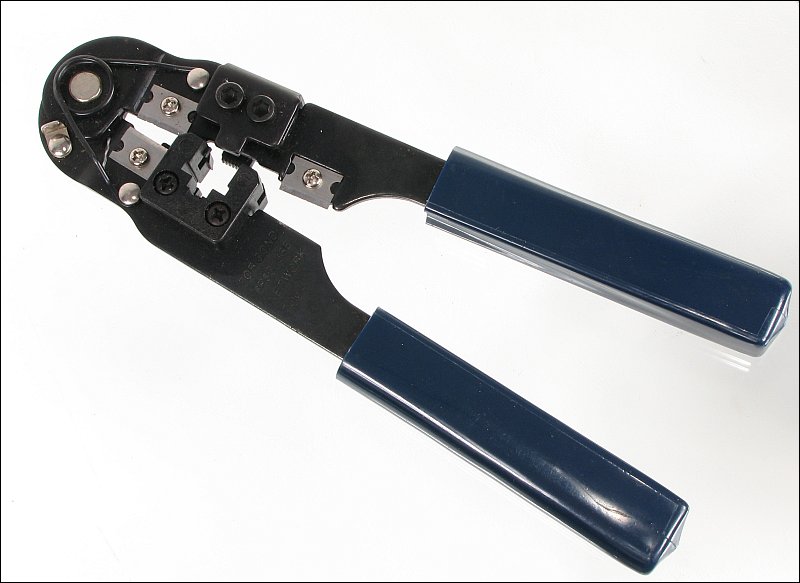
The following image shows a typical pair of (non-professional) crimping pliers. These can be purchased on eBay for less than $10. The crimpers have blades for stripping the outer insulation and cutting the cable. When the cable ends have been prepared and the connector has been placed on the end of the cable, you insert cable and connector into the crimping section of pliers and squeeze down on them. When you do, the individual terminals will be forced through the insulation of each of the individual wires and the connection will be made.
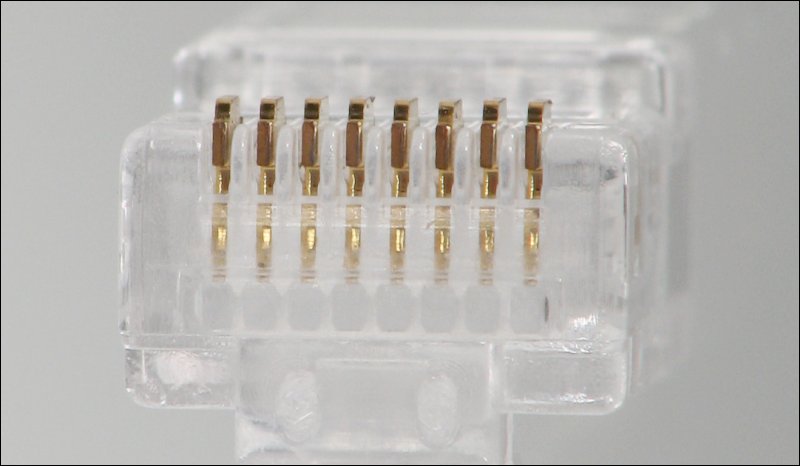
Below, you can see how the terminals are positioned before and after crimping.
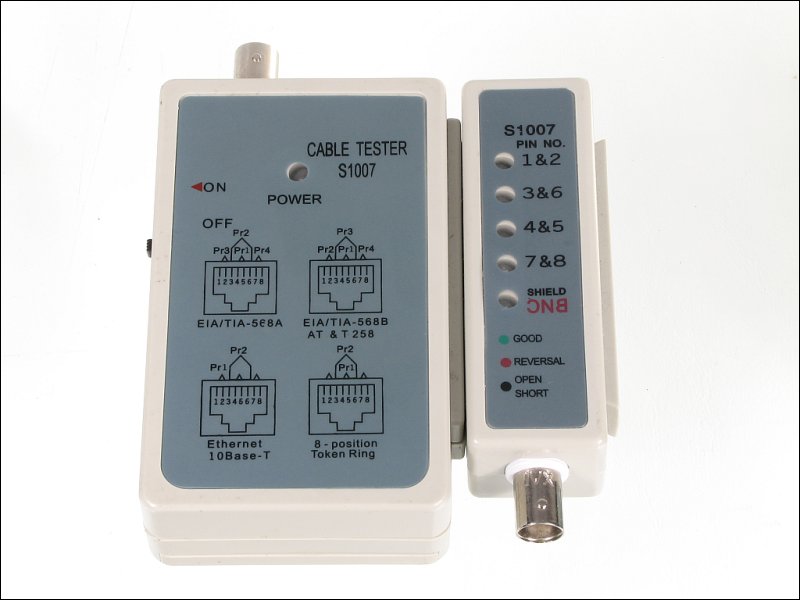
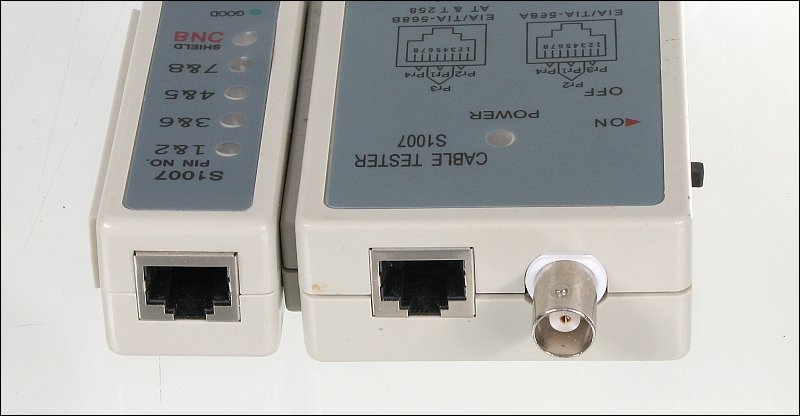
If you want to determine if a cable is good or bad, you can use a cable tester. These are also inexpensive. This one can be separated so that you can check cables when you can't bring both ends together (cables run between rooms).
The color-coded cables have a specific order. In order, they are blue, orange, green, brown and slate (only 4 pairs are used for ethernet). If you look at the face of the tester, you can see that the EIA-568B matches the cable that's been used here. This is the standard ethernet configuration.
Network Hub:
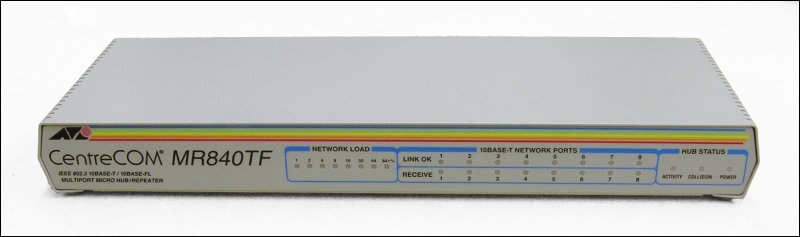
The following 2 images are of a 'hub'. A hub is the simplest interface. It simply passes on any data sent to it by one computer to all of the other computers that are connected to the hub. This is a relatively old hub and its maximum throughput is only 10Mb/s. This is fine for internet connections but is not suitable if you want to quickly move large files from one computer to another.
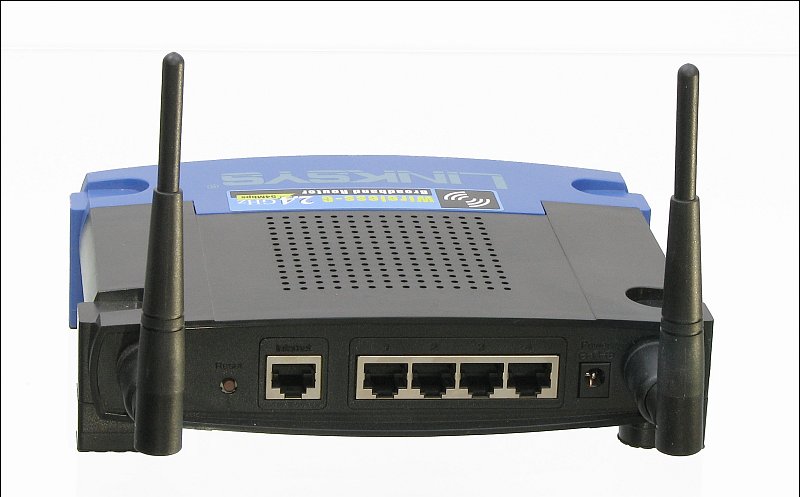
Network Router:
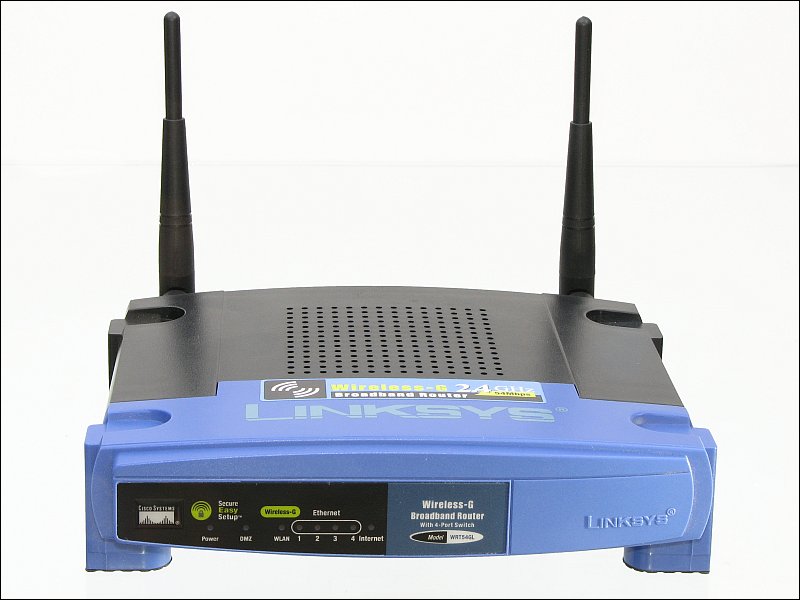
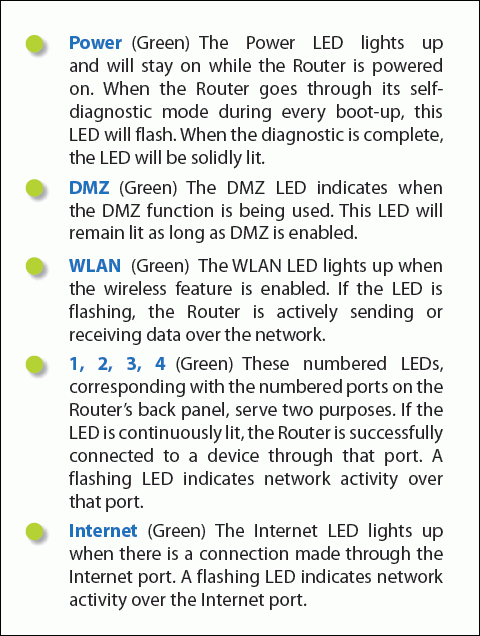
This device is a wireless router. This is one of the most important security devices in a home network. While it allows computers to communicate with each other and the internet, it also prevents other computers from easily accessing the computers on your network (when properly configured). THIS shows you the purpose of each of the indicators.
Below, you can see the input and output ports. The one on the far left (generally separated from the other group) is the internet port. This is where you connect the cable from your internet provider's equipment. The other ports are for the various computers that will be hard-wired to the router. Other computers can connect through the router via the wireless connection.
Wireless Security:
If you're not 100% sure that your wireless network is safe, please read chapter 8 of this site (Virus and Spyware Protection). It deals with security and has suggestions regarding the security features for wireless routers.
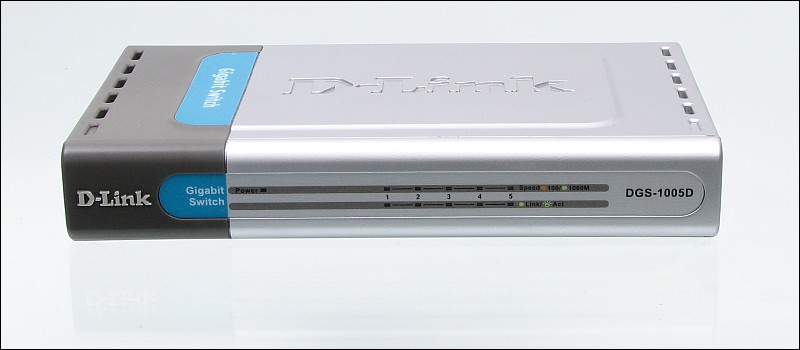
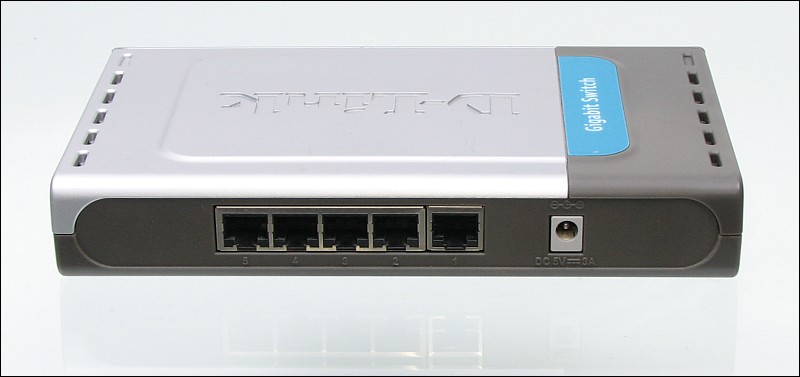
Network Switch:
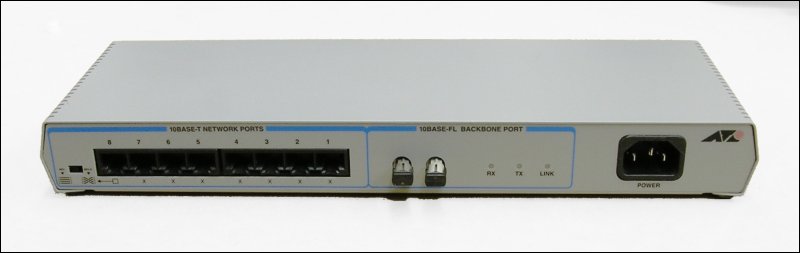
This next piece is a switch. A switch is a lot like the hub that we saw above but a switch passes information only to the computer that needs it. This particular switch is a 'gigabit' switch. Most home network equipment is designed to operate at 10Mb/s to 100Mb/s. This one is capable of transferring data at 1000Mb/s. The only problem is that the computer can not produce that sort of throughput for more than a second or so. The hard drives (even some RAID setups) are simply not fast enough to provide data at that rate. With a RAID to RAID setup, I only managed about 300Mb/s
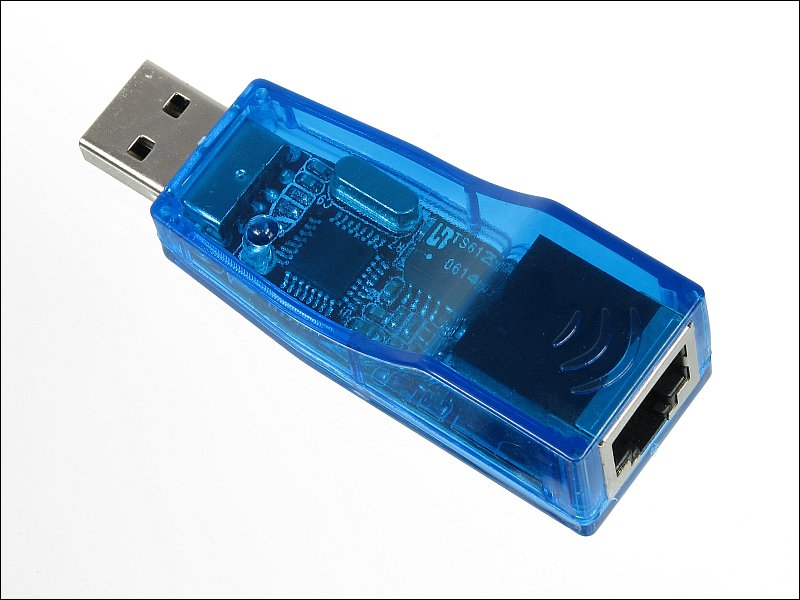
USB Ethernet Adapter:
A USB to ethernet adapter allows you to access the internet (or a network) through a USB port. This is good for times when you don't have a working ethernet jack on the computer (often happens when loading new software onto a computer but can also restore your ability to access the internet if your ethernet port is damaged (often happens if there is a close lightning strike). You plug the adapter into a USB port and you plug the ethernet cable into the adapter. It's not as fast (in my experience) as a proper ethernet connection for file transfers but it's fine for internet traffic. These are VERY inexpensive. I paid only about $5 for this one.
This site was started for pages/information that didn't fit well on my other sites. It includes topics from backing up computer files to small engine repair to 3D graphics software to basic information on diabetes.
This site introduces you to macro photography. Macro photography is nothing more than the photography of small objects. It can take quite a while to understand the limitations associated with this type of photography. Without help, people will struggle to get good images. Understanding what's possible and what's not possible makes the task much easier. If you need to photograph relatively small objects (6" in height/width down to a few thousandths of an inch), this site will help.
If you're interested in air rifles, this site will introduce you to the types of rifles available and many of the things you'll need to know to shoot accurately. It also touches on field target competition. There are links to some of the better sites and forums as well as a collection of interactive demos.
This site is for those who want to install or update their car stereo. It begins with the most basic electronics theory, progresses into basic transistor theory as well as covering virtually everything associated with car audio.
