The following statement may be the most important information on this page (and possibly on the entire site)... Do NOT rely on the integrity of hard drives for important information. Hard drives often fail with little or no warning. Generally, unless you're willing to spend $200 or more (sending it to a data recovery specialist), all data is lost when the drive fails. Later (further down in the directory -- item #53), there is more information and suggestions for backing up important data. This is posted at the top of the page in case you decide to read no further.
Hard Drive Basics
The 'hard drive' is the place where data is stored on your computer. This includes all of the operating system files (the ones that make your computer usable) as well as the files you store on the computer (images, video, music...). Many people are concerned with filling up their hard drive. For most users, this is never really a problem. You have to store an enormous number of music or image files to fill even the smallest commonly available hard drives. Movies and other video files take up considerably more space but most users don't store entire movies on their computer and those that do typically understand computers well enough to know when they're reaching the limit of their hard drive's capacity.
Hard Drive Specifications
Capacity: The 'capacity' of the hard drive is simply the amount of data it's rated to hold. The actual reported data capacity (reported by your OS) may be somewhat less. That's because the 1k (1000) in our number system (the decimal system - based on the number 10) is slightly different than the 1K in the number system used by computers (binary - based on the number 2). In the decimal system, 1K is equal to 1000. In the binary system, 1K is 1024 (2 raised to the 10th power). At 1K, the difference is only ~2.5%. In the 1M range, the difference is ~5%. In the 1G range, the difference is ~7.4%. This is why a 200GB hard drive will only register as a 186GB drive. The available storage is reduced a bit more because formatting requires storage space.
Important! No wait... VERY IMPORTANT!!:
Now that very large hard drives (3 terabytes and larger) are available, many people are now storing large numbers of files on a single drive. This is generally due to the ease of access because all files are on one drive. If the files are important, this is very dangerous unless the files are backed up 100% on another drive or storage media. As was mentioned earlier, disk drives can fail instantaneously. Many give absolutely no warning and the files are lost. In some instances, the files can be recovered but it's expensive and the drive has to be sent to a third party (who will have full access to your files -- which may include sensitive/private information). It's much better to use multiple small drives (500-640 megabyte) to store the information (as well as having optical backup for the most important files).
When selecting a drive, you should use the customer feedback (like that found at Newegg.com) as a guide to the most reliable drives. Some drives have high failure rates. Others have very low failure rates. Try to chose a drive that has a lot of feedback and a very high customer satisfaction rating. This won't guarantee that you'll never have trouble with the drive but it puts the odds in your favor.
Average Seek Time: This is the average time that passes from the time the data is requested to the time the data is delivered.
Average Latency: This is the average time it takes for a point on the platter to come around to the heads. It's half of the time for one rotation. The average latency is determined by the rotational speed alone.
Buffer Size: The buffer is the on-board memory of the drive. Commands or data can be stored there if the drive is busy when the data requests come in or the motherboard is busy when the data is ready to be returned.
Rotational Speed: This is the rotational speed of the spindle and platters in the hard drive. It's specified by RPMs (Revolutions Per Minute).
Interface: There are three common interfaces. The most common in personal computers is the IDE interface. The second most popular is likely the SATA interface. SCSI drives have been around for a long time but they're expensive. SCSI drives are typically used in servers. Very few find their way into home computers.
Form Factor: The 3.5" form factor is the most common size hard drive.
NCQ: Native Command Queuing is a technique that a hard drive uses to more efficiently retrieve data. For most hard drives, the data is retrieved in the order it was requested. This can be inefficient if the data is spread out in a way that takes the heads over the same point more than once. NCQ looks at the location of the data, if the last requested data is 'on the way' to earlier requested data, then it will pick up the last requested data before the earlier requested data.
SATA Hard Drives
Earlier in the tutorial, you saw a photo of an older hard drive with the cover removed. It's heads and actuator arm are shown near the bottom of this page. The hard drive you see below is a newer hard drive. It has some things in common with older drives and there are some new features. The drive below is Western Digital Raptor SATA (Serial ATA) drive. It's designed to be faster than the average drive but there are tradeoffs in the design. It approaches the speed of some SCSI drives but costs significantly less than a SCSI drive. These high-performance will typically run hotter than a standard drive. The average drive spins its platters at 7200RPMs. The drive below operates at 10,000RPMs. Keeping the platters spinning that fast simply takes more energy and causes the drive to run hotter. The upside to the high rotational rate is that the information comes around to the heads more often than with the 7200RPM drives (lower average latency).
Note:
When using a conventional (spinning platter), high performance drive, you may need to install a fan in front of the hard drive bay. Most computer cases provide some sort of fan mounting area for 80mm fans in front of the bay. Keeping air moving over the drive (even a small amount of air flow) will significantly reduce the operating temperature of the drive. Since the advent of 'solid state' hard drives (to be covered below), it's not necessary to use conventional, high performance drives. Solid state drives are faster than conventional drives and are therefore being used for the operating system and most program files. Since SSDs are relatively small (compared to the available capacity of conventional drives), files that require significant storage space are stored on conventional drives. Since it's not important (generally) for those files (multimedia files like movies, most often) to be opened quickly, they are stored on slower, conventional drives. For people who have their computers set up this way, they often choose drives that are slower than the common 7200RPM drives. These drives are often referred to as 'green' drives (as in saving the planet by reducing energy consumption). No only are these drives more efficient, they run cooler and reduce the need for additional cooling.
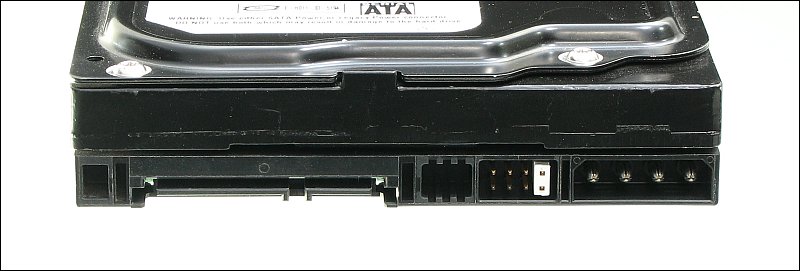
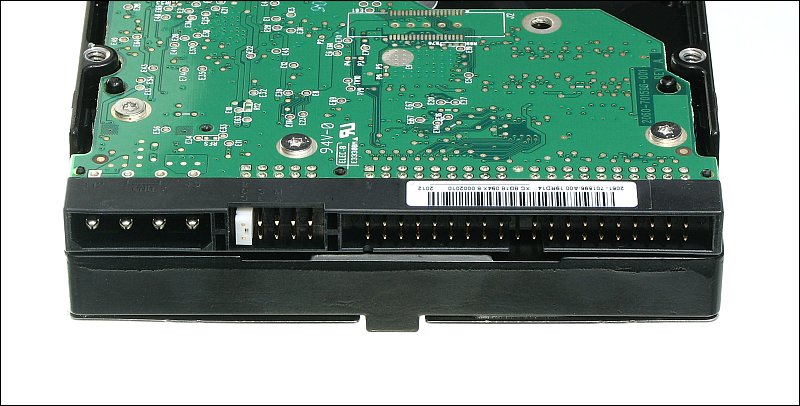
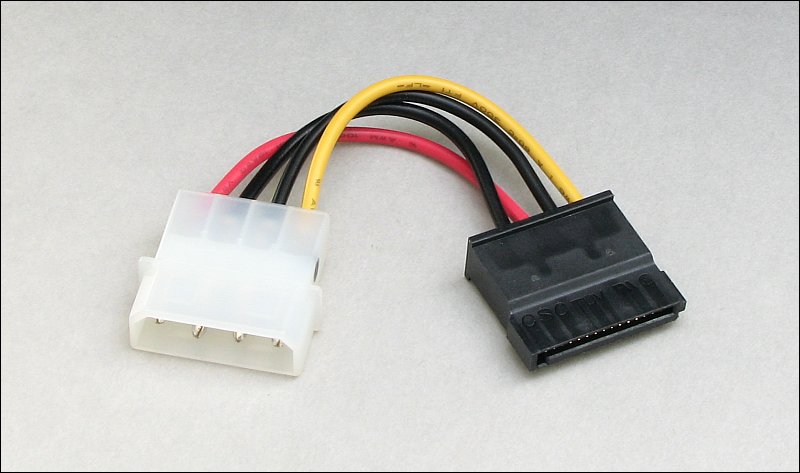
If you look at the connectors on the drive above, you can see that the connectors are significantly different than the connectors on the rear of an IDE hard drive. The drive above uses a different data cable and has the option to use the new style power cable or the standard (legacy) 4-pin Molex. The image below is the bottom of the SATA drive and gives you a somewhat better view of the connectors. Notice that this one has no 4-pin Molex connector. If you are upgrading your computer and are adding SATA drives, you need to see if you have enough SATA power connectors on your power supply. If you don't, you can order adapter plugs that convert the 4-pin Molex to SATA power. Most new power supplies and computers have more SATA power connectors (and fewer Molex connectors) so a shortage of SATA power connectors isn't generally a problem.
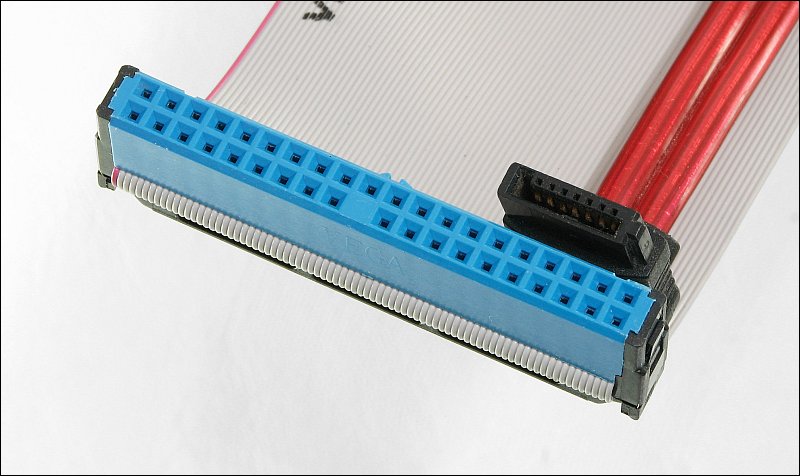
The image below shows the connectors for a SATA data cable and a 40-pin IDE cable. As you can see, the SATA connector is a bit smaller than the 40 pin IDE connector. This makes it easier to route the cables, reduces clutter and allows for better air flow through the case. They also have a longer maximum length than IDE cables (which are limited to 18 inches).
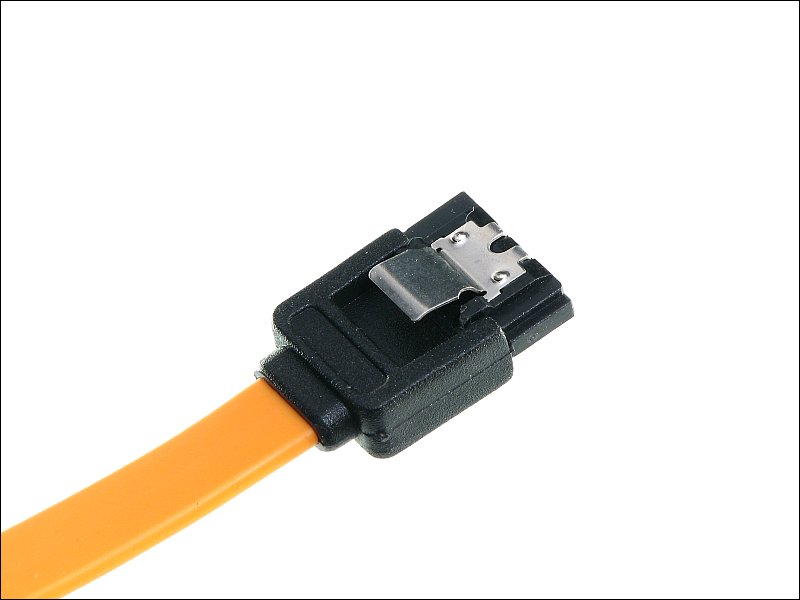
The original SATA connectors had tendency to disconnect from the headers. Most of the newer connectors have a locking tab on them. The tab on the connector in the following photo is metal but some are made of plastic.
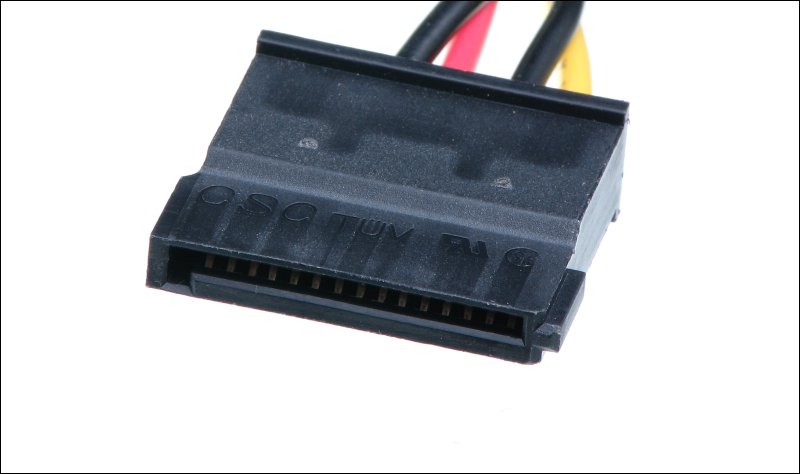
This is a SATA power connector. If you buy a SATA drive and your power supply doesn't have SATA power connectors, Molex to SATA adapters are readily available.
eSATA:
In the recent past, there was only one viable way to transfer data from a computer to an external hard drive. That was via a USB port. The USB 1 and USB 2 ports are OK for small transfers but they're extremely slow when transferring larger files. To provide a faster transfer, many mother boards have an eSATA connection. This allows you to connect an external hard drive to a computer (which was possible before) but the transfer rate is essentially as fast as when the hard drive is connected directly to the motherboard.
Powered eSATA:
For the standard eSATA connection, the hard drive has to be powered via an external power source. The powered eSATA connector has power supply pins to provide power through the eSATA connector. It appears that the powered eSATA connector is at least able to power 2.5" laptop drives. I couldn't find any definitive information as to whether it could power 3.5" hard drives (which often require more current to operate).
The powered eSATA connectors are also able to power USB flash drives and flash drives with an eSATA connector.
SATA Compatibility:
There are several types of SATA protocols. The original SATA was rated for a throughput rate of 1.5G bits/second (billions of bits of information per second). SATA II is rated for 3G bits/second. SATA III is rated for 6G bits/second. Some older motherboards that were produced before the newer SATA protocols were introduced don't work well with SATA II and SATA III drives. To make the newer drives more compatible with the older boards, you can sometimes install jumpers/shunts on the headers on the back of the drives. The manufacturer of the drive will provide the information needed to know where to install the jumpers. This doesn't work for all motherboard/drive combinations but it will often make them compatible.
Solid State Drives (SSD):
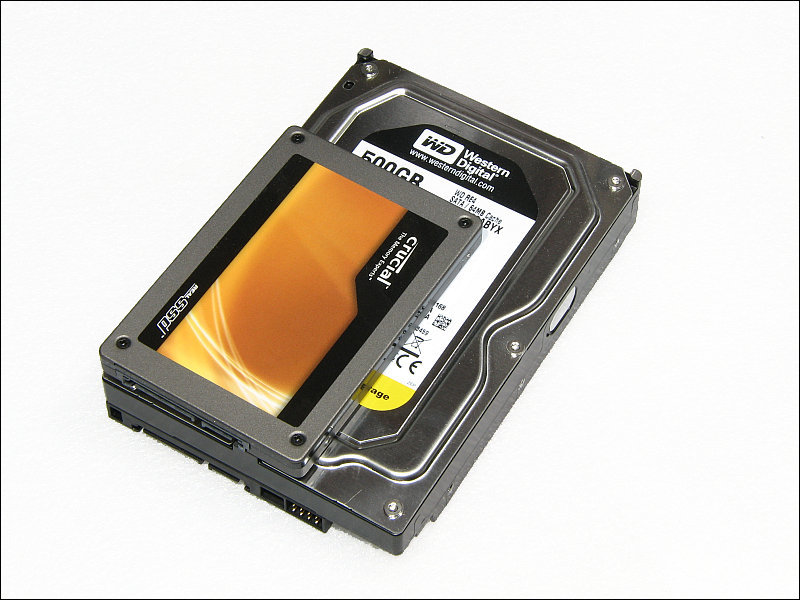
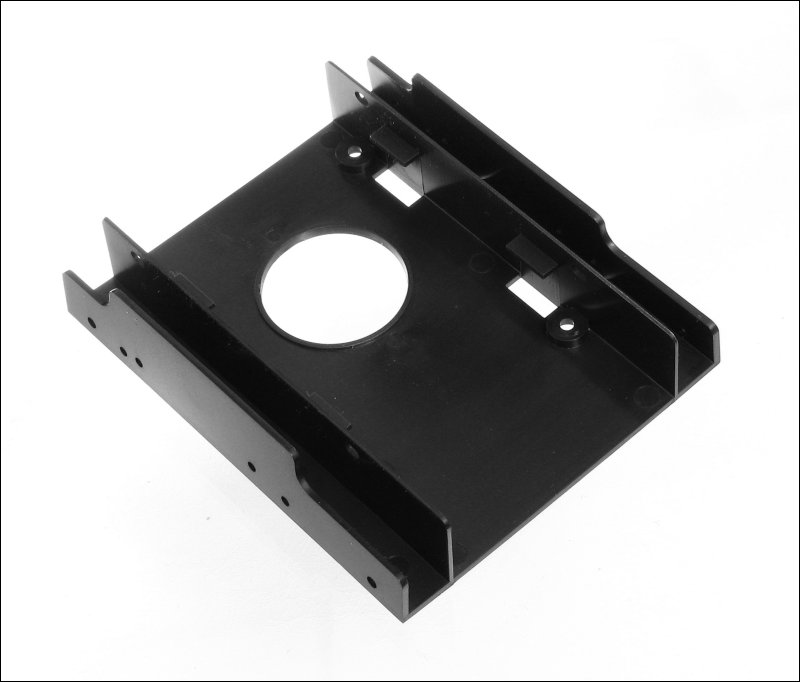
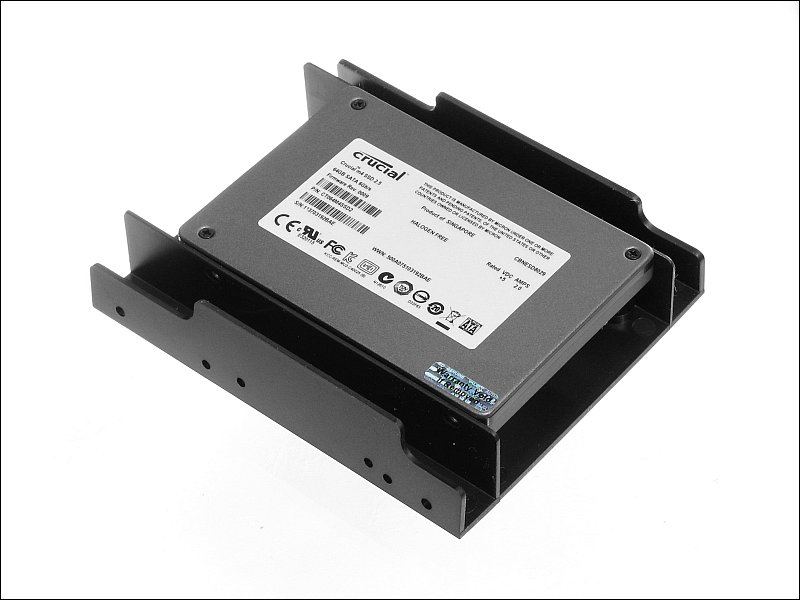
Except for the image at the top of the page, all of the drives on this page stored data on spinning platters. The platters were spun and data was read by a mechanical, moving head. There is a new type of drive that stores data on electronic memory. These 'solid state drives' have no moving parts and the speeds that they can access data are much greater than that of standard hard drives. At this time (mid 2011), the price per GB (gigabyte) of storage for solid state drives is many times greater than that of a conventional hard drive. As of now, most are used to store the operating system files and program files. For those who need large storage capacity (to store movie files and other large files), conventional hard drives are typically used. The photo below shows the difference in size between the conventional drive and an SSD drive. As you can see, the SSD drive is much smaller. When you purchase an SSD drive, you will often have to purchase the mounting brackets separately. The drives are so narrow that they won't span the width of any of the drive bays (this is changing as case manufacturers see the need to include dedicated bays for SSD drives).
Updating Firmware:
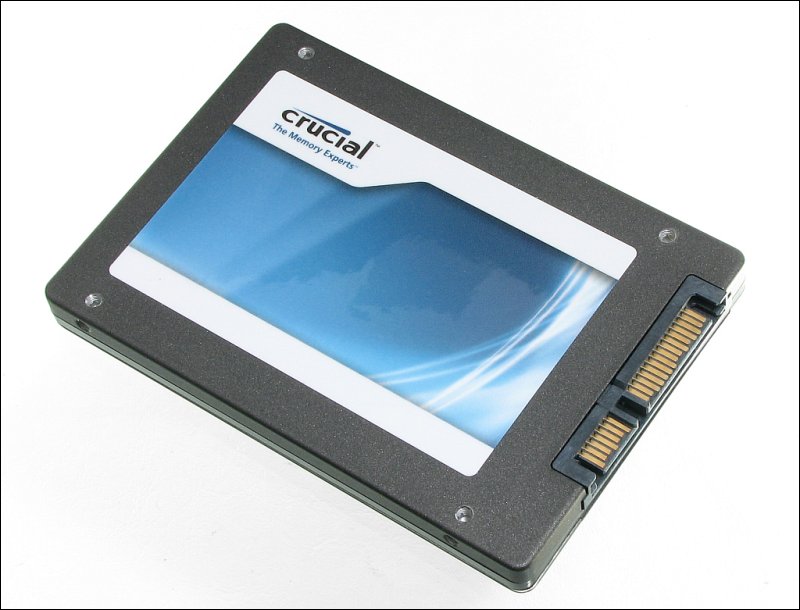
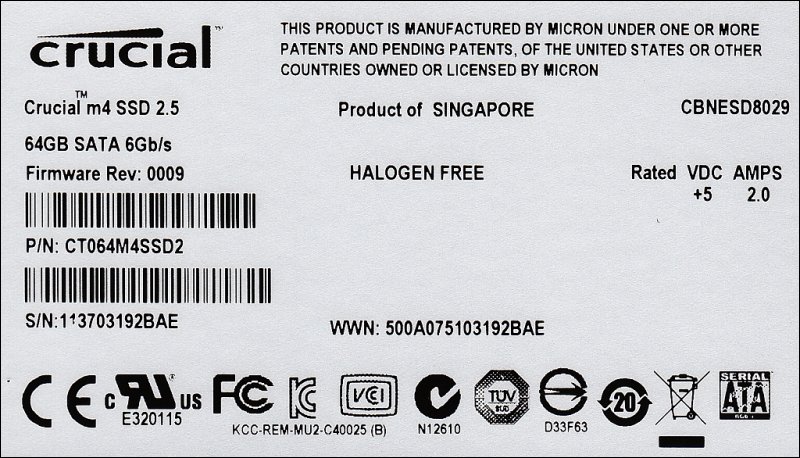
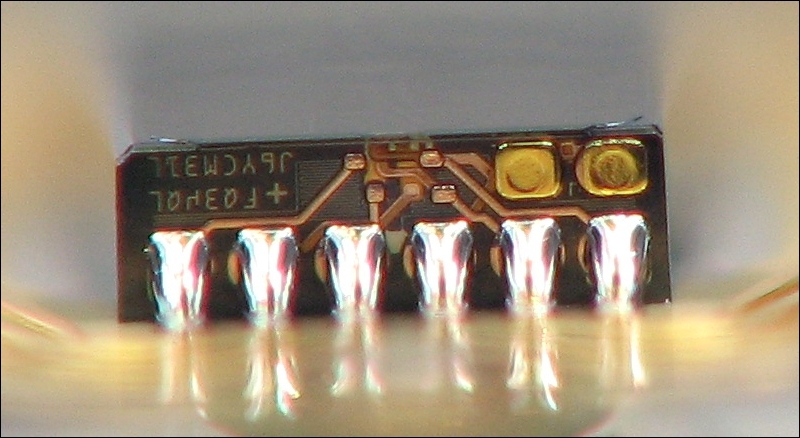
Many of the solid state hard drives have problems when they're initially released. The problems can be minor (poor performance) or serious (blue screening, system freezing...). Many times it due to poorly written firmware. Firmware is the tiny piece of software that determines how the drive functions internally. Many times, the manufacturer will release new firmware that will eliminate or reduce the seriousness of the problems. If you look at the label from the Crucial CT064M4SSD2 below, you can see that there is a firmware version (0009). At the time this was written, this was the latest firmware available. I purchased a drive a few months before this one was purchased and it had an earlier firmware (0004, I think) so I updated it's firmware. I probably wouldn't have updated it for normal use because the drive was working flawlessly but I wanted to use it in a RAID0 array and I wanted the drives to be as closely matched as possible. To update the firmware for this drive, I had to download the new firmware from the manufacturer's site and burn the ISO file to a CD. The computer was restarted and booted to the CD ROM. Then the instructions were followed. THIS is the PDF file from the manufacturer if you want to see the entire procedure.
Previously, mounting brackets for SSD drives were mentioned. Below, you can see a bracket made to hold two SSDs. The bottom drive mounts with screws from the bottom. The top drive mounts with screws from the side.
Partitioning Hard Drives
Do not try to change, add or remove the partition on any drive unless you know precisely what you're doing. The slightest mistake may leave you with an inoperable computer and all loss of data on your hard drive. The following image shows the disk partition manager for Windows. It shows all of the partitions on all of the hard drives. As I mentioned earlier, notice that the main drive (the 40GB Samsung drive that you saw in the 'inside the computer's case' page) has 2 partitions. The small laptop drive in the external USB drive case has only one partition.
On most computers, the entire hard drive space is one partition (sort of like a large building with no internal walls to divide the living space into individual dwellings/apartments). When you set up multiple partitions, you are essentially putting up walls in that building. There have been times that the Windows OS quit working properly for one reason or another (virus, disc error...). Sometimes, the problem is severe enough that you have to reformat (erase and start anew) the entire partition where the OS resides. If you have to wipe the entire partition and you have all of your photos and music on the same partition as the OS, you lose everything. Many times, if your files are on a separate partition, they are safe. I generally setup a 15GB partition for the operating system and programs and leave the rest for my files (in a second partition). Also, if you like to keep your hard drive defragmented, it takes less time to defrag individual partitions than it takes to do the entire drive. If you import/export a lot of large files (like video files), you will badly fragment your hard drive. Doing the video editing on a partition other than the one where your operating system is, will help prevent the OS partition from getting fragmented.
Defragmenting: As we mentioned earlier, sometimes there isn't enough contiguous space (adjacent sectors) to write an entire file. When the file is in non-adjacent sectors, the file is fragmented. Defragmenting moves the files around so that as many as possible are in adjacent sectors.
Formatting: Formatting essentially erases all the information from a partition and readies it for data.
NTFS/FAT32: When you set up a new drive, you have to format it to comply with one of several file systems. The most common are the NTFS (New Technologies File System -- from Windows NT) and the FAT32 (File Allocation Table - 32bit). XP installations default to NTFS but you can select FAT32. If you're using older software or setting up a dual boot system with Win98 or the like, you need to use the FAT32 system. At one time I preferred the FAT32 file system because it was easier to boot to a floppy disc and solve problems with Windows. Now that everyone is using Windows XP, there is little advantage to using FAT32.
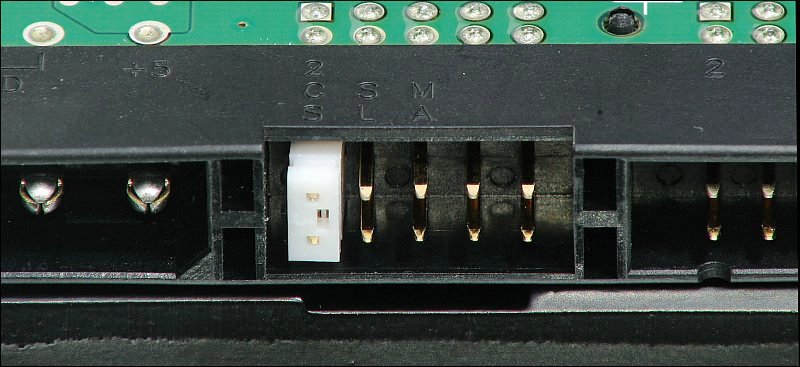
Setting Hard Drive Jumpers
On IDE drives (the ones that use the 40-pin connectors), there are jumpers on the back of the drive. These jumpers tell the motherboard which drive is going to be the master drive (the master drive holds the operating system) and which is going to be the slave drive. As you can see in the image below, there is a white jumper connected across one pair of pins. Beside the red jumper, there are two more pairs of pins.
If you look closely at the image above, you can see some markings on the bottom of the drive. 'MA' denotes 'master'. SL is slave and CS is cable select. This drive is set to CS (the '2' above the CS is nothing more than the pin number of the header). If you're using a 40-pin, 40 conductor cable, you must set the jumpers properly for the master and slave drives. In most simple systems, the hard drive is the master and the CD-ROM drive is the slave (if both drives are on the same cable). If you have a 40-pin, 80 conductor cable, you can set both drives to CS and the drive plugged into the end connector on the cable is the master. The drive plugged into the middle connector on the 80 conductor cable is the slave.
In this image, you can see an 80 conductor cable. On the right is the motherboard connector. To the far left (black) is the master drive connector. In the center (but closer to the master connector than the blue connector) is the slave connector. Sometimes, you will have only one drive on a cable. If that's the case, use the connector on the end of the cable (some systems are sensitive to reflections along the cable and will cause errors). If you have a 40 conductor cable, set the single drive as a master.
Jumpers on SATA Drives:
The drive above was an IDE drive (it may also be referred to as a P-ATA drive or simply an ATA drive). SATA drives also have jumpers but they do not serve the same purpose. For the most part, you can simply leave SATA jumpers as they are from the factory. The hard disc controller or the motherboard will make the proper distinctions between the drives.
Hard Drive Failure Symptoms:
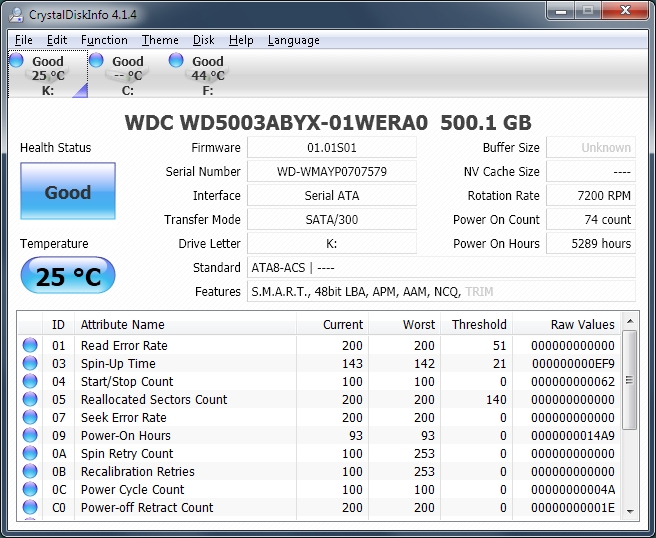
Many times, a hard drive will fail with no warning. That's why you always need to have important information backed-up (have a copy in a different location). When they do show signs of failure, the symptoms vary. The most common for old drives is a constant high-pitch squeal. This often means that the bearings are failing. Sometimes, a failing drive will cause repeated blue screens (BSOD - blue screen of death) or cause files to become corrupted or unreadable. If your drive begins to exhibit any of these symptoms you need to backup your information immediately. If you don't want to have to reload all of the software and other files, you need to use imaging software to make a copy of your entire drive. If you want to take that one step further, you could clone your hard drive to a new drive. There are free programs that can give you some information on the condition of your drives. Programs like Crystal Disc Info work well and are free to download. No drive will be perfect but as long as the drive condition is 'good', there is no reason to believe that the drive is going to fail soon.
Hard Drive Structure
Until now, we haven't gone into much detail about the way a hard drive is structured. As you know, the hard drive has a series of stacked platters. The platters are essentially set up the same way in all hard drives. There are slight variations but the following is a good general description of the common hard drives used in personal computers.
Tracks, Sectors and Clusters:
On each platter we have a series of concentric circles. They are called 'tracks' and there are thousands of them on the typical hard drive platter (I only show a few on the following diagram for clarity). Each of those tracks is broken up into 'sectors'. They are broken up by imaginary lines that cross from one edge of the platter, through the center of the platter and to the opposite side. You can see the tracks and sectors below. When data is written to the disc it is stored in clusters. Clusters are groups of sectors. If the data won't fit in a single cluster, the computer will try to write the data to adjacent clusters. When it can not (because the disc doesn't have a large enough area with enough adjacent clusters for the file you're saving), it finds other clusters in which to write. When a file is in non-adjacent clusters, the file is fragmented. The file is still perfectly usable but it may take a little longer to retrieve it (although you probably won't notice the few extra milliseconds). Clusters vary in size depending on the size of the drive/partition and the operating system or formatting. With all operating systems, there is a limited number of clusters. If you have a very large drive and an operating system that has a very limited number of clusters, the clusters may be quite large. Since only one file can be written to a cluster, large clusters can lead to inefficient use of disk space. Luckily, today's operating systems have a sufficient number of clusters to allow small clusters even with the largest of the available hard drives.
Cylinders:
When writing data to the hard drive, you may think that the data would be written until one side of the platter was full then it would move to the next platter or to the opposite side of the same platter (whichever was next). After all, we've all seen phonographs play from the outside in and CDs and DVDs play from the inside out. It seems only natural that the hard drive would operate in a similar fashion. That's not the case. A hard drive will write to a series of sectors (along a single track) and then when that track is full (if it has more data to write), it moves to the next track in the same 'cylinder'. As you can see below, we have a stack of six platters. The tracks are all aligned vertically. Let's imagine that you had a single track on each side of each platter and that each track was one inch high and the cylinder walls were only as thick as a single track. If you laid all of the platters on top of one another, the one inch high tracks would form a thin-walled cylinder (sort of). In the following diagram, you see how the 'cylinders' pass through the corresponding tracks of all of the platters. The number of cylinders is equal to the number of tracks on one side of a single platter. If you have 20,000 tracks on a single side of a single platter and you have 3 platters, you only have 20,000 cylinders.
Other Information on the Hard Drive:
Hard drives have to store information about the way the information is stored/arranged on the platters. This is done in at least 2 different ways. One way to do it is to have one entire platter dedicated to such information. The other way is to have the information stored in fixed areas of the data discs.
Hard Drive Construction
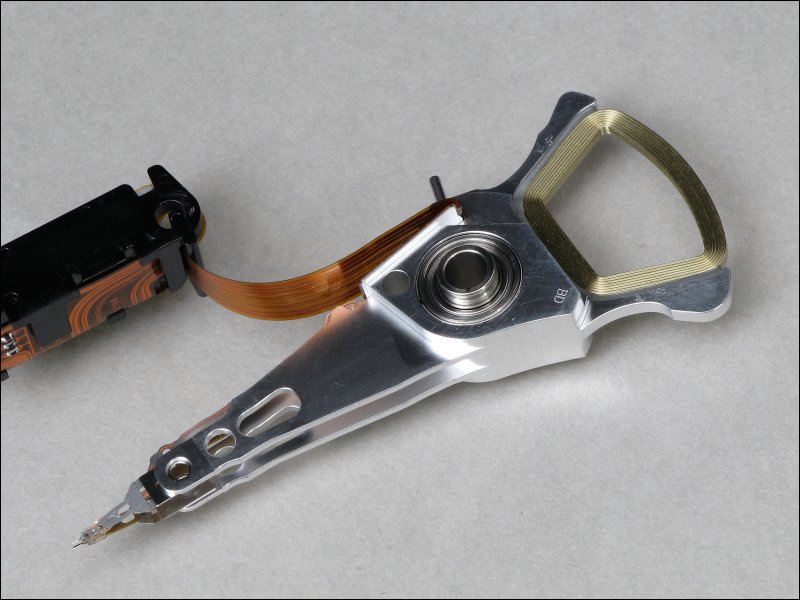
The following shows the internal components of a Western Digital WD3200AAJS. This is the typical internal shot of a hard drive that you've likely seen many times. Do not open your drive. Tiny contaminants or fingerprints can cause the drive to fail. If the heads contact the surface of the platter while it's stopped or spinning slowly, they will be damaged. If the platters are rotated the wrong way while the heads are in contact with the platter, the heads will be instantly destroyed and the platter is likely to be scarred too badly for the data to be recovered.
This shows the actuator arm and magnet assembly. Here, the heads are parked. When older drives parked, they did so on the platters but that meant that there was a short period of time when they were touching the spinning platter. When a hard drive is operating normally, the heads ride on a thin layer of air and don't touch the platters. Newer drives, park the heads off of the platters and only move them into place when the platters are spinning fast enough to float the heads.
On the rear of the actuator arm, you can see a coil of wire. This is the voice coil actuator. It is positioned between two very strong magnets and the application of voltage to the coil causes the arm to move.
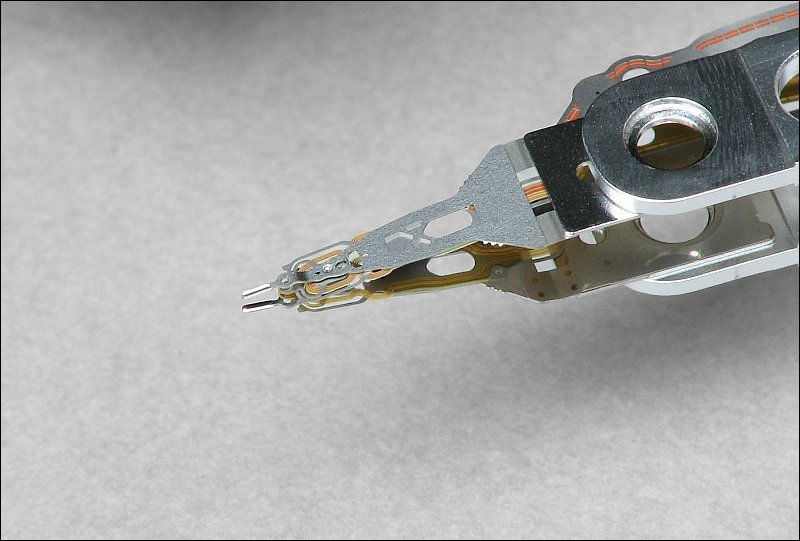
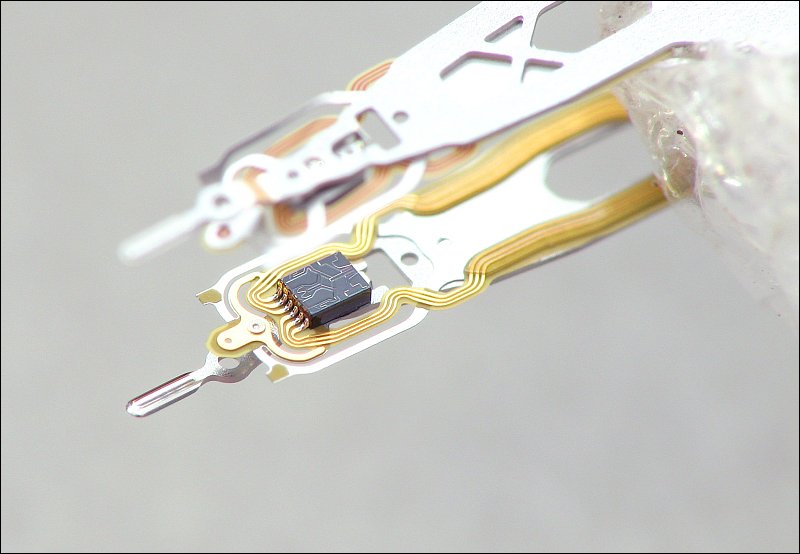
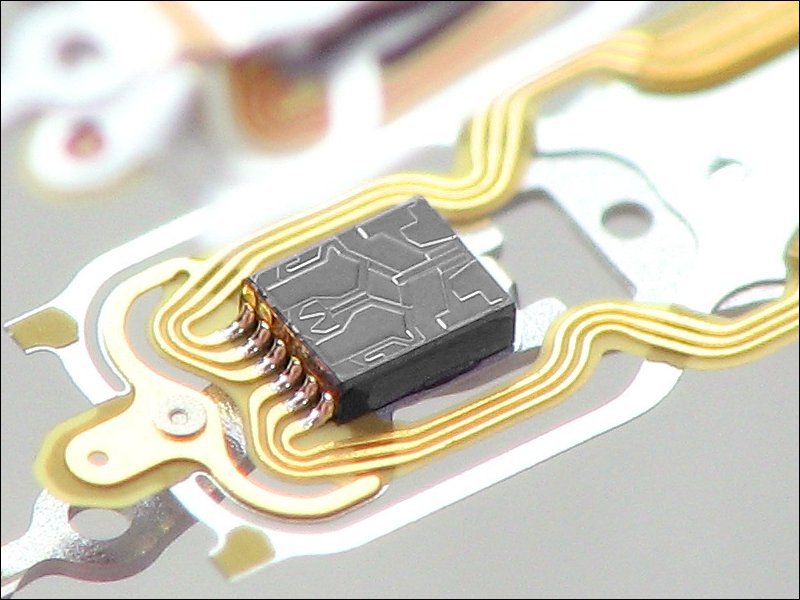
The next 3 images are close-ups of the other end of the actuator arm and one of the heads.
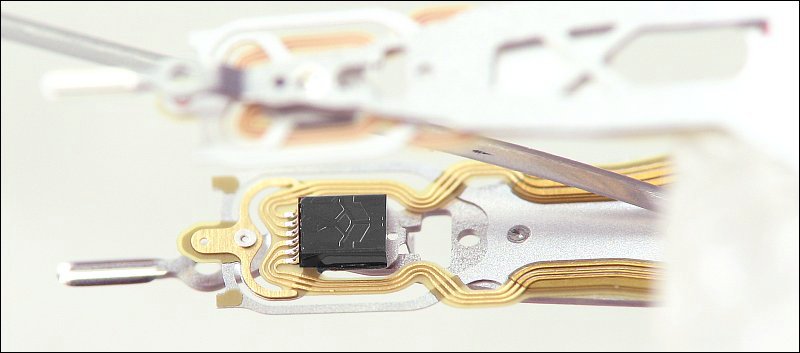
This is the head. It looks relatively large here but it's tiny. THIS image shows a bristle from a paint brush near the head. Using a dial caliper, the bristle was found to have a 0.009" diameter. I couldn't measure the heads directly. Actually, the black item isn't the head. It's much more likely an assembly of components and the head. The head is likely positioned in front of the V of the raised area to the left of the black assembly (if someone could claify this, I'd appreciate it.
Here is a photo of the front of the head. The actual head is likely in the center of the black assembly, aligned with the top edge of the assembly (as seen here). This is likely magnified about 200 times.
The following piece is the dock for the heads. It's turned 90� here. The arms that extend beyond the heads ride on the ridge that spans the length of the dock. The bottom (in the photo) is positioned next to the edge of the platters. The ramps gently set the heads down onto the platter (or more precisely, onto the layer of air that they will ride on).
This site was started for pages/information that didn't fit well on my other sites. It includes topics from backing up computer files to small engine repair to 3D graphics software to basic information on diabetes.
This site introduces you to macro photography. Macro photography is nothing more than the photography of small objects. It can take quite a while to understand the limitations associated with this type of photography. Without help, people will struggle to get good images. Understanding what's possible and what's not possible makes the task much easier. If you need to photograph relatively small objects (6" in height/width down to a few thousandths of an inch), this site will help.
If you're interested in air rifles, this site will introduce you to the types of rifles available and many of the things you'll need to know to shoot accurately. It also touches on field target competition. There are links to some of the better sites and forums as well as a collection of interactive demos.
This site is for those who want to install or update their car stereo. It begins with the most basic electronics theory, progresses into basic transistor theory as well as covering virtually everything associated with car audio.


