|
Overview:
In most operating systems, you can 'drag and drop' files from one folder to another. This page will tell you how to do it and things you should avoid to prevent problems.
The Basics:
When in 'Windows Explorer' (not INTERNET Explorer), you will sometimes need to move files around. This can be easily accomplished by 'dragging and dropping' the files. It's done with your mouse. To drag and drop a file, you simply click on it with the left mouse button and 'without' releasing the mouse button, you can drag it to another folder. This is especially handy when you need to sort photos or arrange documents.
Note:
When you open a 'my computer' window, you are using 'Windows Explorer'. Windows Explorer is a file manager program. It allows you to see and manage all of the files on your computer.
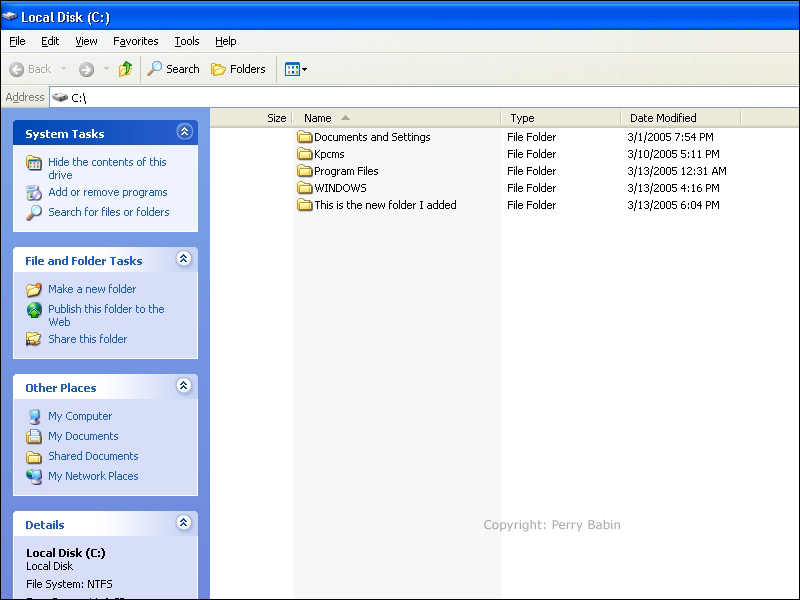
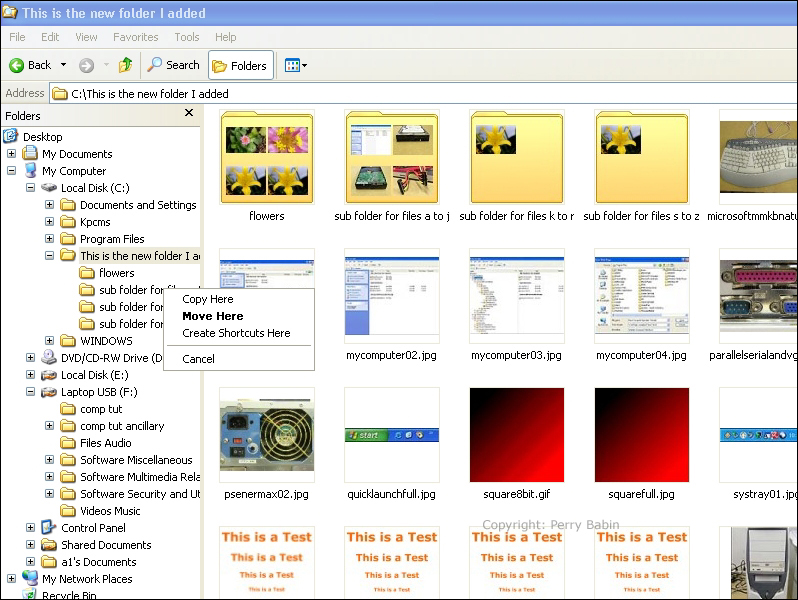
In the following image, you can see that I've added a a new folder named 'This is the new folder I added'. Once you're in Windows Explorer (where you view the files on your computer), you can create a new folder one of several ways:
- Click on 'Make a New Folder' on the 'common tasks' toolbar on the left
- Right-click on a clear area in the right pane and select NEW >> FOLDER
- Go to the top of the page to FILE >> select NEW >> FOLDER
Note:
To get into a folder you can double-click it or you can use the RIGHT-click to open a dialog box. From the dialog box, you have at least 2 options. If you choose either 'open' or 'explore' for a hard drive folder, it will bring up the list of folders inside of the folder on which you just clicked. If you select 'open', the file manager will open the 'common tasks' on the left side of the list of files. If you choose 'explore', you will have the list of folders on the left side. For beginners, it's probably best to use 'open' but as long as you're careful, either view is fine.
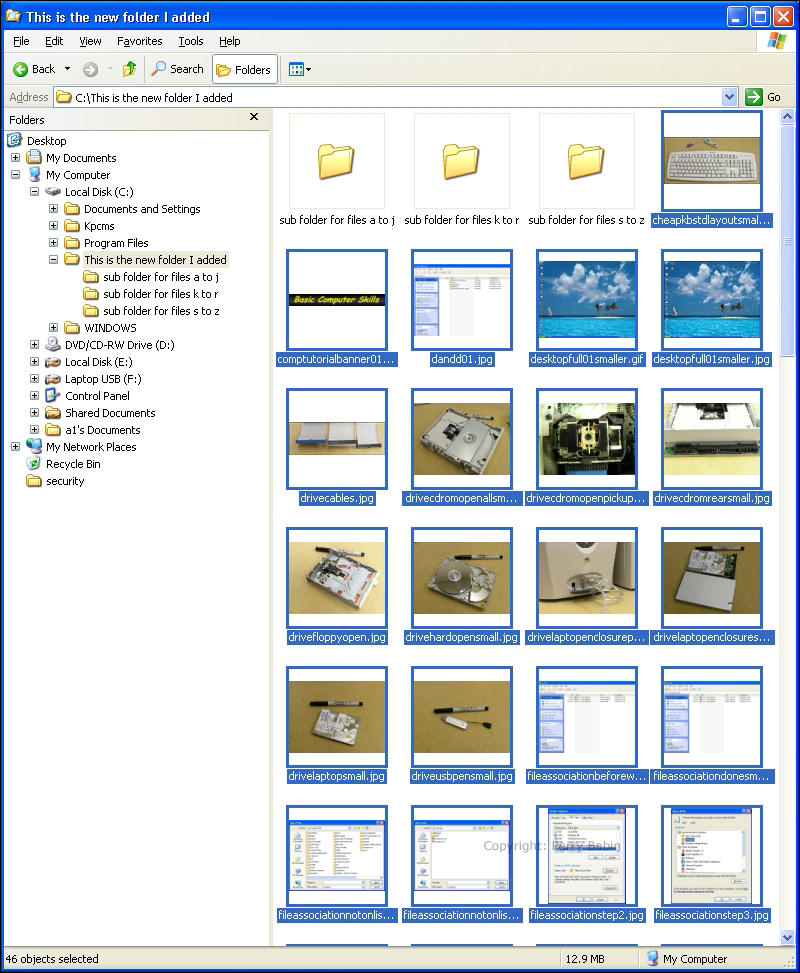
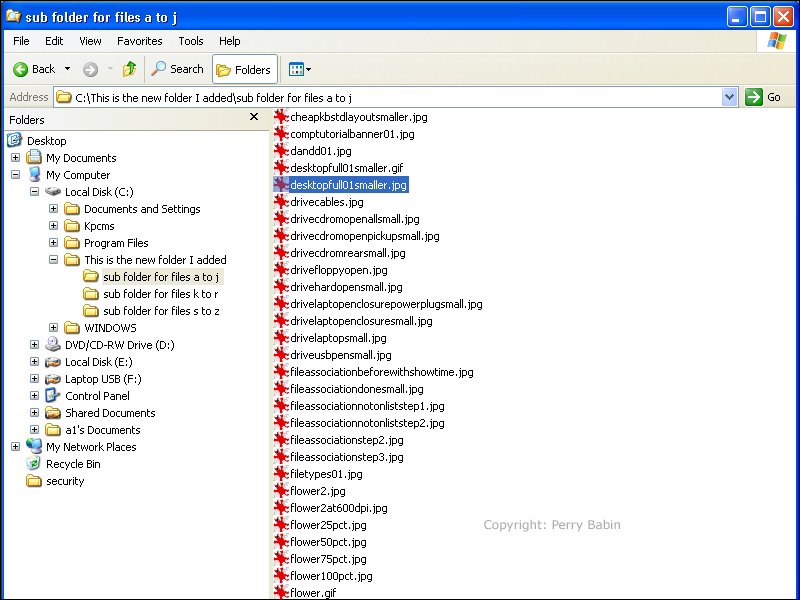
To get into the new folder, double-click on it. In the image below, you can see that I've opted to view the folders on the left. At this point, you should notice a few things. Look at the address bar. You can see that the address tells you where you are. You are looking a folder 'This is the new folder I added' and it's on drive C. Also notice that I've selected the 'thumbnail' view from the toolbar (VIEW >> THUMBNAILS). If you look at the 'This is the new folder I added' on the left, you can see several new sub-folders I created. I will use them to organize the images I have in the folder.

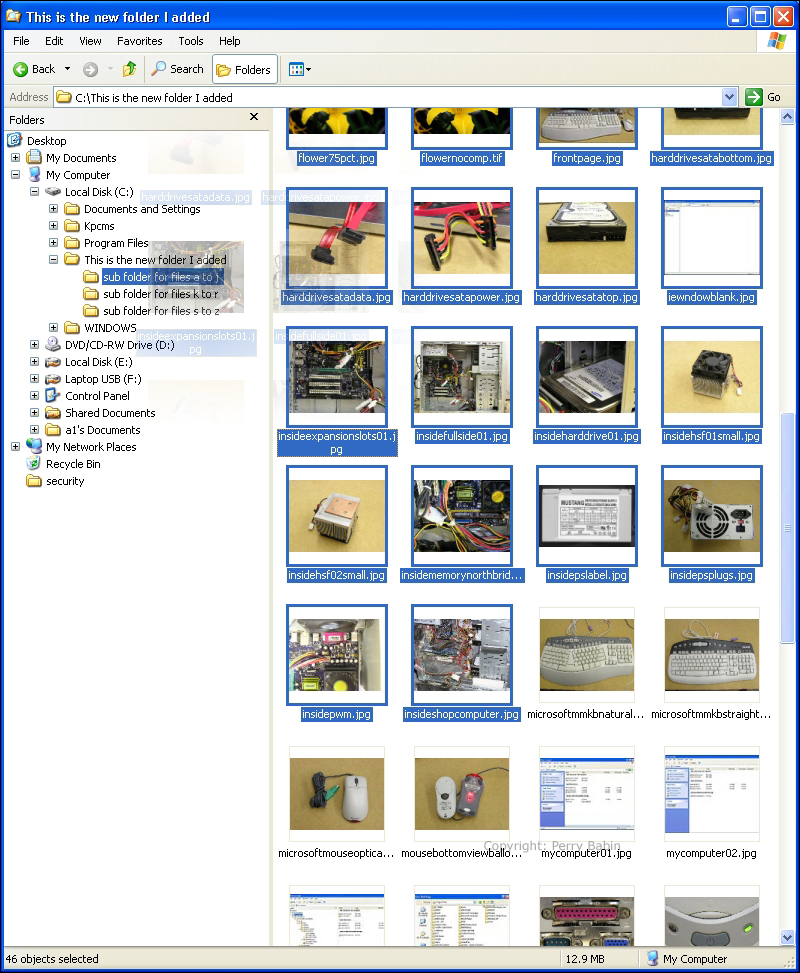
I've selected to organize the images alphabetically for this example. As you can see in this next image, the new sub-folders as well as the files will show up when you view the contents of the folder (you may have to 'refresh' -- in the right-click dialog box or ctrl-r). You should notice that the files look a little different. Here they have dark outlines and the name is highlighted. To highlight the files I wanted to move, I used the shift key to select multiple items. The 'shift' option only works to select 'consecutive' items. If you wanted to select the first 10 items, you could use the 'shift' option. Select the first item, hold down the shift key and select the last item. All will then be highlighted. If you wanted 10 NON-consecutive items, you would instead use the ctrl option. To select non-consecutive items, you hold down the ctrl key while making the desired choices. Please notice that these items are sorted alphabetically. They can be sorted in a number of ways and I'll show you how to do that later.
Now that we have selected the files we want to move, you can move them. Click the left mouse button on any of the highlighted files. HOLD the button down and slide the mouse over to the folder in which you want to move the files. Notice how the folders' names are highlighted as the mouse cursor moves over them, this is to let you know which folder you're over. When you have the cursor over the folder you want, release the mouse button.
Notes:
*It is important that you don't drop the files in the wrong place. If you do, you can UN-DO the move by selecting EDIT >> UNDO MOVE from the top of the page. It is very important that you don't perform any other moves or do anything else between the time that you accidentally moved the files and the time when you 'undo' the move. Often, you can only undo one step back. If you perform a second operation before undoing, you may not be able to undo the move.
*If you're moving files to a folder near the top or bottom of the left pane, I would suggest that you hold the mouse cursor over the destination folder for at least 2-3 seconds. Sometimes, if you're moving items to a folder near the top or bottom of the window, the list will auto-scroll. If you are not paying attention and it scrolls, you may drop the files into the wrong folder. If you notice the mistake, you can undo it but if you don't notice it, you may have trouble finding the files. If possible, before moving the files, manually scroll the folder list so that the destination folder is near the middle of the window.
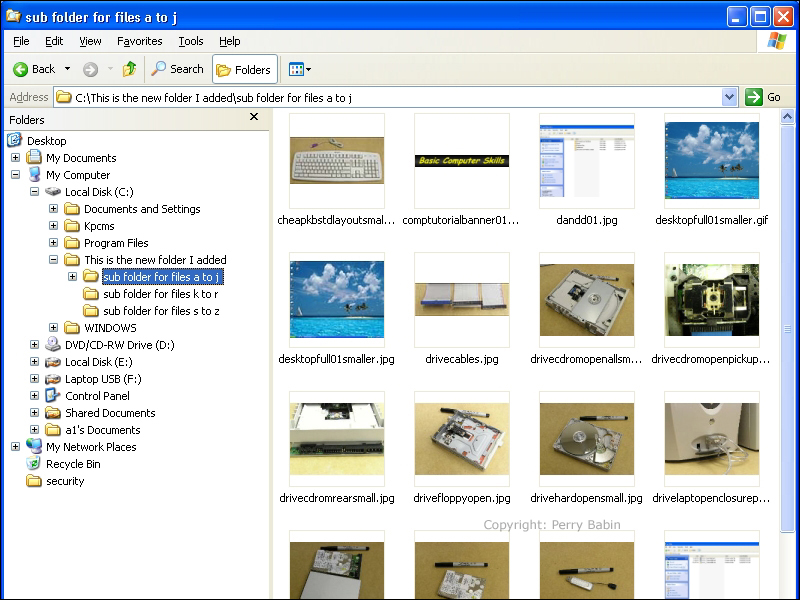
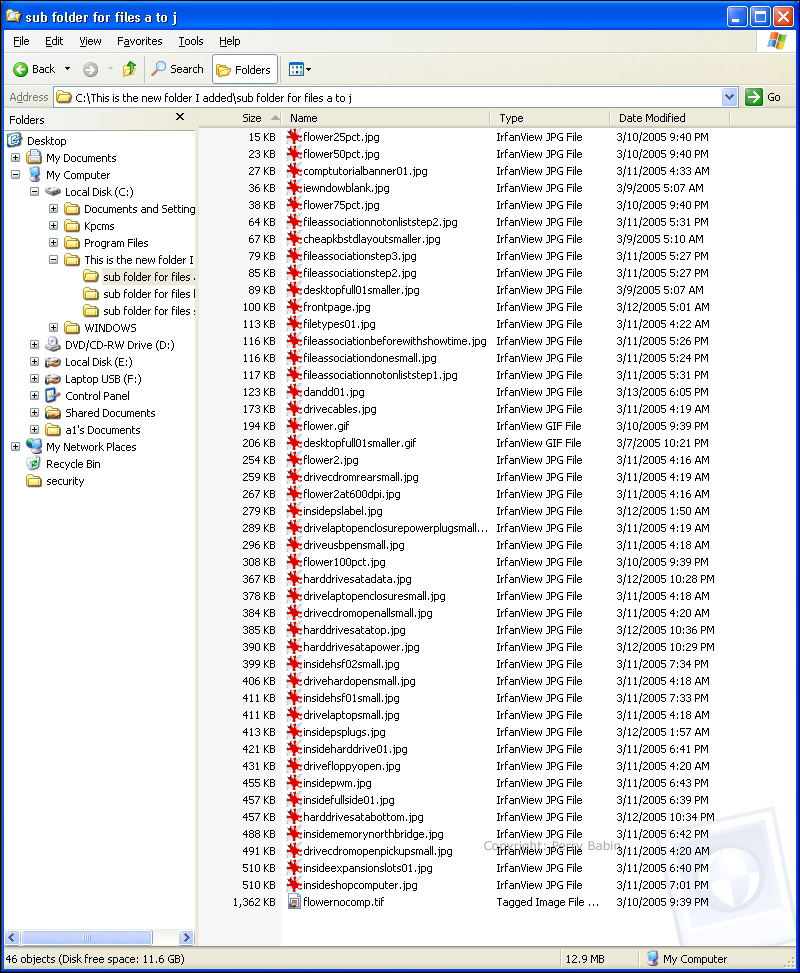
As you can see in the next image, I've double-clicked the 'a to j' folder to view the files in it. You can see that the image files are in the new folder. You should also notice the address bar. It now shows that we are in the...
sub folder for files a to j which is in...
This is the new folder I added which is on...
Drive C
Moving Individual Files:
If you were moving image files of family members and you needed to sort the files by name but the files were not named in way that would allow you to recognize the files by name, you could do as we did above but you would not highlight multiple images. You would simply drag a single image to the folder with the name of the person in the photo.
Different VIEW Types:
In the previous images on this page, all of the views used the 'thumbnail' view option. While this is OK for images, it's really of no use for many other file types. In the next image, we have selected the 'list' view. It will give a list of files but the only information given is the file name and extension (if you've chosen to show extensions for known file sizes). You can sort the items by using the RIGHT-CLICK >> ARRANGE ICONS BY >> select the desired sorting.
In this image, we have chosen the 'detail' view. This is the one I use most. It allows easier/quicker sorting and provides much more information. As you can see, at the top of the left pane, there are 4 attributes (size, name, type and date modified). if you want to sort by any of the individual attributes, you can simply click on the button bar where the attribute resides. If you click on name, it will sort by name. You should notice the little arrow (triangle) to the right of the attribute. It tells you if the files are sorted in ascending or descending order. If you click on the name attribute again, it will sort by name but in the reverse order.
 Other Features in 'Detail' View
Column Sizing:
As you can see in the image above, there is one name that has 3 dots at it's end. This indicates that the name is truncated. To show the entire file name, put the cursor on the line between 'name' and 'type'. You can see that it changes. At this point, you have 2 options. If you double-click, the NAME column will automatically resize to allow all file names in the list to fit in the column. If you have a few VERY long names and you don't want the column as wide as it would be it the longest name were to fit (as would happen if you double-clicked), you can simply click and hold and drag the divider to resize the column.
Adding/Removing Attributes:
As you can see, there are only 4 attributes. You can add or remove attributes by right-clicking on the attribute button bar. It will bring up a list of possible attributes (not all of the available attributes apply to all file types). You can select/deselect any of the attributes in the list.
Sorting Attributes:
On my computers, I set the 'size' as the first attribute. It's not set there by default. To move any attribute, you can simply click and drag it to anywhere on the attribute button bar.
Using Two Instances of Windows Explorer
In the previous example we used one instance of Windows Explorer. If we wanted to see the image files in two different folders as we were moving them, you could open a second instance of Windows Explorer. When doing this, you can not open a second identical instance. For example, if you open 'my computer' and immediately try to open a second instance of 'my computer', Windows, will simply bring the first instance to the front. To avoid this, navigate to one of the desired folders in the first instance. Then open the second instance and navigate to the other folder in which you need to view the files. It's very likely that you two windows (assuming that you have no other programs running) and they're at least partially overlapping. To make things easier, you should close all other open programs and right-click on the taskbar. There will be two 'tile' options in the dialog box. Select one of them. I selected the 'tile horizontally' for this example. The results are below.
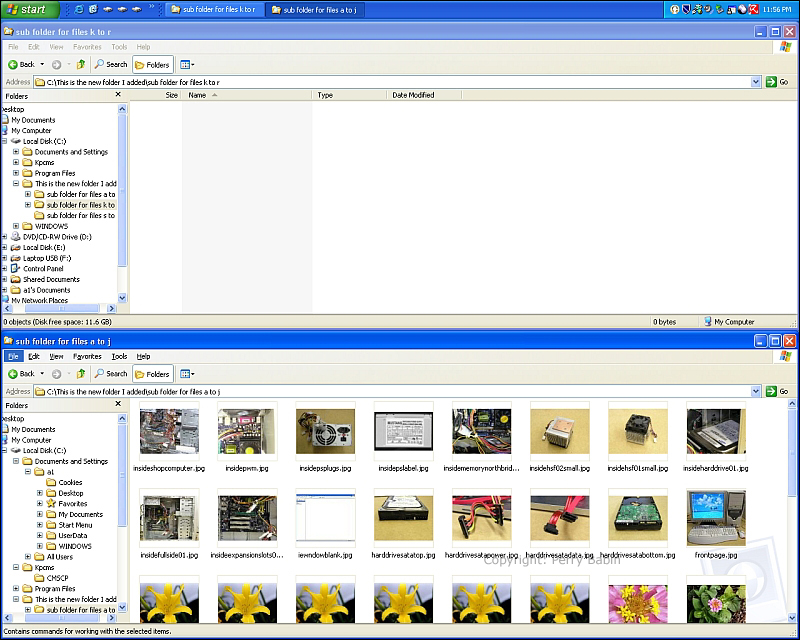
As you can see (barely), the top folder is the 'k to r' folder that we created and the bottom folder is the 'a to j' folder we created. Now, we can move the files and are able to see which files we have moved. Of course, it would make little sense to move the files for our situation (alphabetically sorting files into folders) but if you were moving pictures around for some reason, this would allow you to see precisely what you had in each folder.
Cutting, Copying and Pasting
When performing cutting. copying or pasting, you can perform the operations on one or many files. The files can be of any type (except possibly Windows Operating System Files or files that are 'in use'). OS files are files that Windows uses. 'In use' files are files that are being used by another program. For example, if you were trying to move a video file but it was being played in some program (like Windows Media Player), you would not be able to move it until you closed WMP or until you quit using that file in WMP.
Copying:
Copying a file is what you'd do if you want to make a duplicate of a file but you want to leave the original file as it is. When you copy a file, you put a copy of it into a buffer (called the 'clipboard' in Windows).You can copy it to multiple locations if desired. It will generally remain in the buffer until you copy something else or you restart Windows. Ctrl-c is the keyboard shortcut for copying.
Cutting:
Cutting is similar to copying but you remove the original from it's previous location to place it somewhere else. It will not be removed from its original location until it has been successfully stored in its new location. It's removed from the clipboard as soon as it has been stored. Ctrl-x is the keyboard shortcut.
Pasting:
After a file has been copied or cut, it is 'pasted' into the new location. The keyboard shortcut is ctrl-v.
Drag and Drop Right-Click Options:
We discussed moving files with the left-click but you can also move and copy files using the right-click. You do everything else as usual when using the right mouse button. When you release the right button, instead of moving the file, you are given a few options. You simply select the desired operation (with the left mouse button). The option dialog box (very small near the folders that we've dealing with throughout this page).
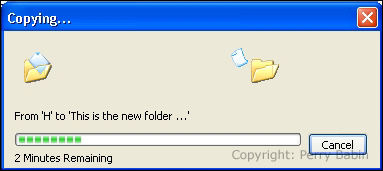
Moving Large Files:
To this point, we have moved relatively small files and the moves were essentially instantaneous. When moving large files, you may see a dialog box like the one below. It will show the origin and destination folders. It will also have a progress bar and an estimated time to completion.
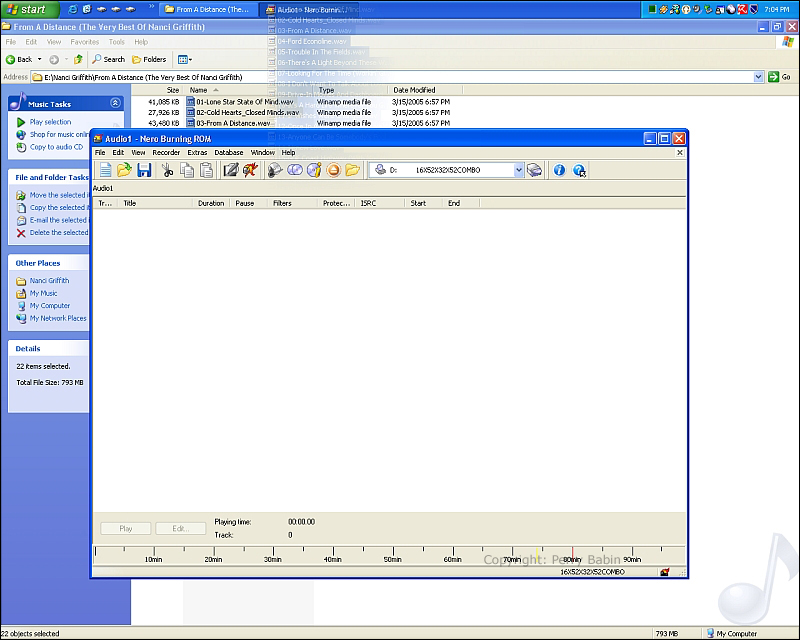
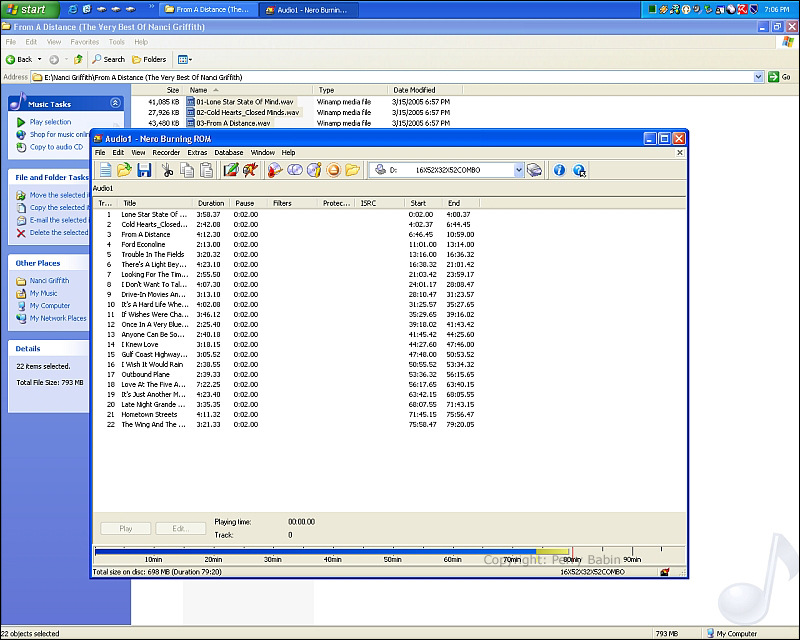
Dragging and Dropping into Other Applications
Sometimes it's convenient or necessary to drag a file into another application. One example is when you're burning files with Nero. Let's say for example that you have the files on your hard drive and it's more convenient or quicker to find them in Windows Explorer than in the window in Nero. You can drag the files from Windows Explorer to Nero. The operation is similar to what you've done before. You highlight the desired files, click and hold the left mouse button and drag them to the Nero button on the taskbar (Nero has to be open prior to the attempt to copy the files). Do not release the button yet. Wait for the screen to change. After about a second, the Nero window will move to the 'top'. When it does, simply continue dragging the files into the appropriate window in Nero.
Note:
Normally, when you drag files from one window to another, the files are moved. In this instance (when dragging into an application such as Nero), the files are not moved. You're essentially copying the files. Another instance where the files will not be 'moved' by dragging and dropping is when you're dragging from one drive to another. If you want to move files from one drive to another (removing them from the source drive), you have to use the CUT/paste option.
As a side note, I own the CD that I ripped for this example. I don't condone illegally copying CDs or software.
|
You May Be Interested in My Other Sites
-
This site was started for pages/information that didn't fit well on my other sites. It includes topics from backing up computer files to small engine repair to 3D graphics software to basic information on diabetes.
-
This site introduces you to macro photography. Macro photography is nothing more than the photography of small objects. It can take quite a while to understand the limitations associated with this type of photography. Without help, people will struggle to get good images. Understanding what's possible and what's not possible makes the task much easier. If you need to photograph relatively small objects (6" in height/width down to a few thousandths of an inch), this site will help.
-
If you're interested in air rifles, this site will introduce you to the types of rifles available and many of the things you'll need to know to shoot accurately. It also touches on field target competition. There are links to some of the better sites and forums as well as a collection of interactive demos.
-
This site is for those who want to install or update their car stereo. It begins with the most basic electronics theory, progresses into basic transistor theory as well as covering virtually everything associated with car audio.
|
|