|
Building a Basic Computer - Part 2
|
|
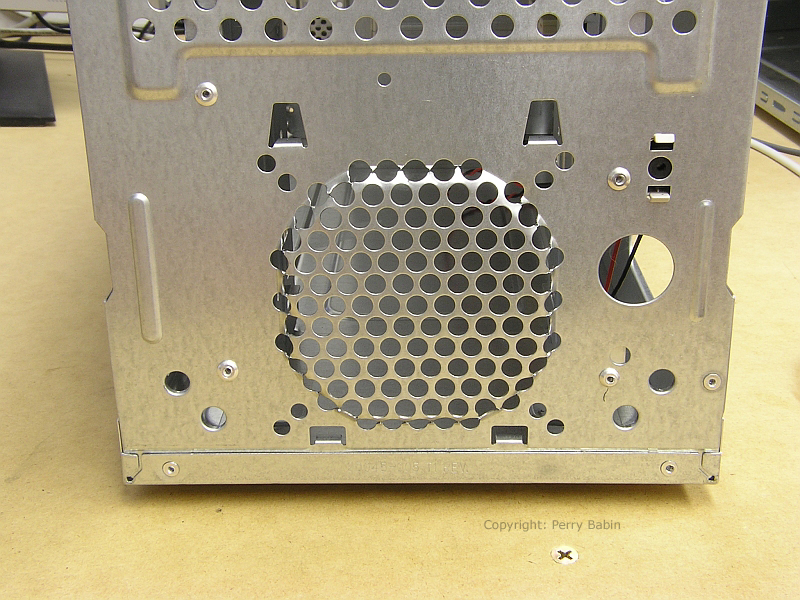
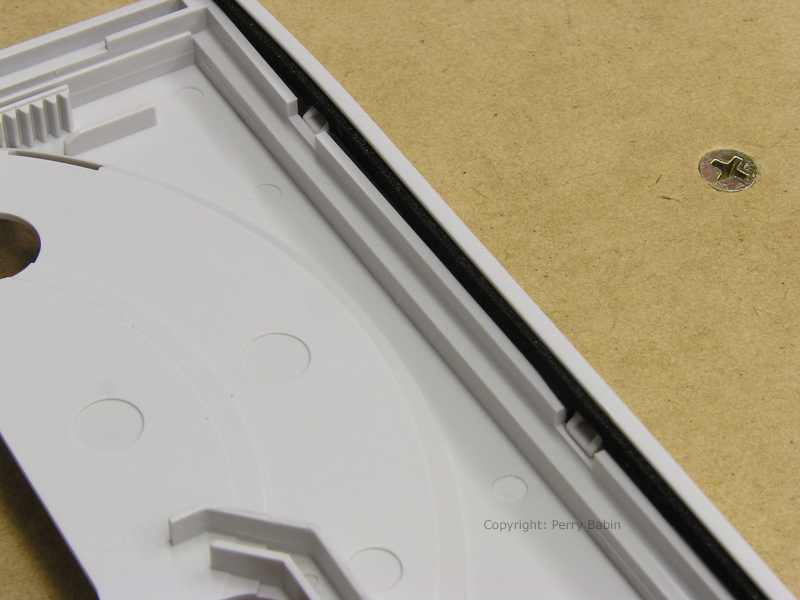
Virtually all computer cases need forced-air cooling. For low power computers, the power supply fan draws enough air through the case to keep it cool. For today's computers with more powerful processors, extreme graphics cards and high speed hard drives, you need additional cooling. The most common fan setup has one fan pulling fresh air into the front of the case and a second one forcing warm air out of the rear of the case. Here you can see the front grill of the case. The front panel has been removed.
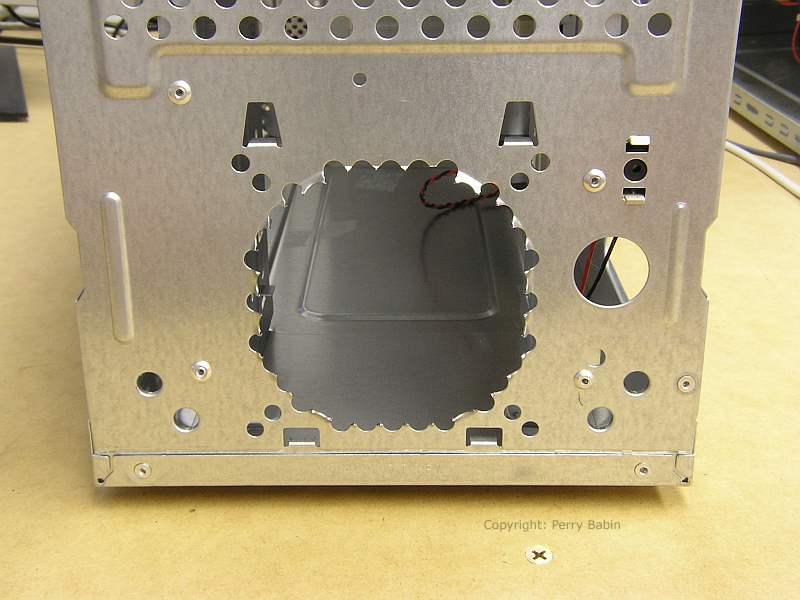
 To allow more air flow with less noise, some people cut the fan grill out as shown below. Most of the cases are made of soft enough material that it takes very little effort to cut the perforated grill from the case. Sometimes the same thing is done with the rear case fan. When this is done on the rear, the fan is typically protected with a wire grill that has very little effect on air flow and does not add any significant noise (from the blades of the fan passing close to the holes in the grill). The fan here works to bring fresh air into the case but it's located in front of the hard drive bays so that it will help keep the hard drives cool also. Many of the newer drives ('green' drives) produce very little heat and don't really require forced air cooling. Many of the older, high performance drives (like the original Raptor drives) produced quite a bit of heat and needed the fan to keep them at acceptable operating temperatures. If you don't have a fan in front of the hard drives, you should monitor the temperature of the hard drives when you begin using the computer. Install all of the case covers and use it for about an hour. Remove the cover and check the temperature of the drive. if it's too hot to hold your hand on for 15 seconds, it needs a fan to help keep it cool. There are various applications that will tell you the temperature of the hard drive (drives with S.M.A.R.T.). One such application is PC Wizard. It's a very useful piece of software that can also tell you many things about your computer (or a computer you're repairing).
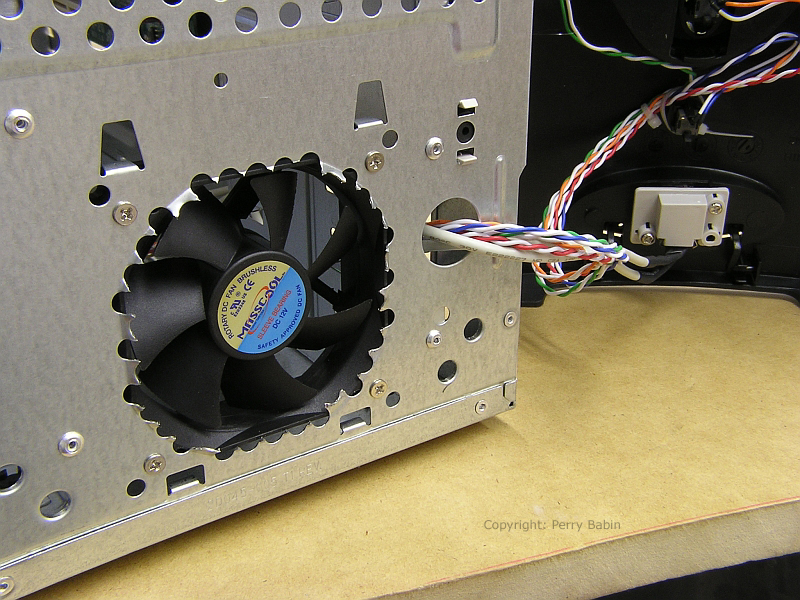
A Quick Note... To keep the wires away from the fan blades and any sharp metal, you may need to use a wire-tie or two.
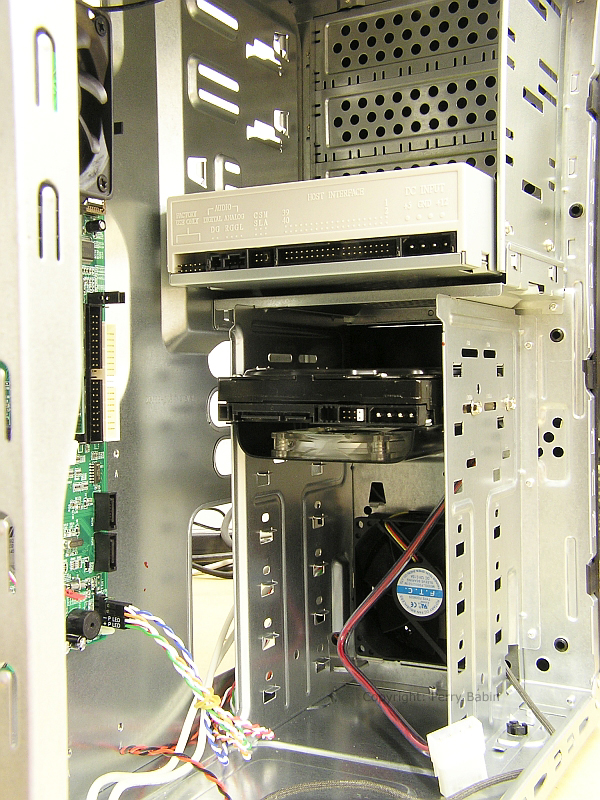
 Below you can see that the fan has been installed. Also notice that I bent some of the metal tabs back towards the fan. I did this because it looked like they may cut into the front USB wiring.
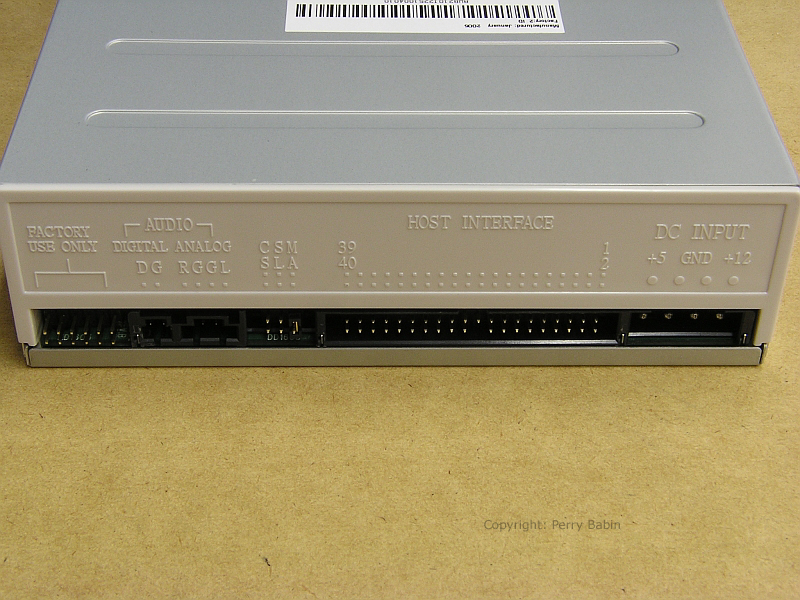
Below, you can see the rear of the DVD drive. It's essentially the same as the one on the storage devices page but this one has better markings for the different connectors.
 The computer I'm assembling here is black. The DVD drive has both black and beige bezels but the beige bezel is installed from the factory. It's relatively easy to change the bezel and drawer cover. Here you can see the bottom of the drawer. There are two catches holding it in place. To remove the drawer cover, you gently pull the catch away from the drawer until it can be slid upwards. To install the new cover, you simply slide it down over the drawer.
 To change the bezel there are several latches (one on each side of the drive). Push the catches inwards with a small screwdriver (being careful not to slip and allow the screwdriver to enter the drive). After the original bezel is removed, you simply snap the new bezel into place.
 From this angle, you can see the installed drives and fan. For the tutorial, I ordered a drive cooler and figured I'd use it in this system. This was the last system that I used a drive cooler in. The fans didn't last long and made it difficult to fit the drive in the drive bay. Positioning the hard drive directly in front of the front case fan is a much better option. Generally, high performance drives need to be fan cooled. If you don't use auxiliary cooling, the drives will run hot. If you have a drive that runs too hot to continuously hold your hand on it, it needs to be fan cooled. Generally, it requires only a small amount of air flow over the drive to make a big difference. If you don't want to use fans (to reduce noise), you can use 'green' drives. They run cooler but often operate at slower speeds. They're not typically used in high performance computers but can work well for the average computer user if noise is a major concern. SSD drives are another option. They're fast and produce very little heat but they're more expensive than standard hard drives for the limited storage they offer.
 Note:

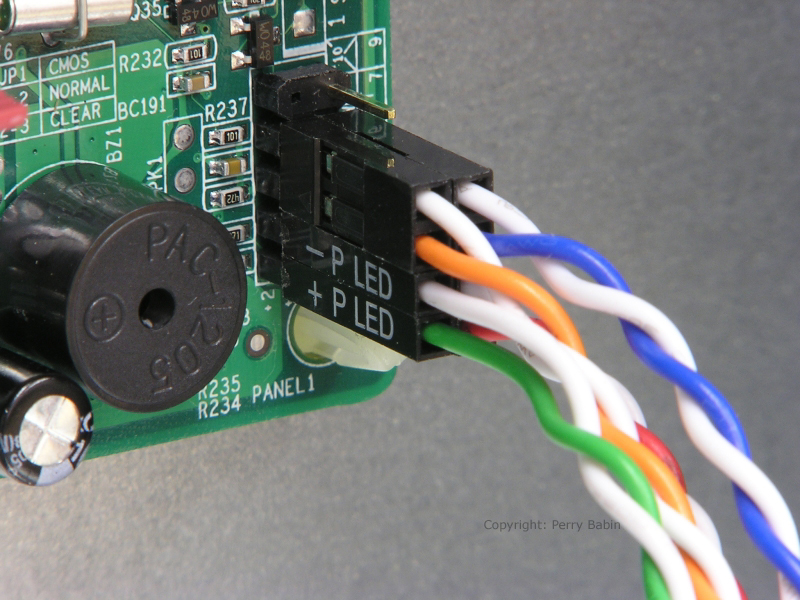
The following image shows the connections from the front panel of the computer case. There are generally four connectors (for the power indicator LED, hard drive activity indicator LED, reset switch and power switch). The polarity for the LEDs is important. If you have the polarity (positive/negative) reversed, the LEDs will not light up. If you look closely at the area just below the connector header, you can see a small '+' (just below the small number '2'). That tells you that that terminal is the positive terminal. The switch connections are not polarity sensitive.
 Here you can see the front panel USB connector where it plugs into the motherboard.
 The following image shows two jumpers. These jumpers are used to match the FSB (Front Side Bus) to that of the CPU. If these are set higher than that of the CPU, the computer may not start and will likely crash if it does start. For this CPU, the FSB is 166MHz. The rated FSB of the CPU is actually 333MHz. The FSB is doubled because we're using DDR (Double Data Rate) RAM. These settings are set in the BIOS of newer motherboards.
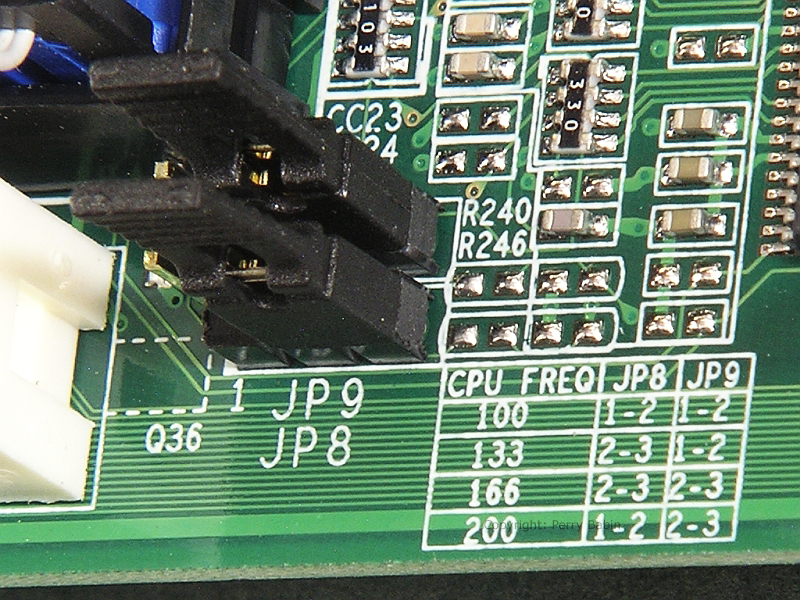 Above, notice that we have two 3-pin headers and the left-most pin is marked '1'. Also notice that the jumpers are connected across pins 2 and 3. If you look at the table to the right of the jumpers, you can see that the configuration shown is for a 166MHz system. At this point, the computer will power-up but it doesn't have an operating system. Powering it up, allows you to determine if it's functioning at a basic level but it's not very useful at this point. Next, I will go through the basic BIOS features then we will install the 'operating system', Windows XP.
|
|
| Contact Me: babin_perry@yahoo.com | |
|
Perry Babin 2005 - Present All Rights Reserved
|